🎓 Why NiblyNotes?
A notebook that fits school life
NiblyNotes is developed in Germany — together with teachers. We took care to include every function needed without overloading the app. Privacy-friendly school cloud providers are integrated directly. The app is completely free, with optional support for the developers.
Made in Germany
Developed in Germany. No dependency on third-party servers for your notebook content.
👩🏫
Built with teachers
Every function was tested in real classroom use — enough features for school needs, without unnecessary bloat.
☁️
School clouds built in
BayernCloud Schule, Nextcloud and NetMan for Schools are available directly in the app — no detours.
💯
Free & ad-free
No ads, no subscription, no tracking. The app has a supporter area where users can buy the developers a coffee. We are also actively seeking public funding to keep the app free in the long term. Even without funding, our promise stands: NiblyNotes will remain free for at least 5 years.
🔒
Your data stays with you
All notebook content is stored locally on the device. Cloud connections are optional and only use the accounts you set up yourself.
🌍
German & English
The entire interface is available in both German and English, and follows the system language automatically.
🏫
Ready for school IT
Can be pre-configured centrally via MDM, optionally with the school's own server.
🗒️ Page styles
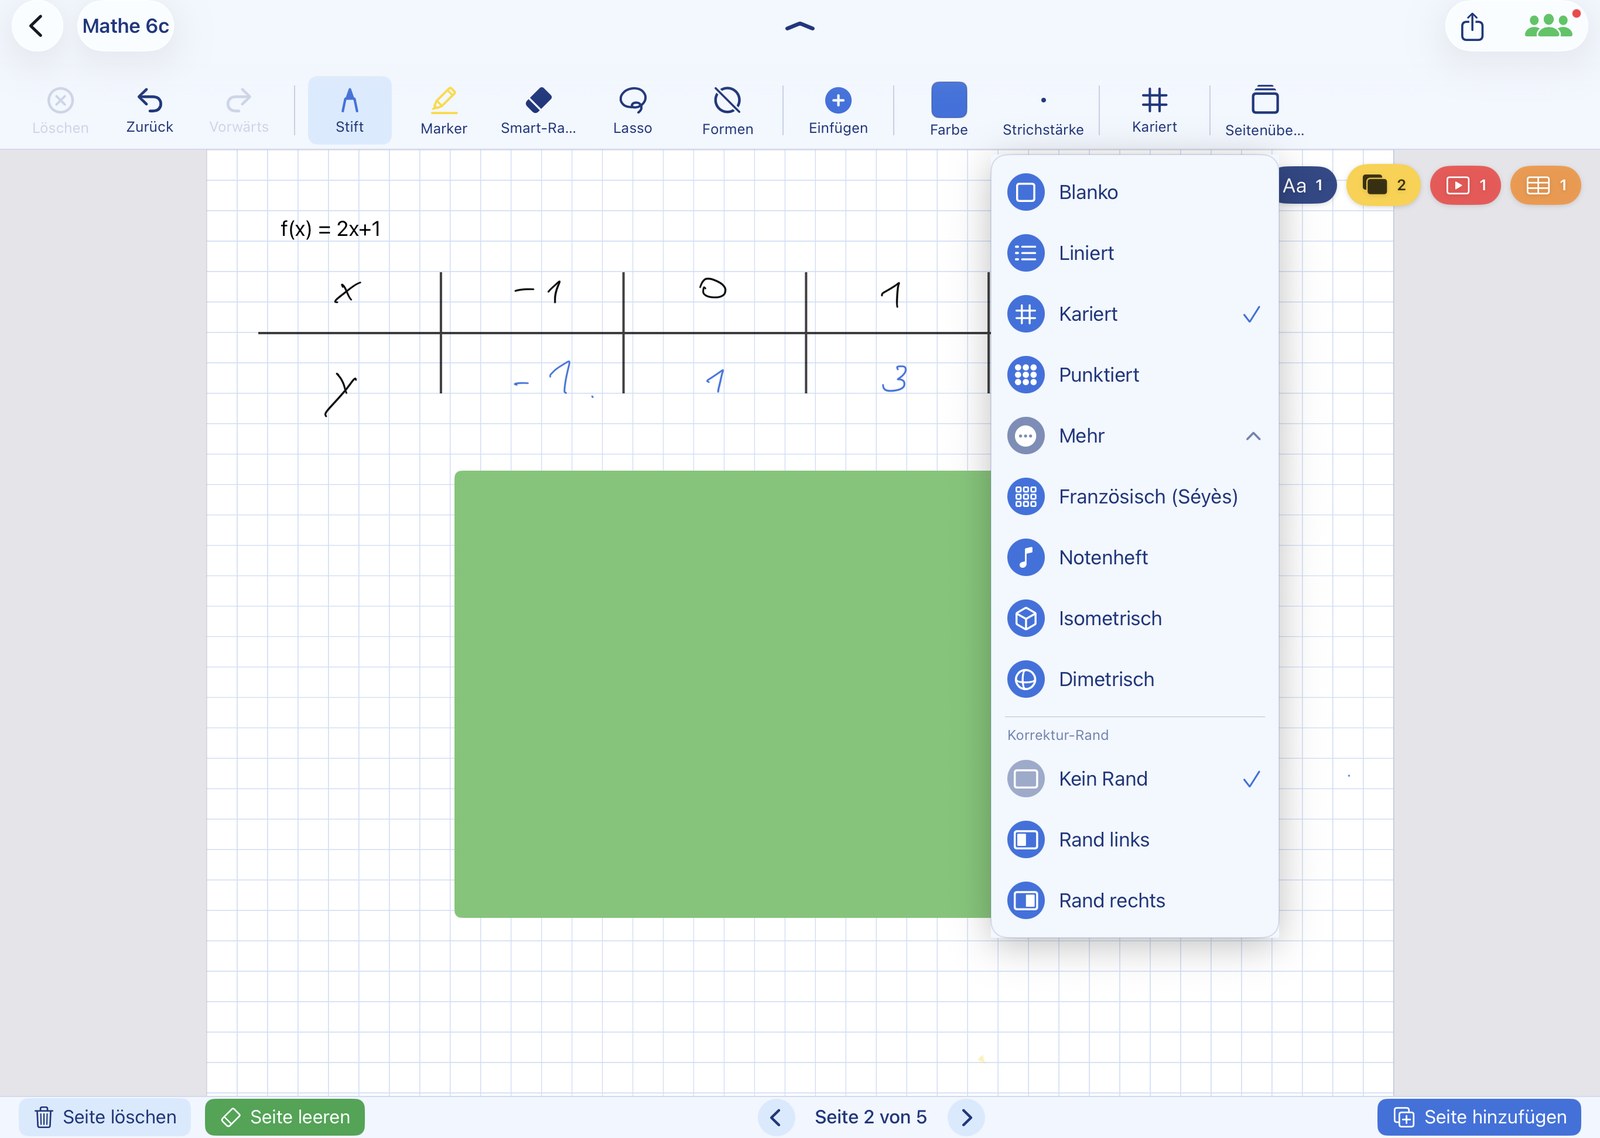
Precise rulings to standard
The line and grid patterns in NiblyNotes aren't arbitrary designs — they follow the standardised spacing for school notebooks. Measure on the Apple® iPad® with a real ruler and you'll see: the distances are 100 % accurate.
Page background, fully adjustable
- ✓ Blank — classic white page
- ✓ Lined — standard spacing for handwriting
- ✓ Grid — standardised 5 mm grid for maths and drawings
- ✓ Dot grid — subtle, ideal for sketches
- ✓ Margins on the left or right for corrections, notes or hole-punching
- ✓ French ruling (Séyès) — the school ruling commonly used in France, with large base lines and fine guide lines in between, ideal for neat cursive writing
- ✓ Music manuscript — 5-line staves, perfect for music lessons
- ✓ Isometric — isometric drawing paper with three axes for spatial and technical drawing
- ✓ Dimetric — dimetric drawing paper following the standard layout for technical sketches
- ✓ Per-page configurable — every page in a notebook can have its own style
Note: Because the spacing matches the standard grid exactly, printed pages can be used just like a regular school notebook.
📏 Highlight: ruler & set square
Like the tools from maths class — just digital
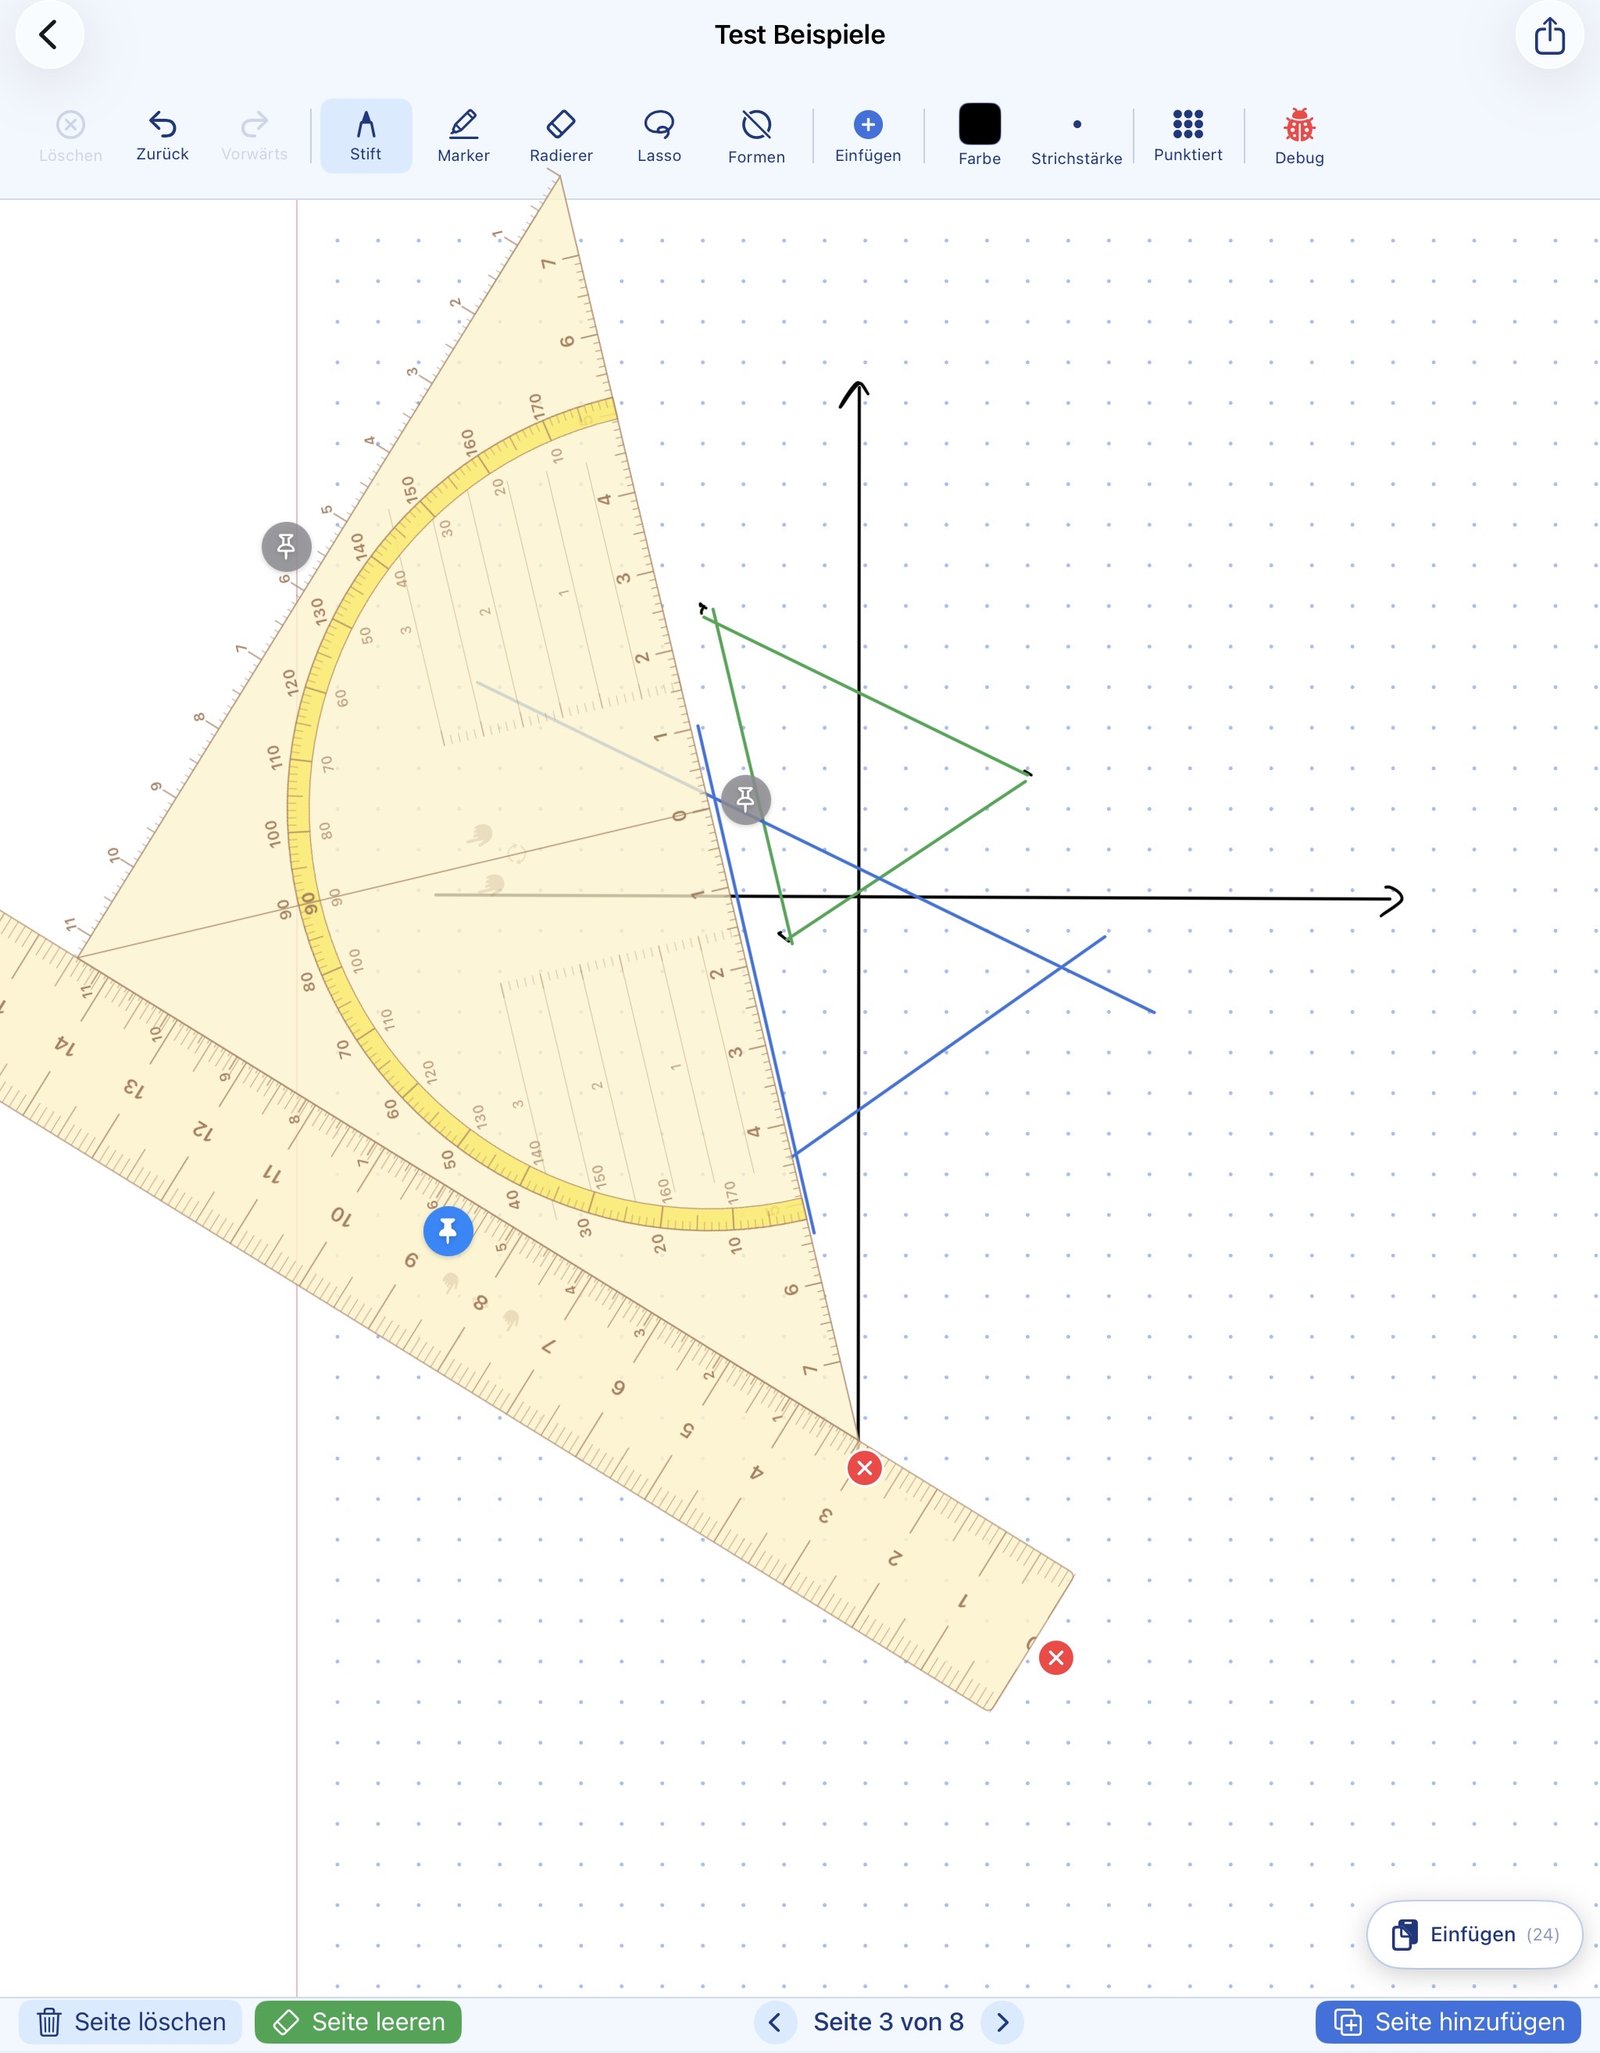
Ruler, set square and compass in NiblyNotes work just like the real tools from your pencil case. Draw along the edge, rotate with two fingers, and combine the tools for more complex constructions.
Draw along the edge
When you draw with the pen along the ruler or set square, your stroke snaps to the edge — just like in real life. Perfectly straight lines and precise angles.
- ✓ Stroke snaps to the edge
- ✓ Ruler and set square with millimetre scale
- ✓ Works with all pen tools
True to scale — like on paper: As soon as the ruler or set square is shown, NiblyNotes adjusts the zoom automatically so that grid squares on the iPad measure exactly 5 mm and the line spacing in lined mode measures exactly 9 mm. You can hold a real ruler or set square against the screen and verify — the values match 1:1.
Move & rotate with two fingers
With two fingers you can move and rotate the ruler or set square at the same time — just like you would with a physical tool. No need to switch modes.
- ✓ Two-finger gesture moves and rotates simultaneously
- ✓ Draw one-handed with the other hand free


Highlight: parallel shift
The ruler can be attached to the set square. This enables the classic parallel shift: the set square slides along the ruler, and every drawn line is exactly parallel — just like in geometry class.
- ✓ Attach ruler to set square with a tap
- ✓ Set square slides along the ruler
- ✓ Perfect parallels — for perpendicular bisectors, triangle constructions and more
Tip: Construction exercises from geometry class can be done digitally 1:1 — step by step, as you learned on paper.
Compass for circles and arcs
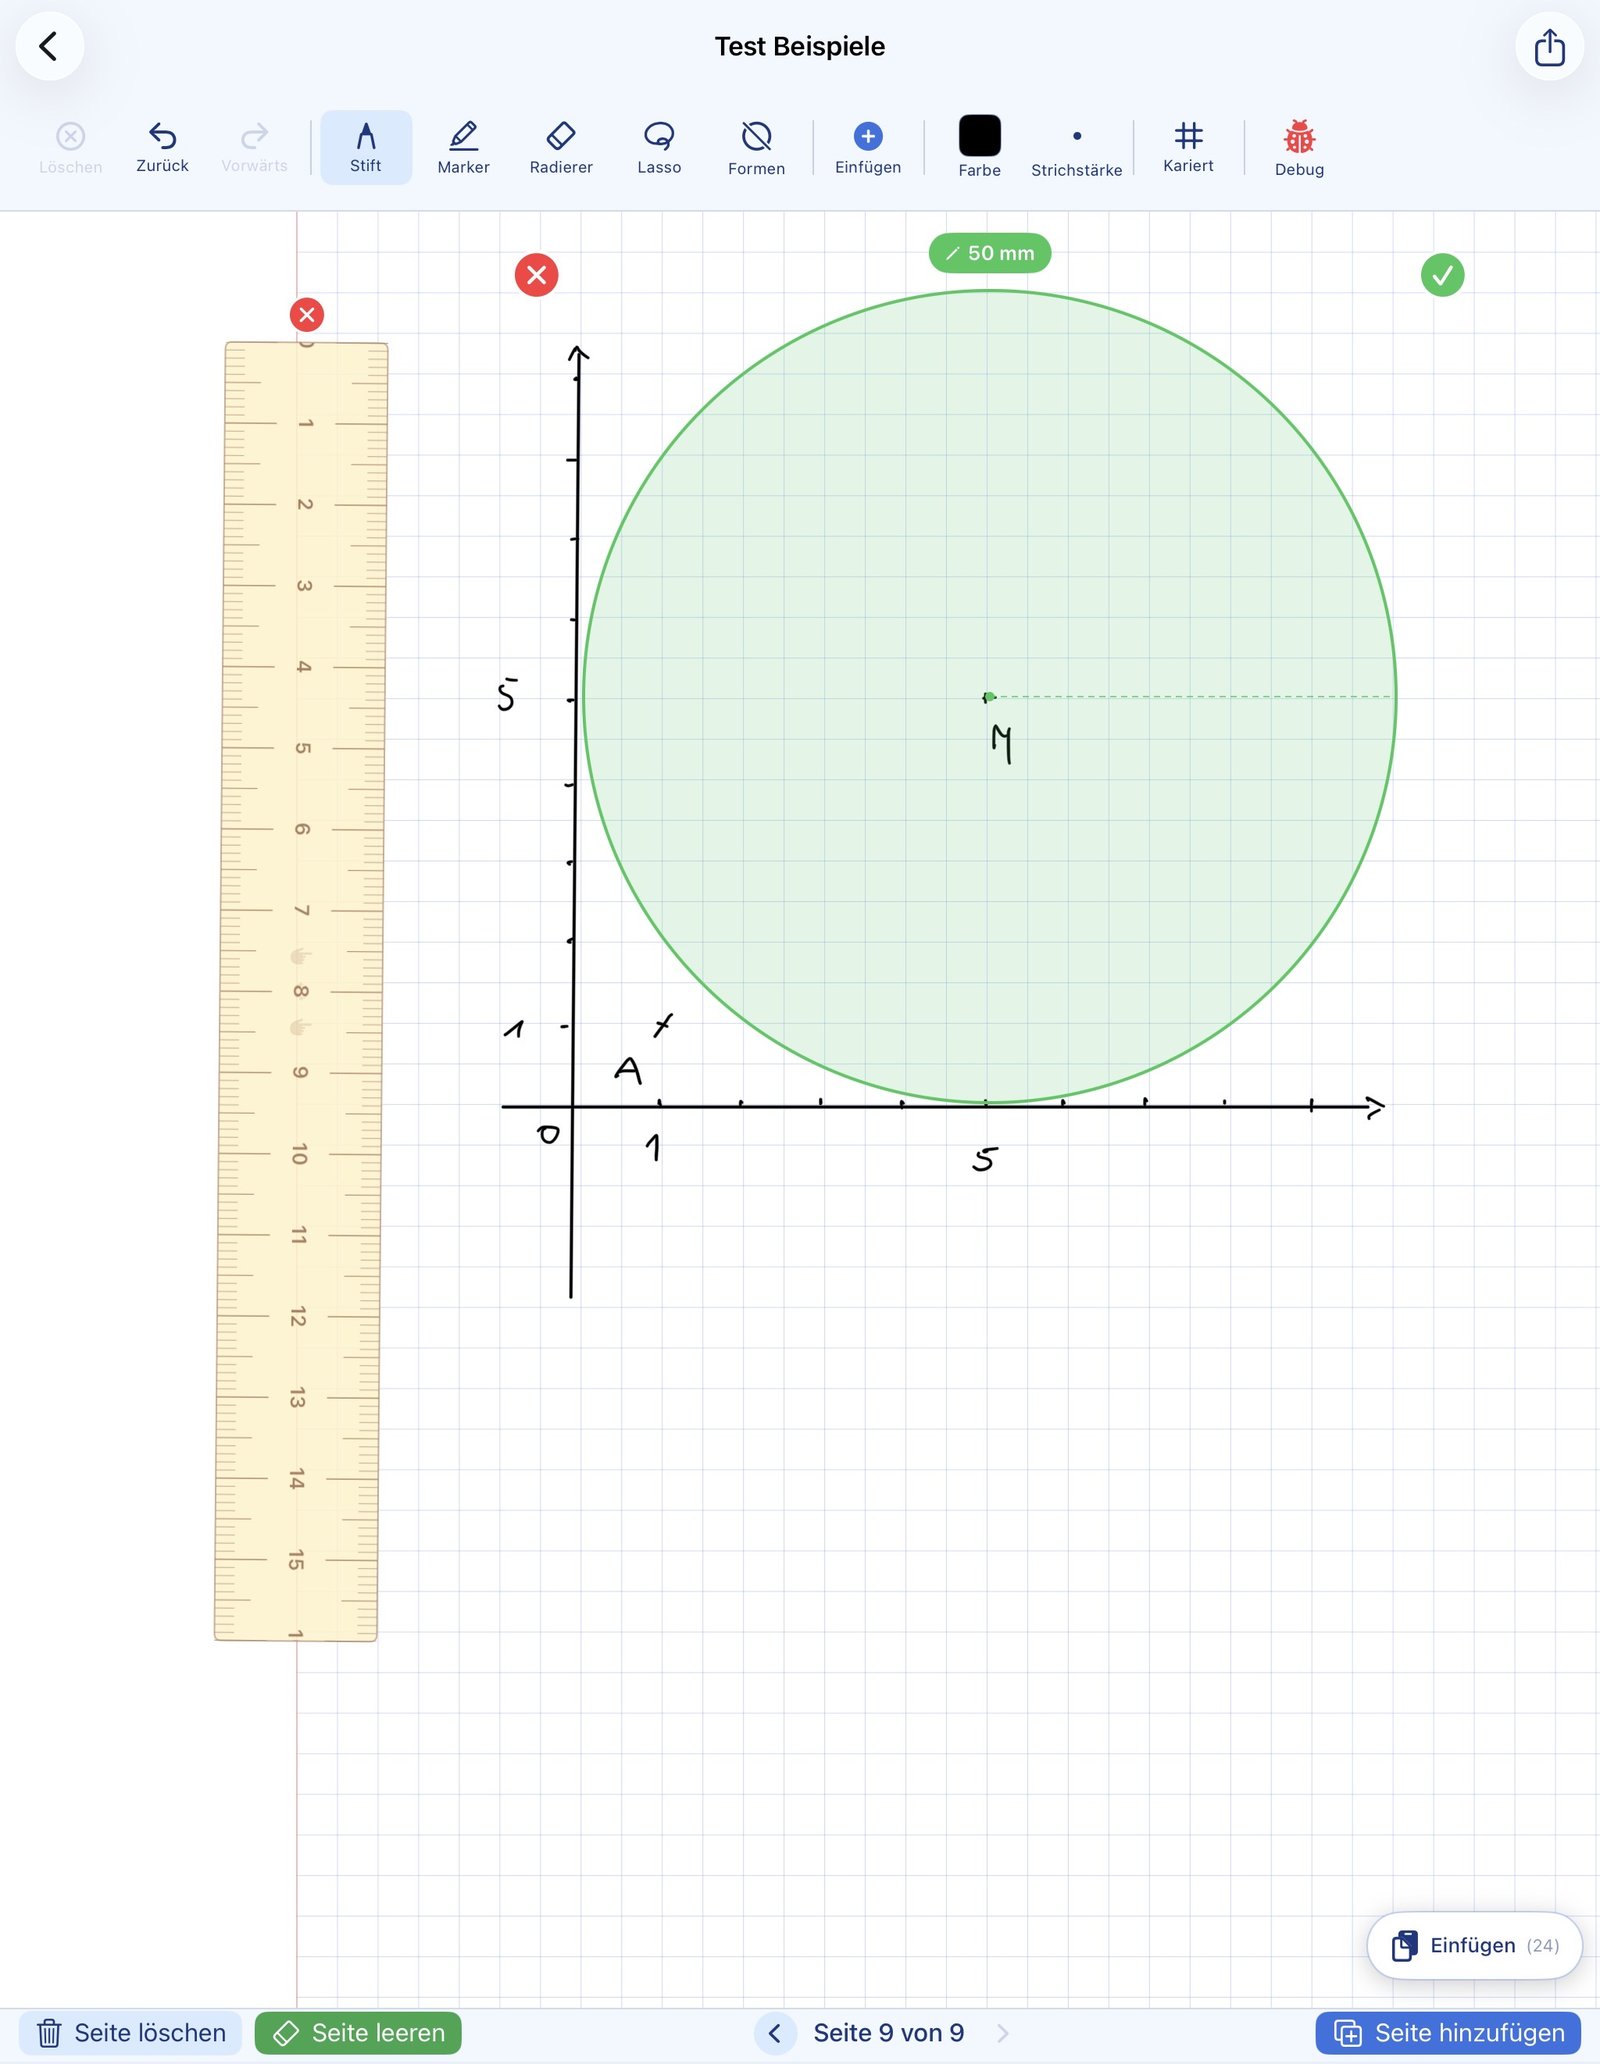
In addition to the ruler and set square, a compass is available. Set the radius, place the centre point, draw a circle or arc — like a real compass from the maths toolbox. The circle can then be turned into a permanent stroke with a tap on “Lock in”. It then becomes part of the page and can be erased with the regular eraser — perfect when guide lines should disappear later.
- ✓ Centre point freely placeable
- ✓ Radius can be adjusted precisely
- ✓ The centre point is drawn too — when you lock the circle in, NiblyNotes adds a small dot at the centre, just like the pinprick of a real compass. It stays visible and is included when printing
- ✓ Full circle or arc — switchable (see below)
- ✓ Lock in turns the circle into a permanent stroke — then erasable
- ✓ Until locked in, position and radius remain fully editable
- ✓ Ideal for geometric constructions
After locking a circle in, the compass window reopens automatically — so several circles can be created quickly one after another. While the compass is open, the ruler and set square are hidden temporarily and restored automatically afterwards, so the two-finger gestures of the tools cannot interfere with each other.
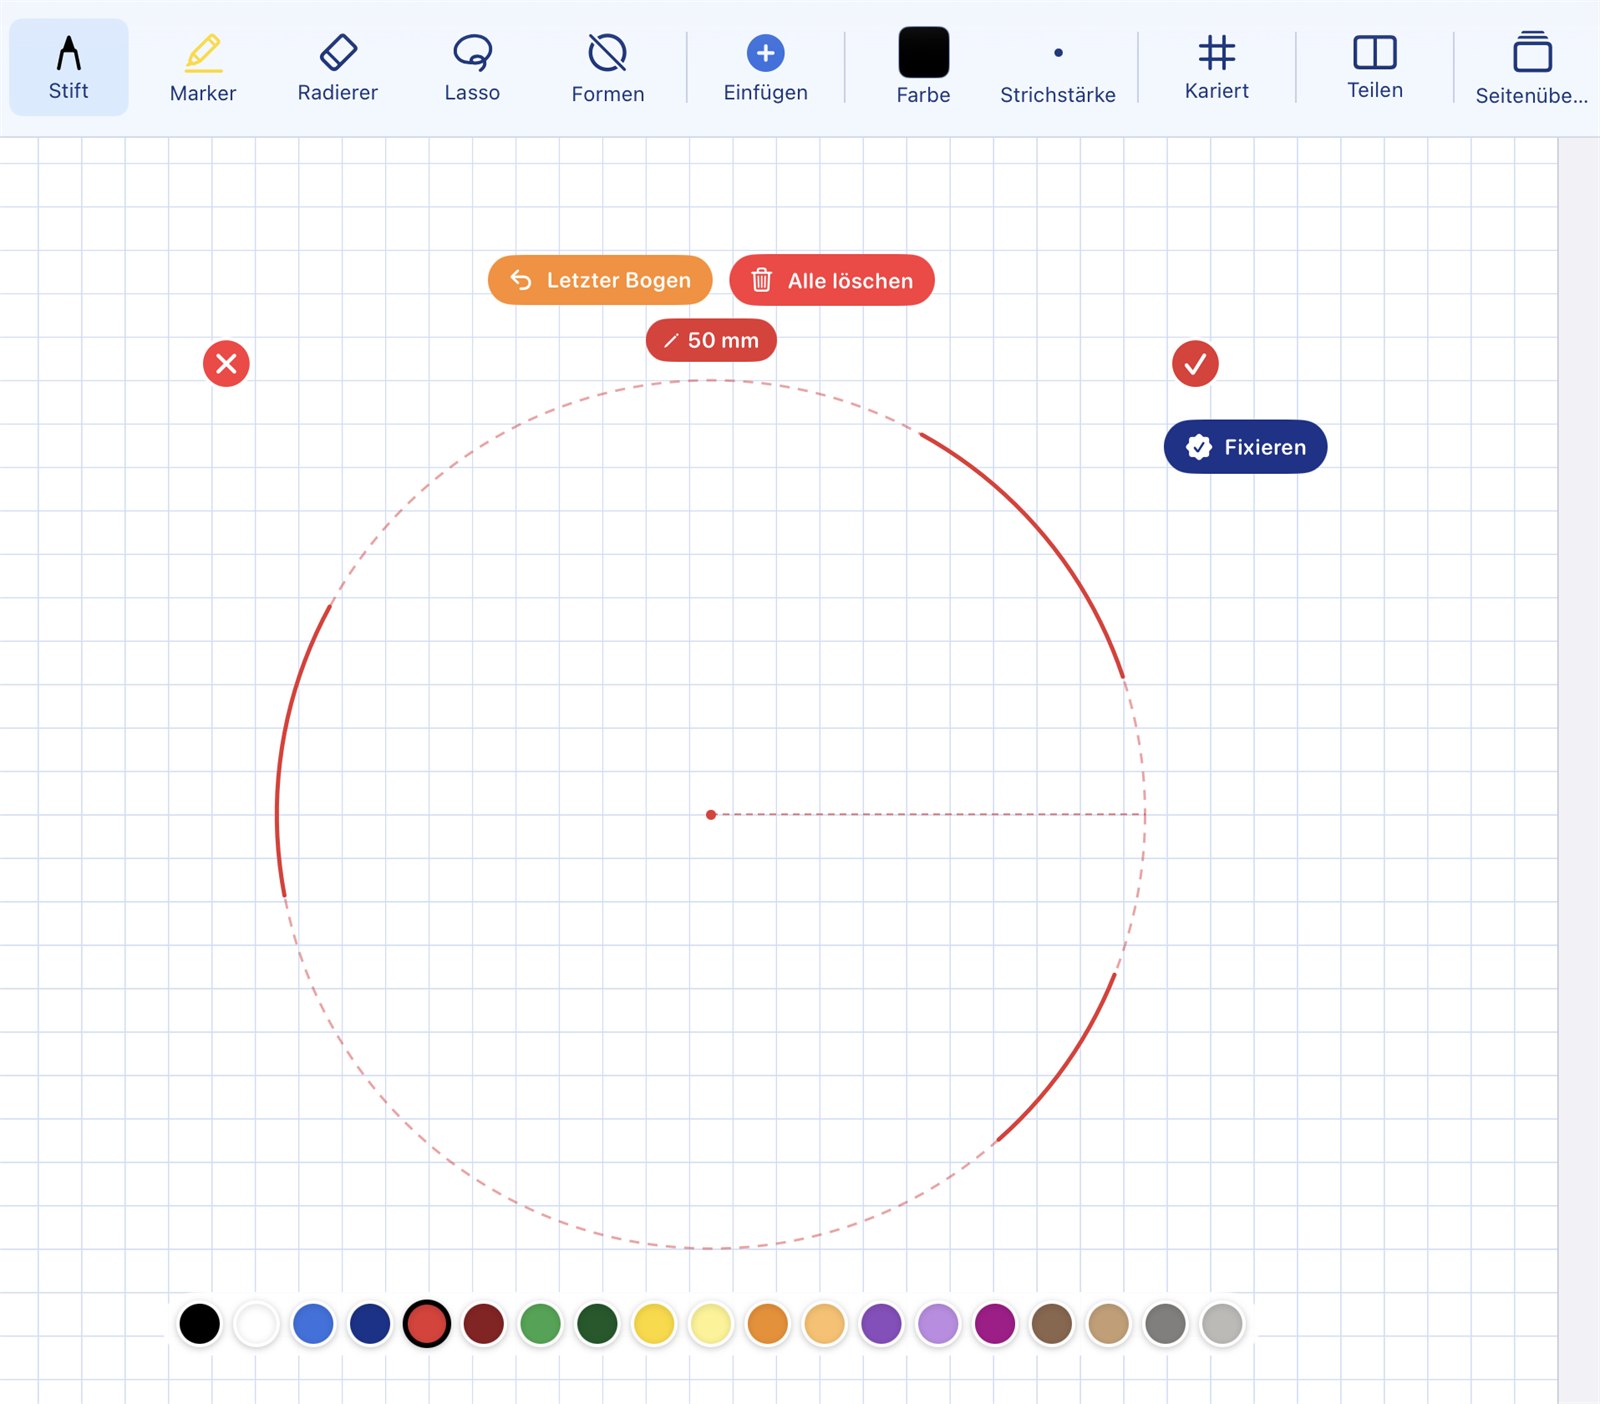
Arc mode — for real constructions
The compass can be switched between "Full circle" and "Arc". In arc mode the circle is shown only as a dashed guide line. Place the pen on that line and drag along it — exactly the arc you need appears. Several arcs on the same circle are possible.
- ✓ "Full circle" / "Arc" switch right on the compass
- ✓ Dashed guide circle — ink appears only where the pen travels
- ✓ Several arcs on the same circle
- ✓ "Last arc" undoes the most recent arc, "Clear all" removes them all
- ✓ Only when you lock in do the arcs — together with the centre point — become permanent strokes in the notebook
Just like in geometry lessons: perpendicular bisectors, angle bisectors and triangle constructions are built from individual compass arcs, not from full circles. Arc mode makes exactly that possible on the iPad.

Scrolling with a tool open
To keep the centimetre and millimetre scales true to real-world size, zoom is fixed while the ruler, set square or compass is visible. So that you can still reach another part of the page, there is a scroll bar along the right and bottom edge of the writing area.
- ✓ Move the page without closing the tool
- ✓ Scale and tool position are preserved
📊 Tables
A clean grid, filled in by hand
A table is placed on the page as a grid and then filled in with the Apple Pencil®, exactly as in a paper notebook. Measurement series, vocabulary comparisons or calculation tables are ready in seconds, without drawing a single line by hand.
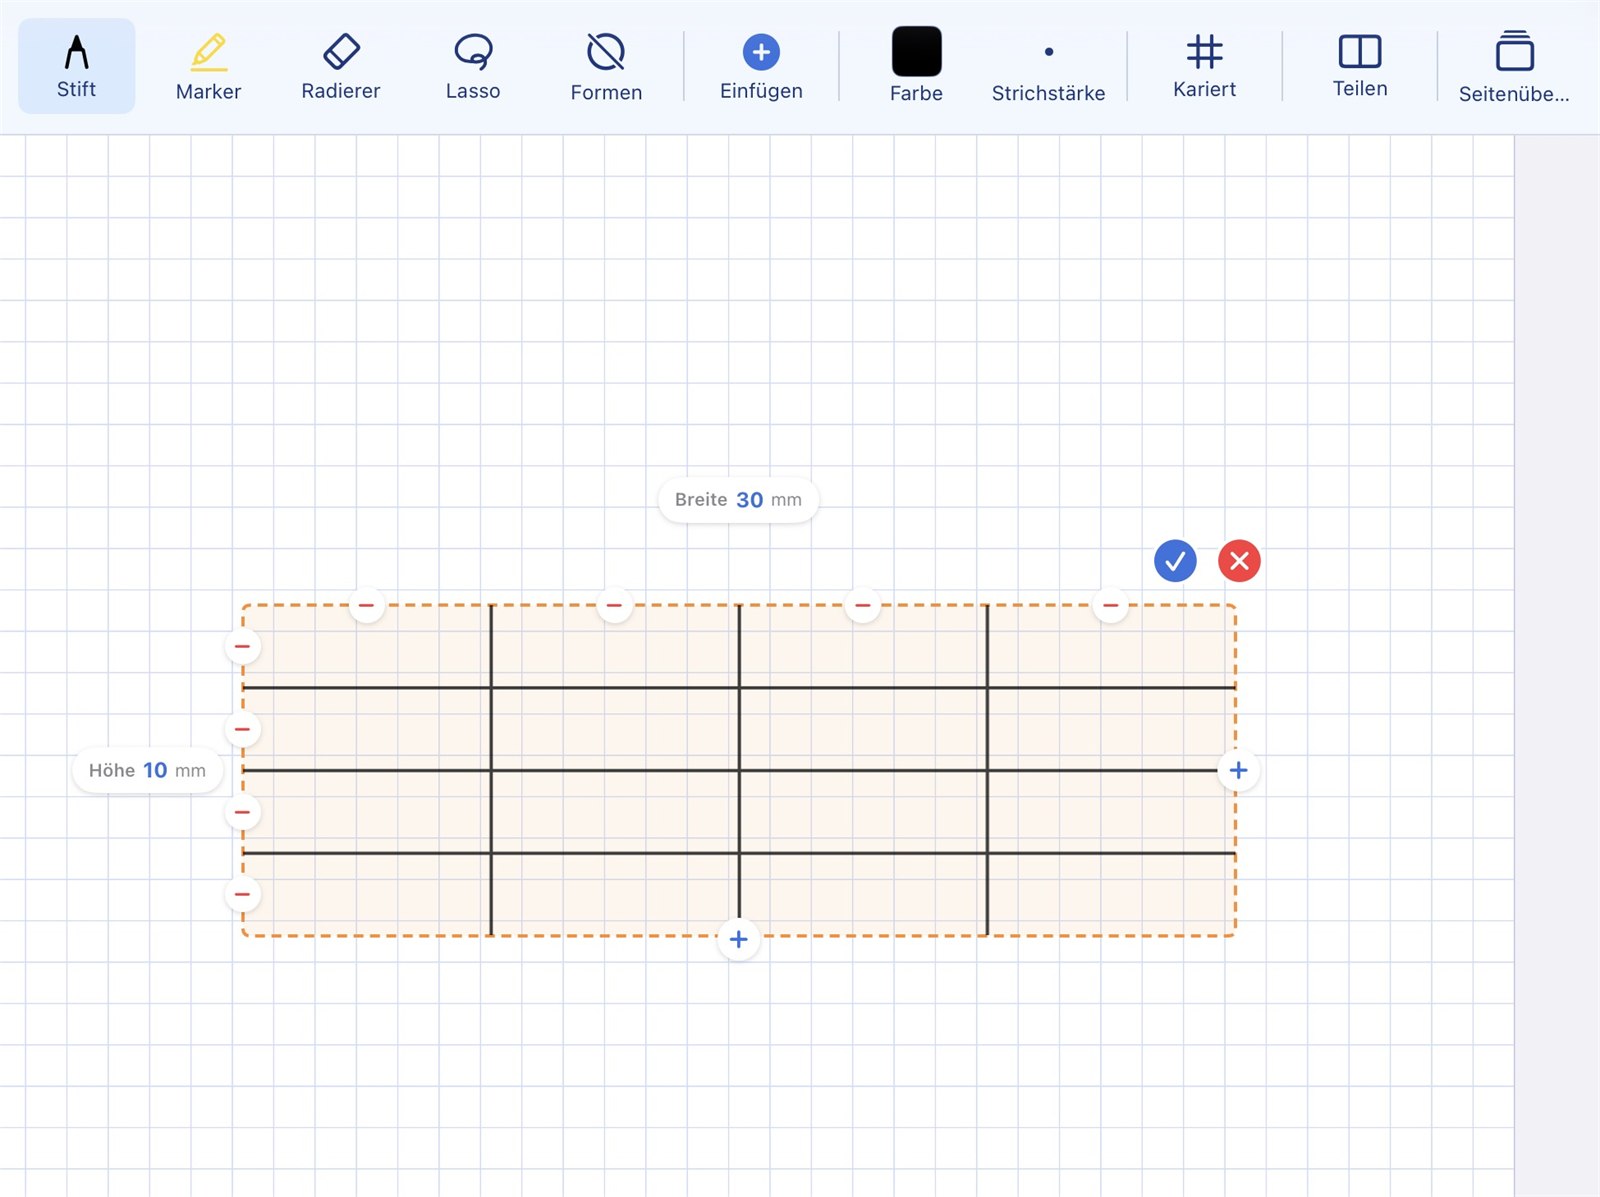
Ready in seconds — filled in by hand
- ✓ Freely selectable number of rows and columns
- ✓ Fixed cell size, so there is always enough room to write
- ✓ The table can be moved on the page and pinned in place
- ✓ Entries are handwritten — no typing required
- ✓ As many tables per page as you like
🎧 Audio in the notebook
Listening exercises, vocabulary and recordings right on the page
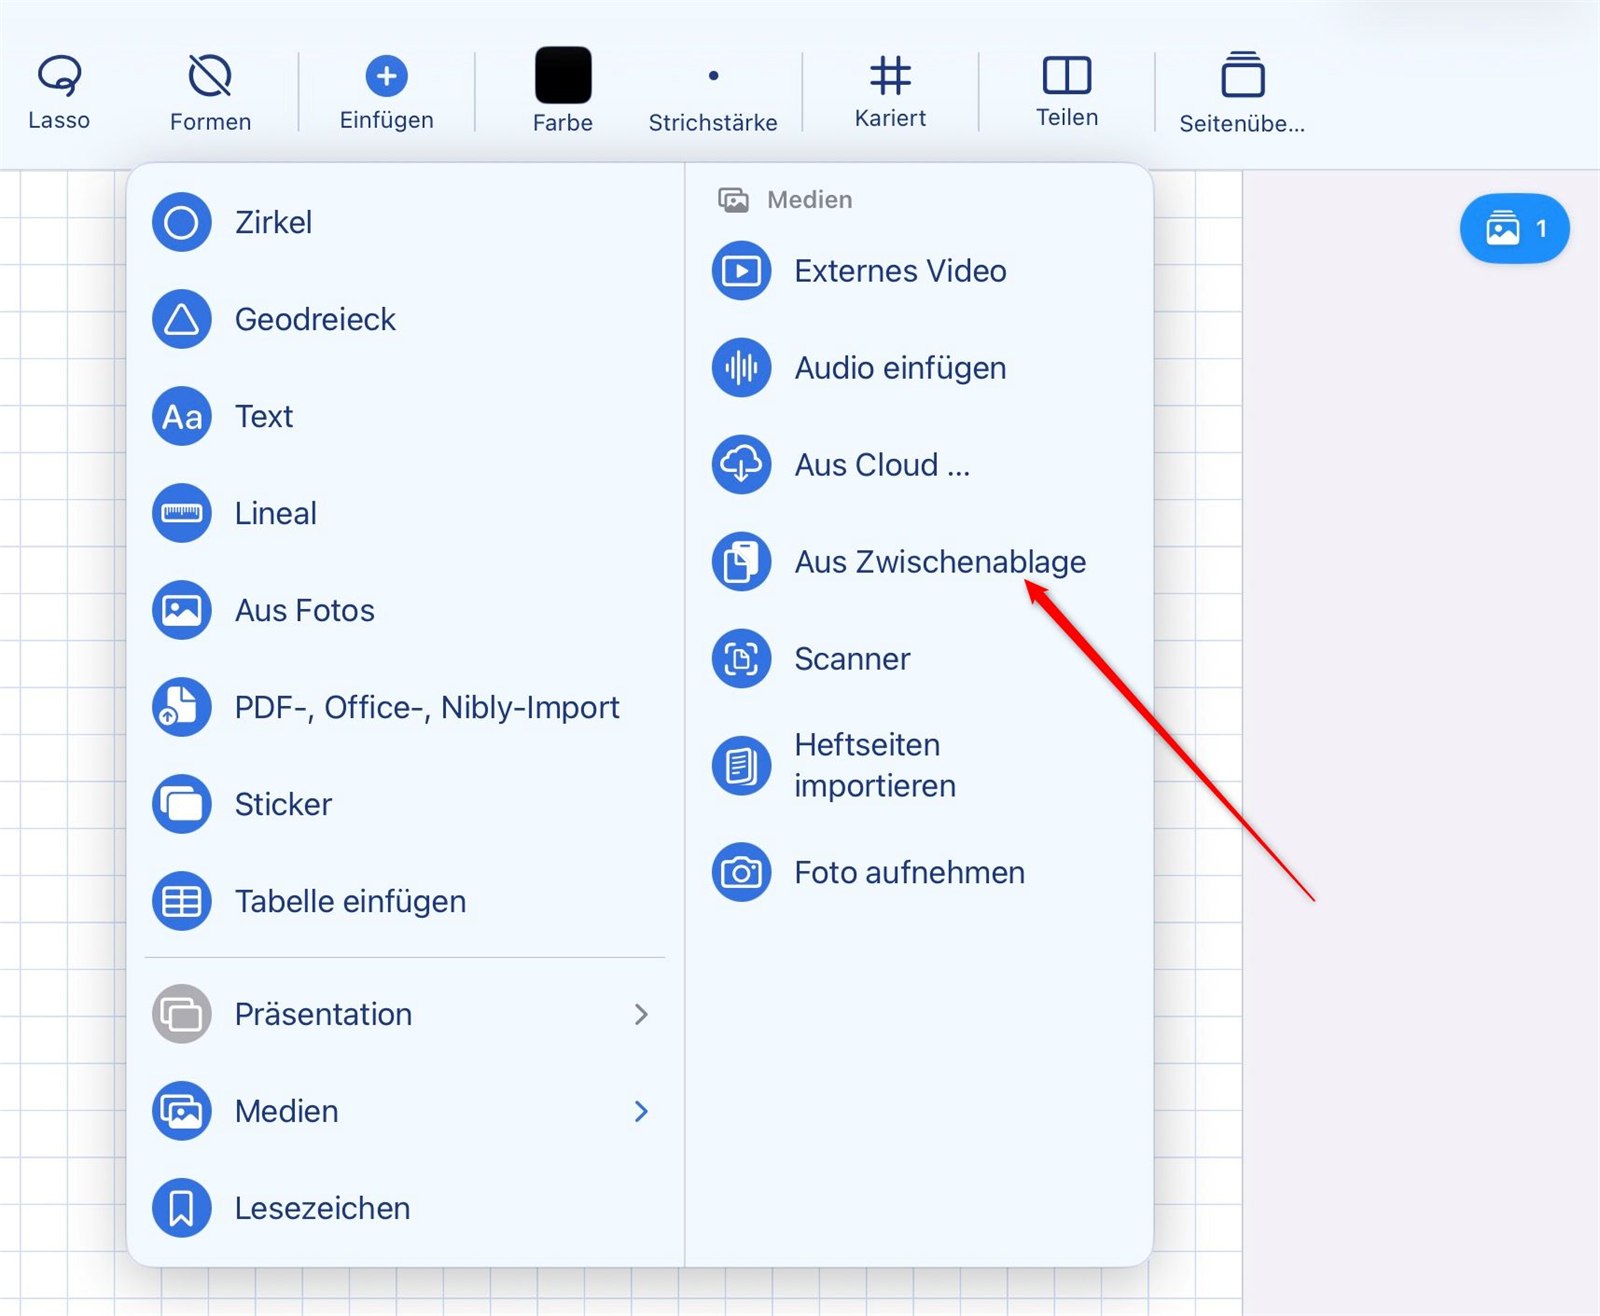
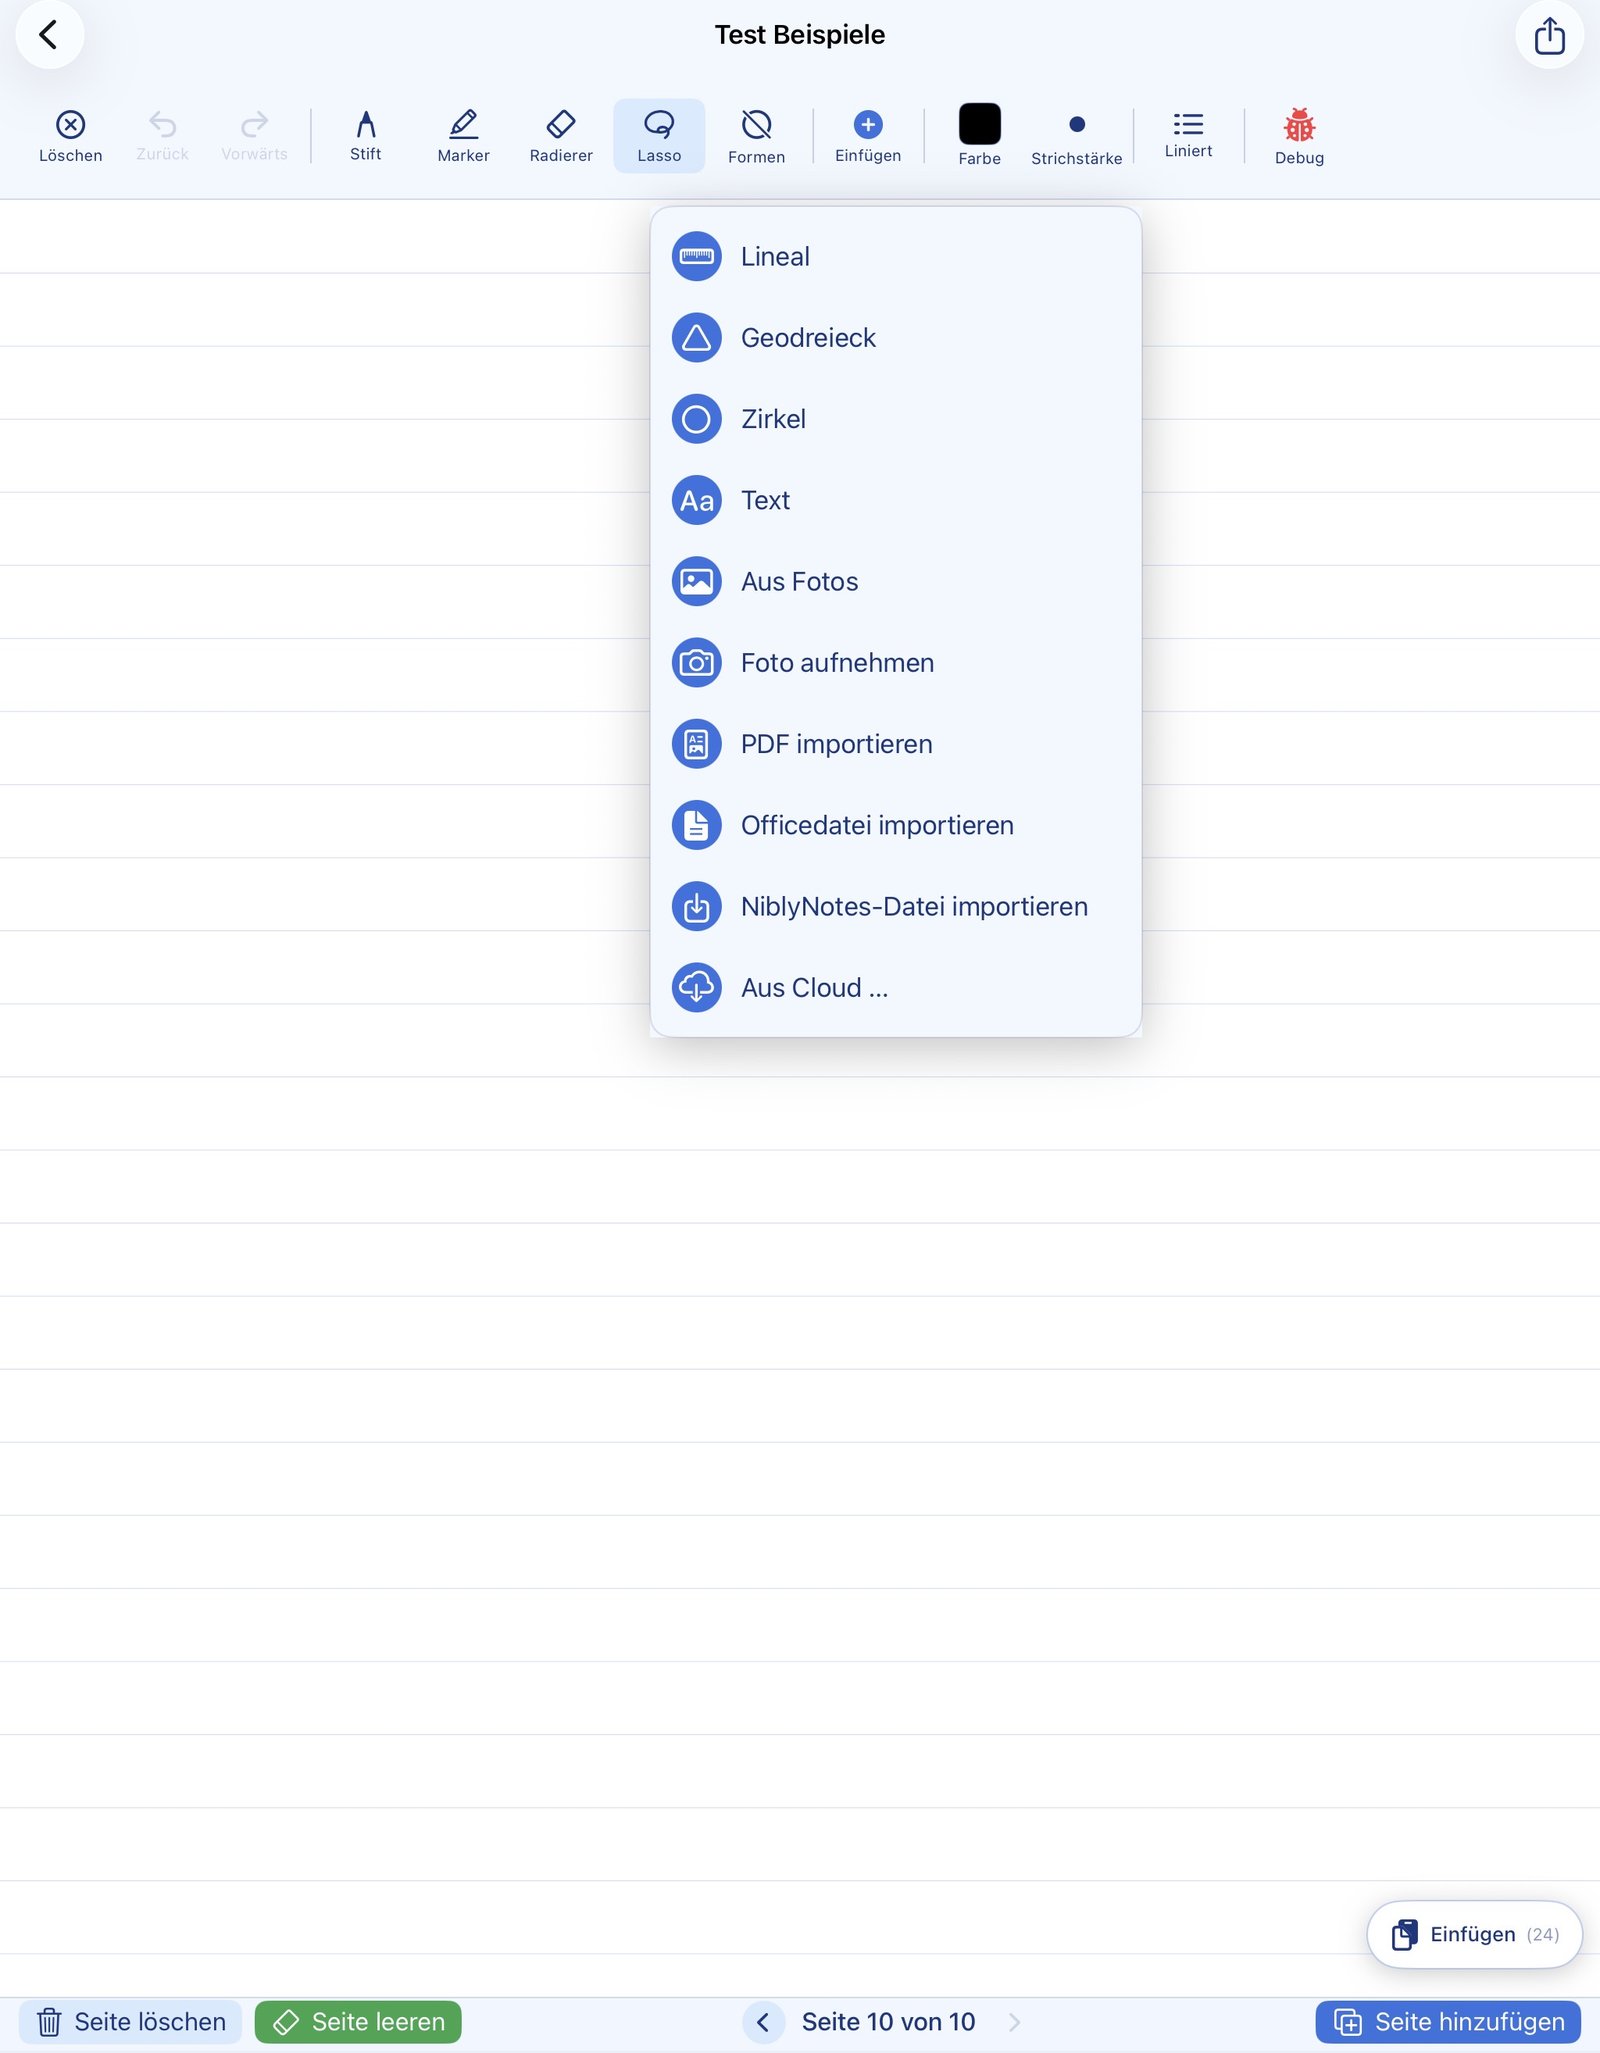
Audio files can be placed on a notebook page as their own box — for example a listening exercise in language lessons, a vocabulary list to repeat after, or a music example. The file is picked from the plus menu and then sits in the notebook as a small player.
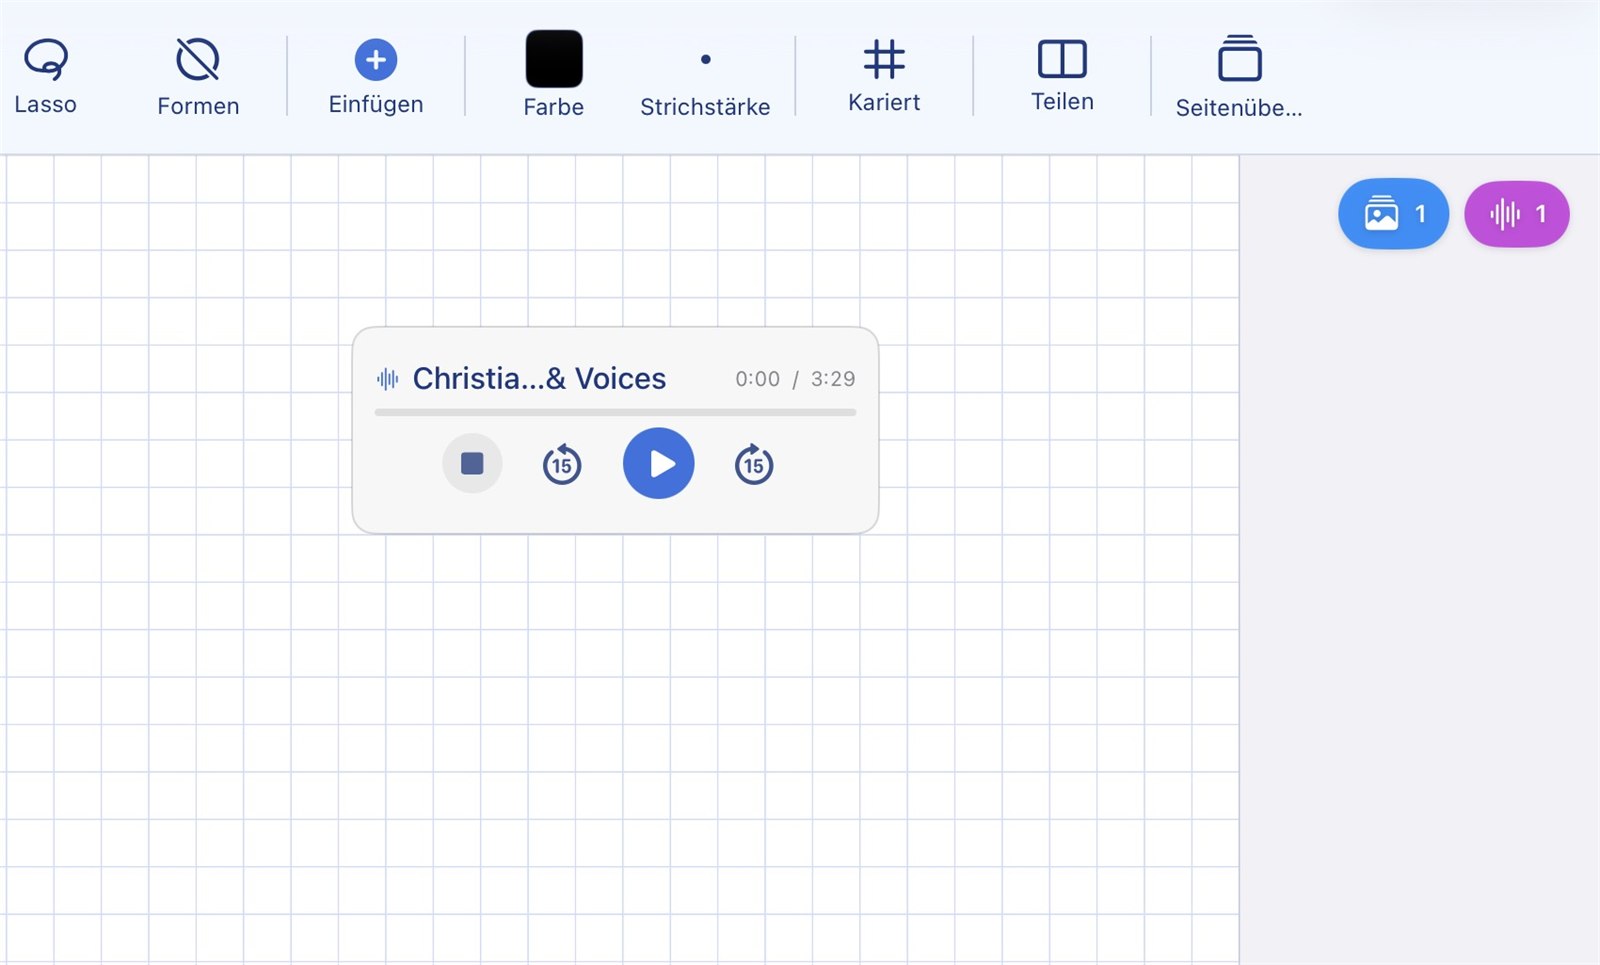
A small player right on the page
- ✓ Insert an audio file from the plus menu
- ✓ Supported formats: MP3, M4A, WAV, AAC, AIFF and CAF
- ✓ The player can be moved freely on the page and pinned in place
- ✓ Each audio box can be given its own title
- ✓ You can keep writing around the box as usual
Privacy note: Audio files are stored separately from the notebook. They are therefore not part of a notebook export and are not transferred with shared notebooks — so no third-party audio file is ever passed on with a notebook.
▶️ Embed External Videos
Videos directly in the notebook — privacy-friendly
Video links can be pasted directly into a notebook page. The video appears as a neutral placeholder — the connection to the provider is only established when the user taps "Play". NiblyNotes uses the most privacy-friendly embed mode each provider offers.
Privacy-friendly embedding — only a tap on Play creates the connection
Inserting a video link merely creates a neutral placeholder with a play symbol on the notebook page. At this point no connection is made to the provider. The iPad only opens a connection to the video provider when "Play" is actively tapped. NiblyNotes uses the most privacy-friendly embed mode each provider offers — no tracking cookies are set before active playback.
- ✓ Privacy notice before the first insert — the app shows a notice that must be actively confirmed
- ✓ Neutral placeholder — no preview image; nothing is loaded from the provider until the video is actually played
- ✓ Privacy-friendly embed mode — where the provider offers one, with no tracking cookies before playback
- ✓ Cookies and cache only briefly — the playback session is fully discarded when the player is closed
- ✓ Auto-stop on page change — leaving the page automatically stops the video
- ✓ Full-screen button in the player — stream to a projector via AirPlay® or HDMI from there
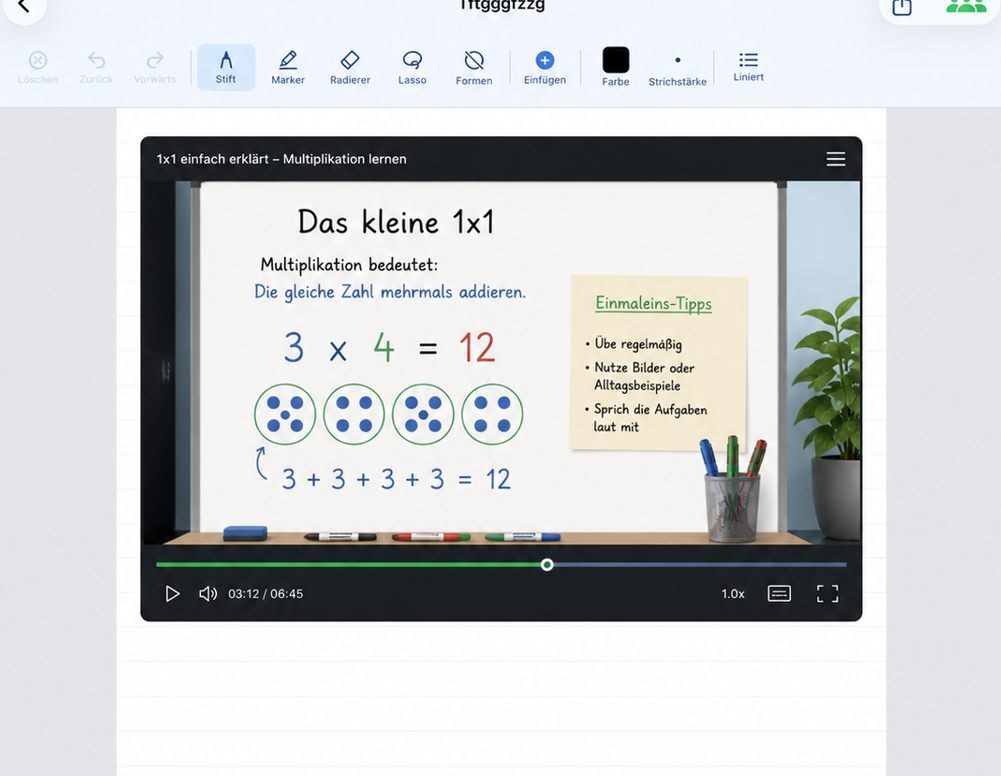
Note: A detailed description of the data flows when external videos are played is available in the privacy policy.
🔍 Zoom & zoom writing
Fully dynamic zoom — portrait or landscape, doesn't matter
Every page in a notebook can be zoomed freely — no matter the page format. Whether portrait or landscape, A4 or custom: pinch to zoom in, pan with one finger to move around. This makes detail work just as comfortable as overview work — perfect for corrections, fine drawing or showing things on the projector.
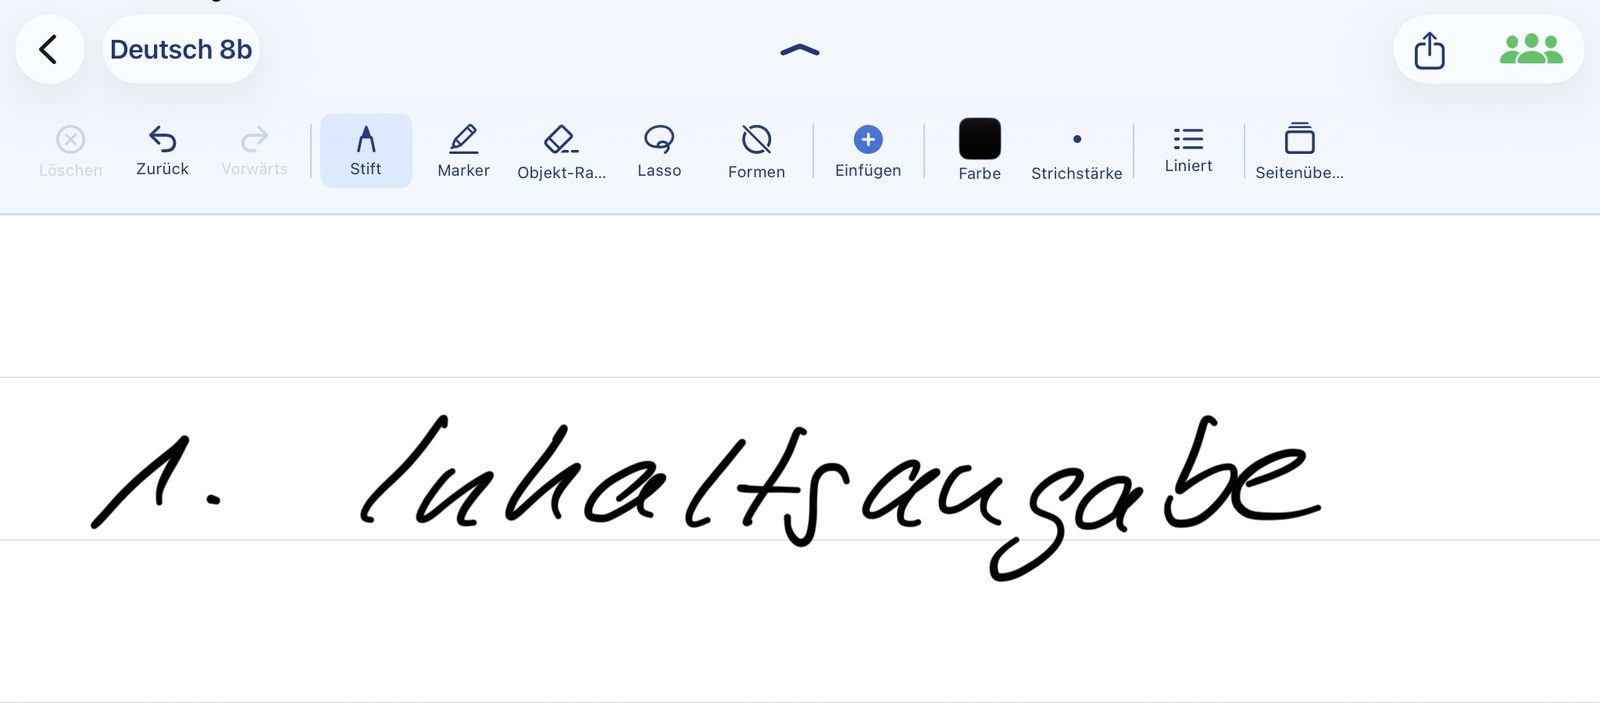
Pinch gesture on every page
Pinch with two fingers to zoom in or out — the page enlarges smoothly. Zoom works dynamically in any page format; the previous app version was limited to a single fixed level. Writing with the Apple Pencil® stays active while zoomed, so even tiny details can be edited precisely.
- ✓ Two-finger pinch — smooth, stepless zoom in and out
- ✓ Works in portrait and landscape orientation alike
- ✓ Pan the zoomed view with one finger
- ✓ Apple Pencil® keeps writing while zoomed — ideal for fine strokes
🔎 Zoom writing
Write big — appear small in the notebook
Zoom writing opens a magnified writing panel at the bottom of the screen. Whatever is written there at a comfortable size lands neatly and small on the notebook page. Ideal for students with large handwriting — and for clean notes inside narrow rulings.
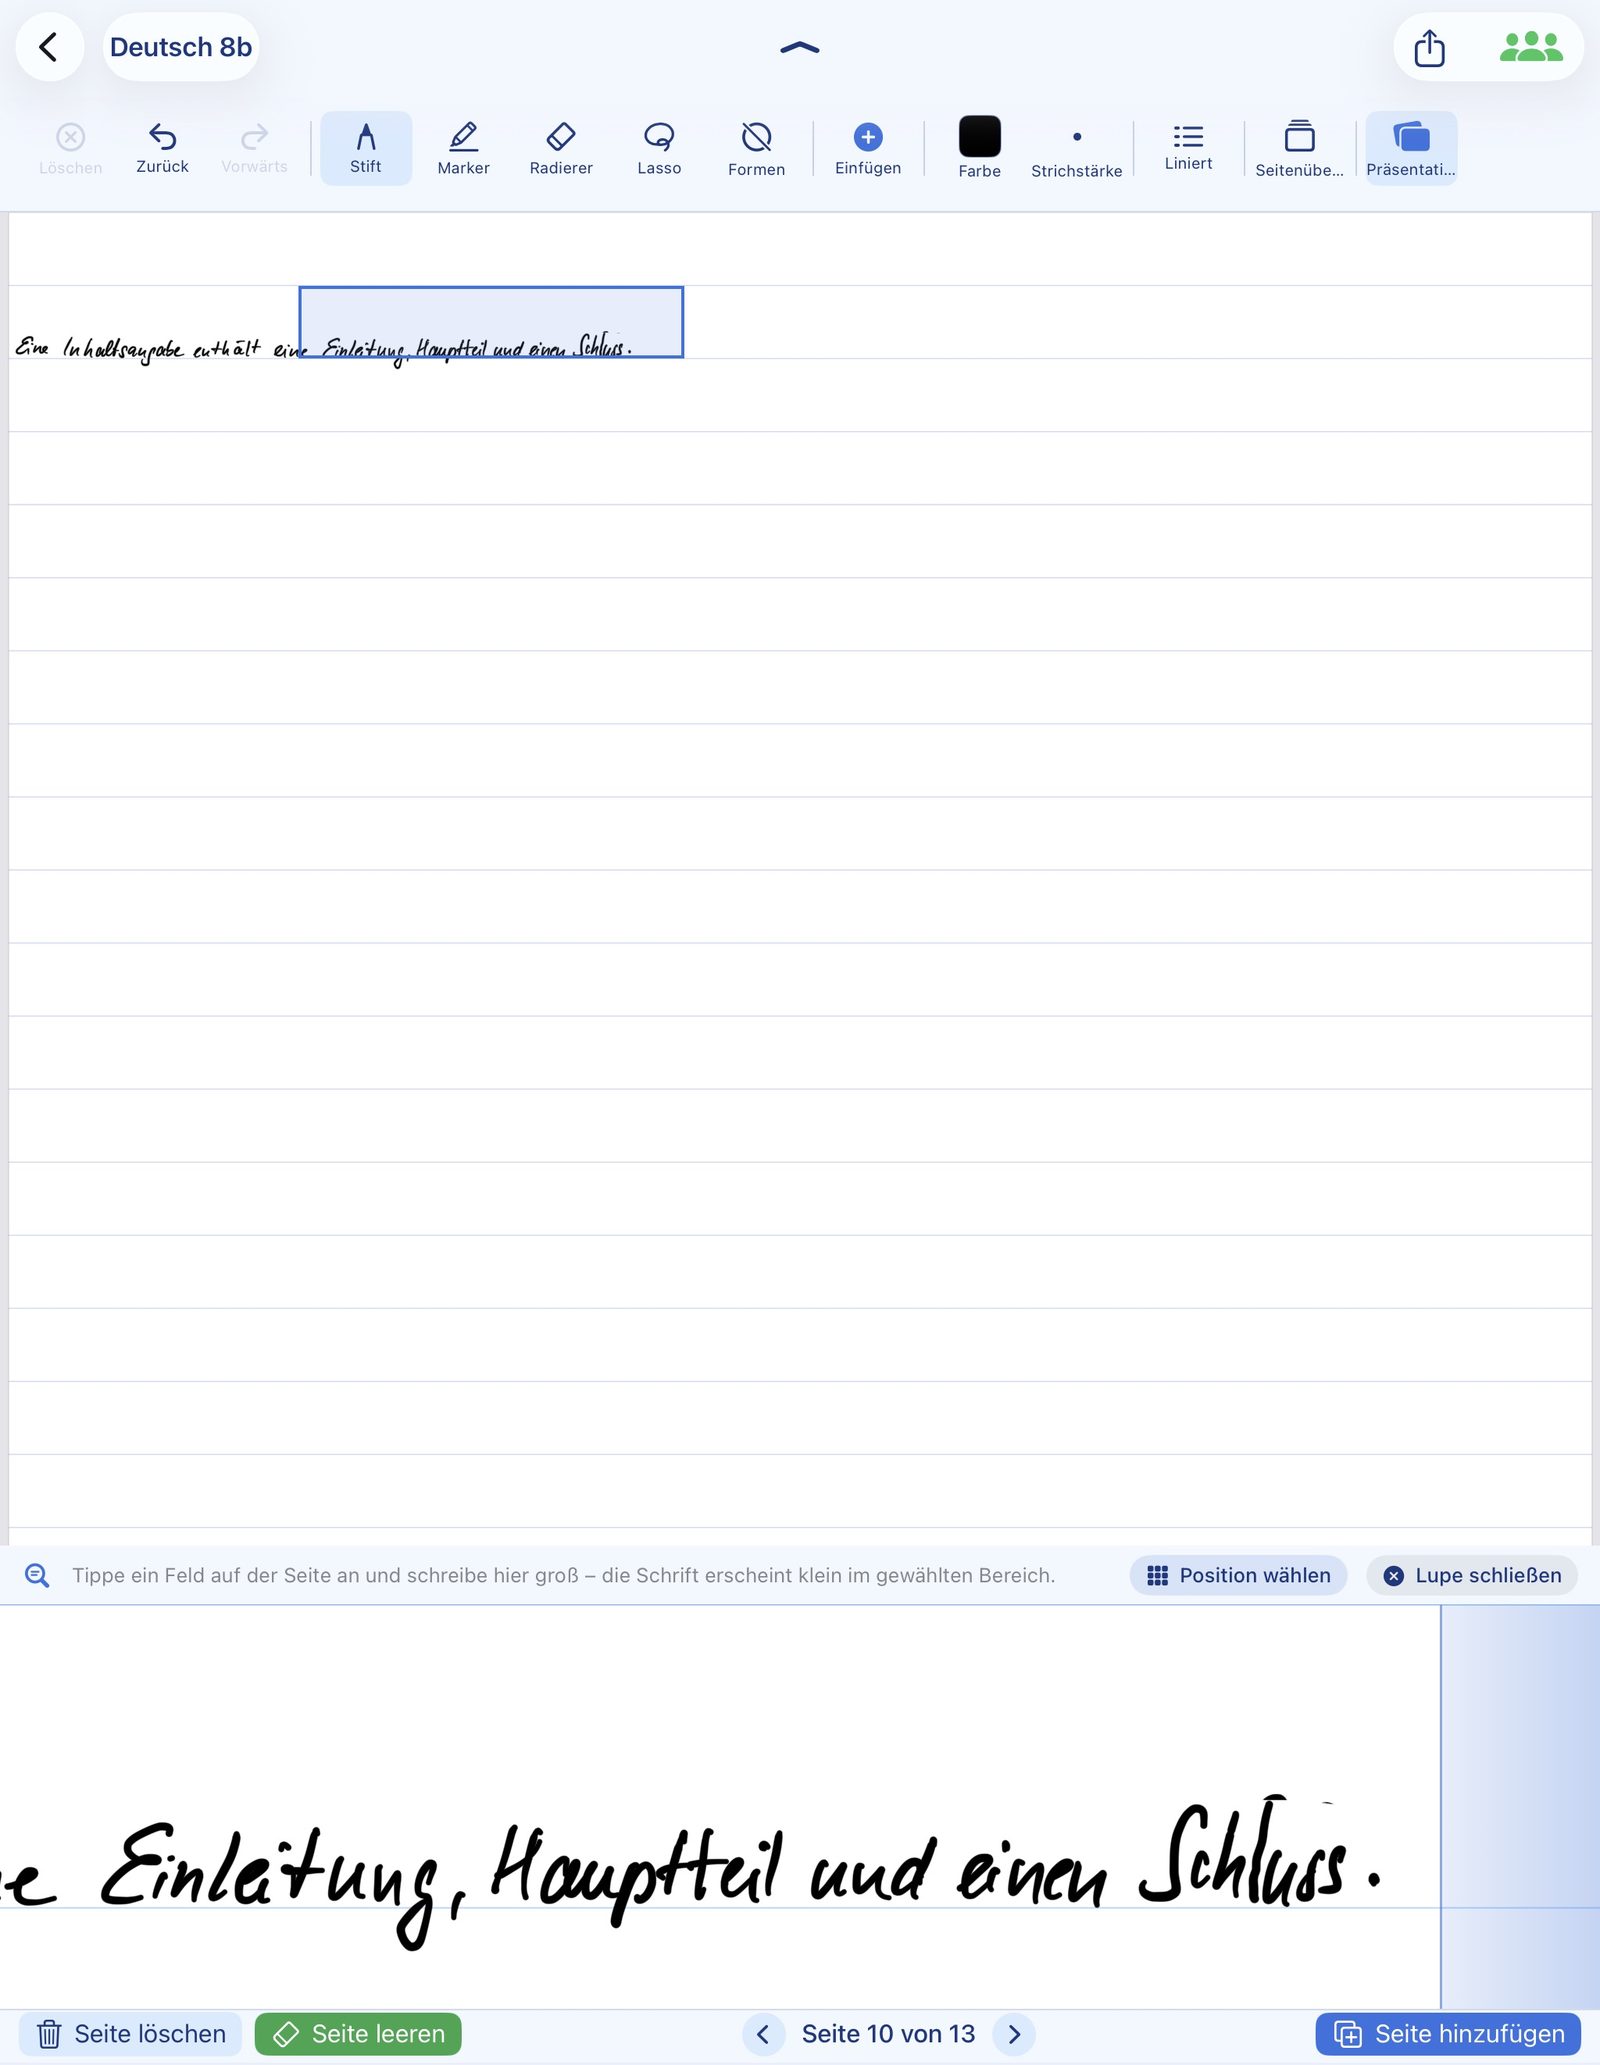
Big writing field at the bottom, small entry on the page
A selection rectangle on the page marks where the text will end up. The bottom panel shows that exact spot strongly enlarged. The Apple Pencil® writes there at a relaxed size — on the notebook page, the writing lands precisely scaled.
- ✓ Bottom panel with around 3.5× magnification
- ✓ Selection rectangle freely movable on the page
- ✓ Lined or grid background also shown in the panel — handwriting stays on the line
- ✓ Existing strokes are mirrored in the panel — start the next stroke exactly where it belongs
- ✓ Close button in the panel — the mode ends with a single tap
📖 Split page
Read on the left, write on the right — at the same time
In landscape orientation the notebook page can be split: a pure reading area on the left, the normal writable page on the right — or the other way round if you prefer. The worksheet, the board photo or the textbook PDF sits right next to your own notes — no switching apps, no constant flipping back and forth.
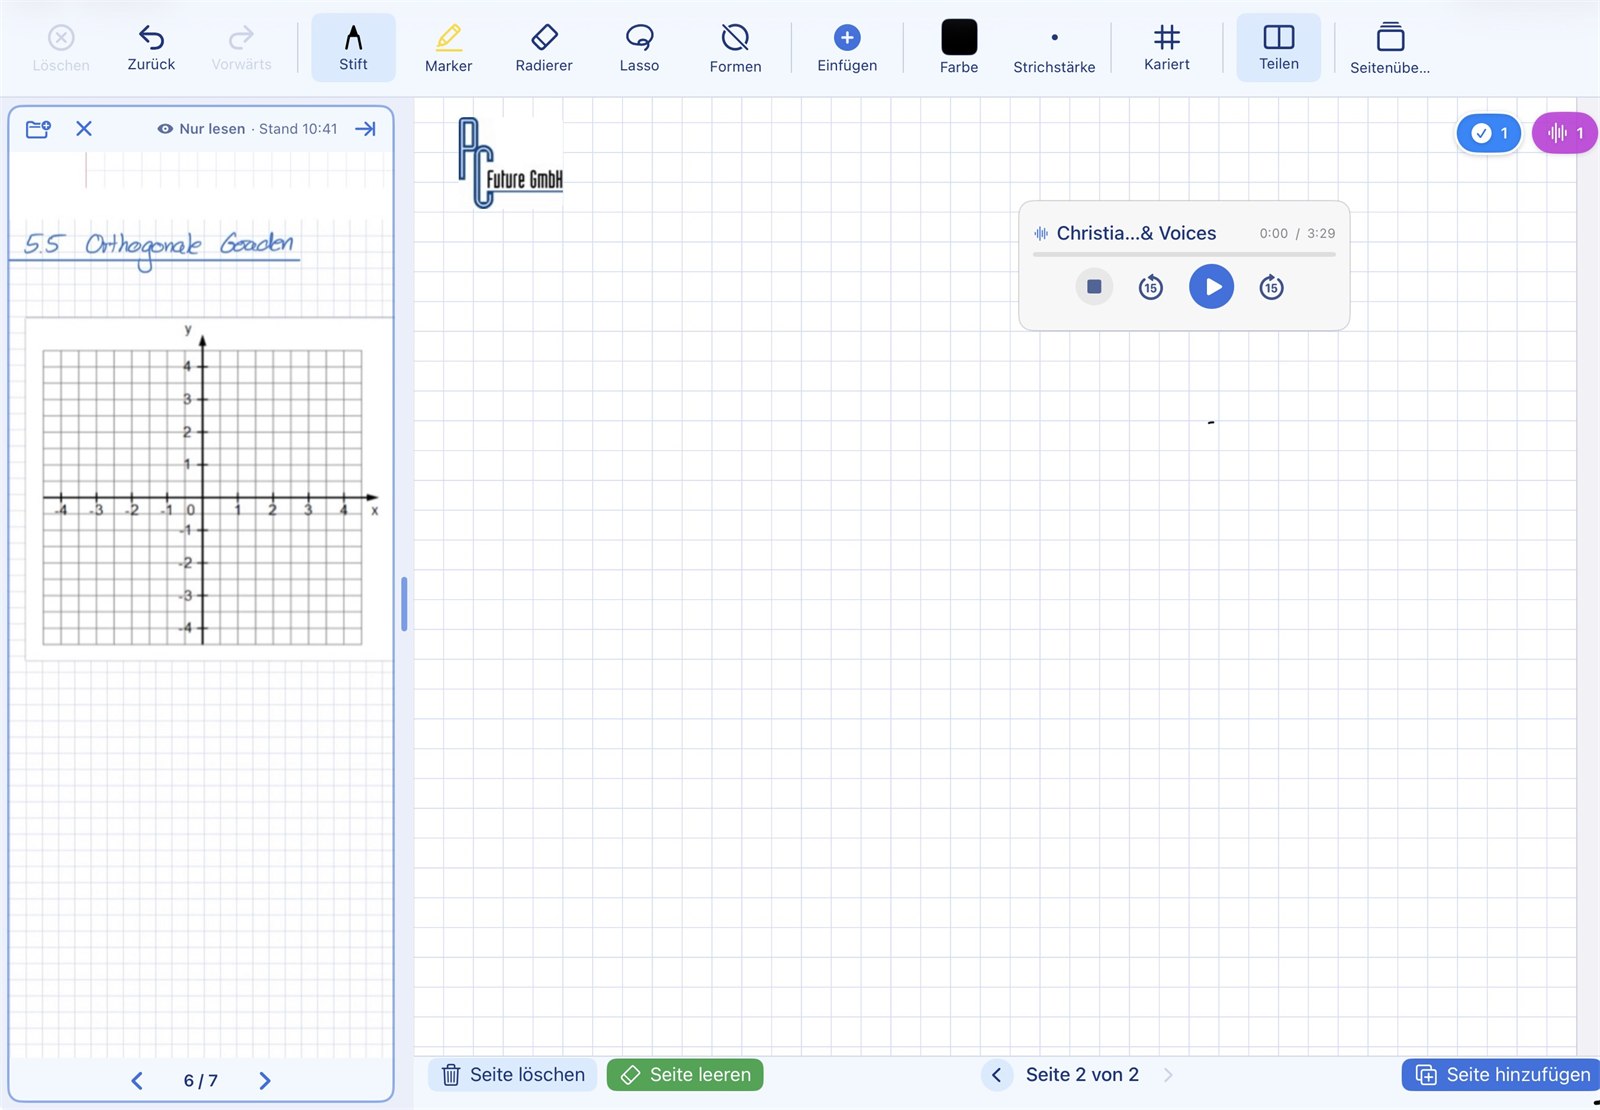
Source and notes side by side
- ✓ A PDF or another notebook can be opened as the reading source
- ✓ The divider in the middle can be dragged with your finger
- ✓ In the reading area: single pages, swipe to turn, two-finger zoom
- ✓ Writing in the reading area is deliberately not possible — the source stays untouched
- ✓ On the right, the full notebook page with all tools remains available
- ✓ Available in landscape orientation
Note: The notebook only stores a reference to the reading source, not the document itself. That keeps notebooks small.
📃 Turning pages
Turning pages like on paper
Pull vertically at the page edge — with both pages in view. Besides swiping and the page buttons, you can also pull vertically at the page edge to reach the neighbouring page. You may deliberately stop between two pages: the end of one and the beginning of the next are then visible at the same time — handy when a calculation or a text runs across the page break.
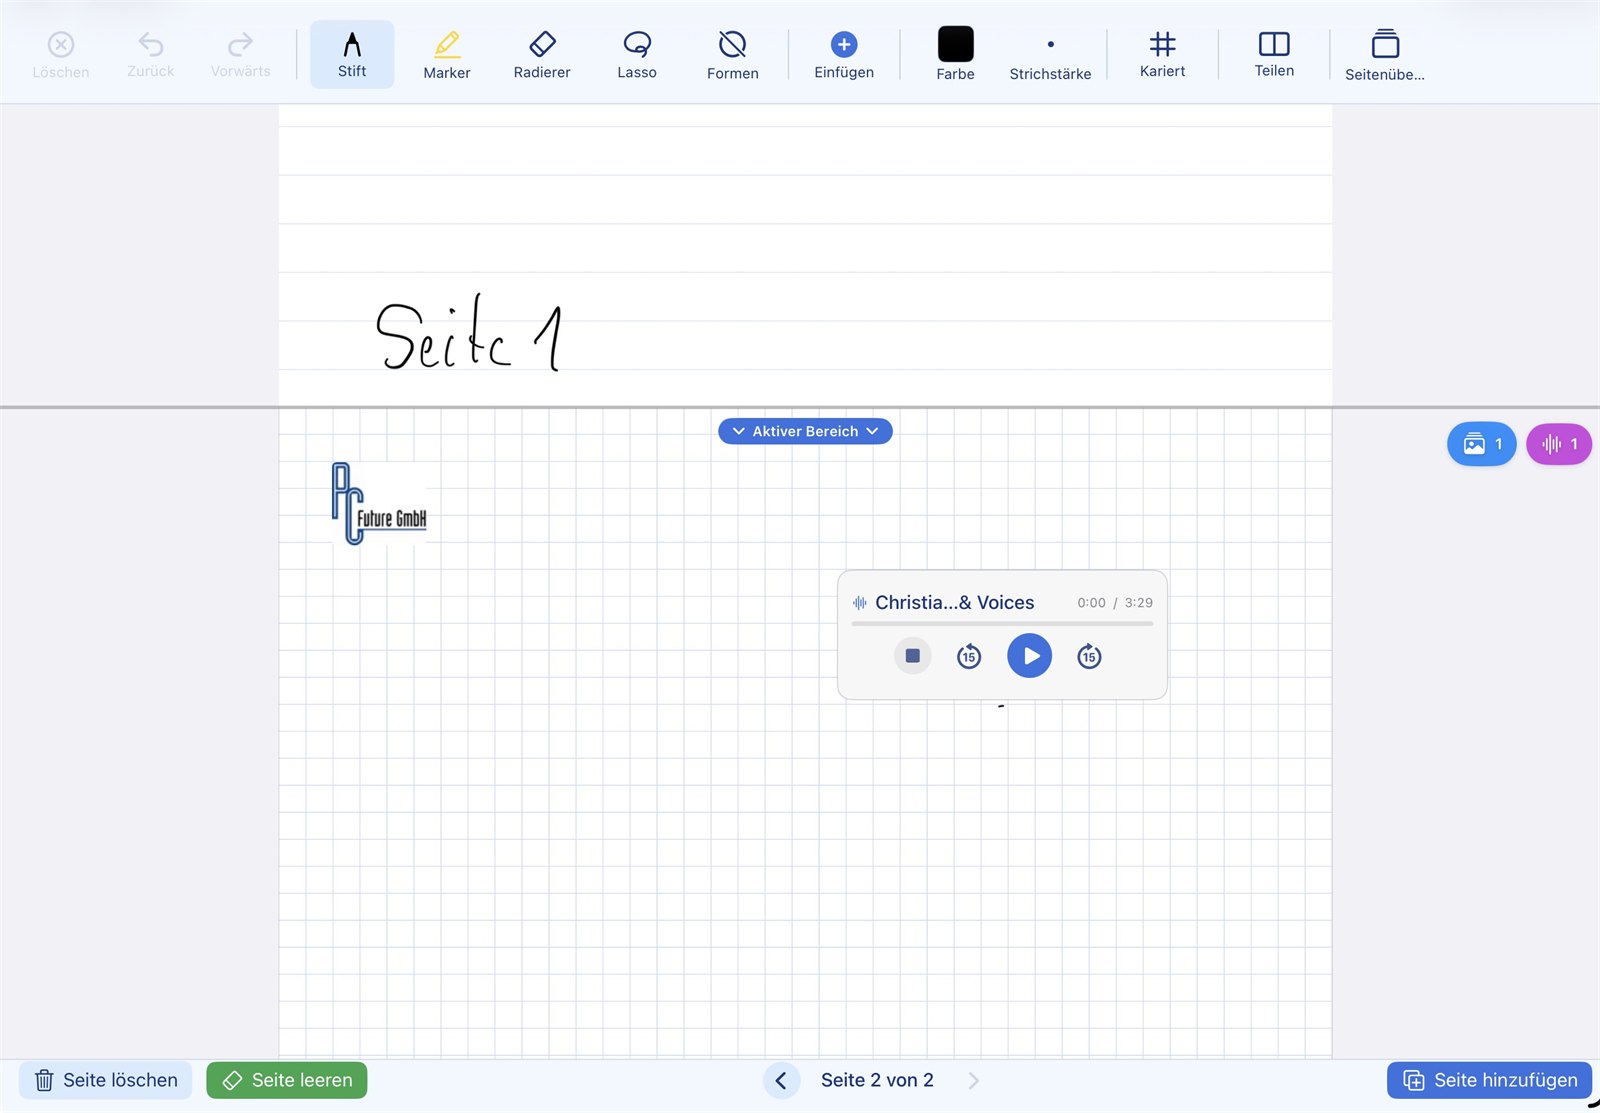
Stop between two pages
- ✓ Pull vertically to reach the previous or next page
- ✓ Intermediate position possible: both pages in view at once
- ✓ Only beyond a certain point does the new page snap in and become active
- ✓ Still available as well: horizontal swiping and the page buttons
📺 Presentation mode
No menus on the projector while screen mirroring
When the iPad is mirrored to a projector or Apple TV via AirPlay or cable, NiblyNotes automatically switches into presentation mode: the external display only shows the notebook page, without the toolbar or any menus. On the iPad itself, everything stays fully usable.
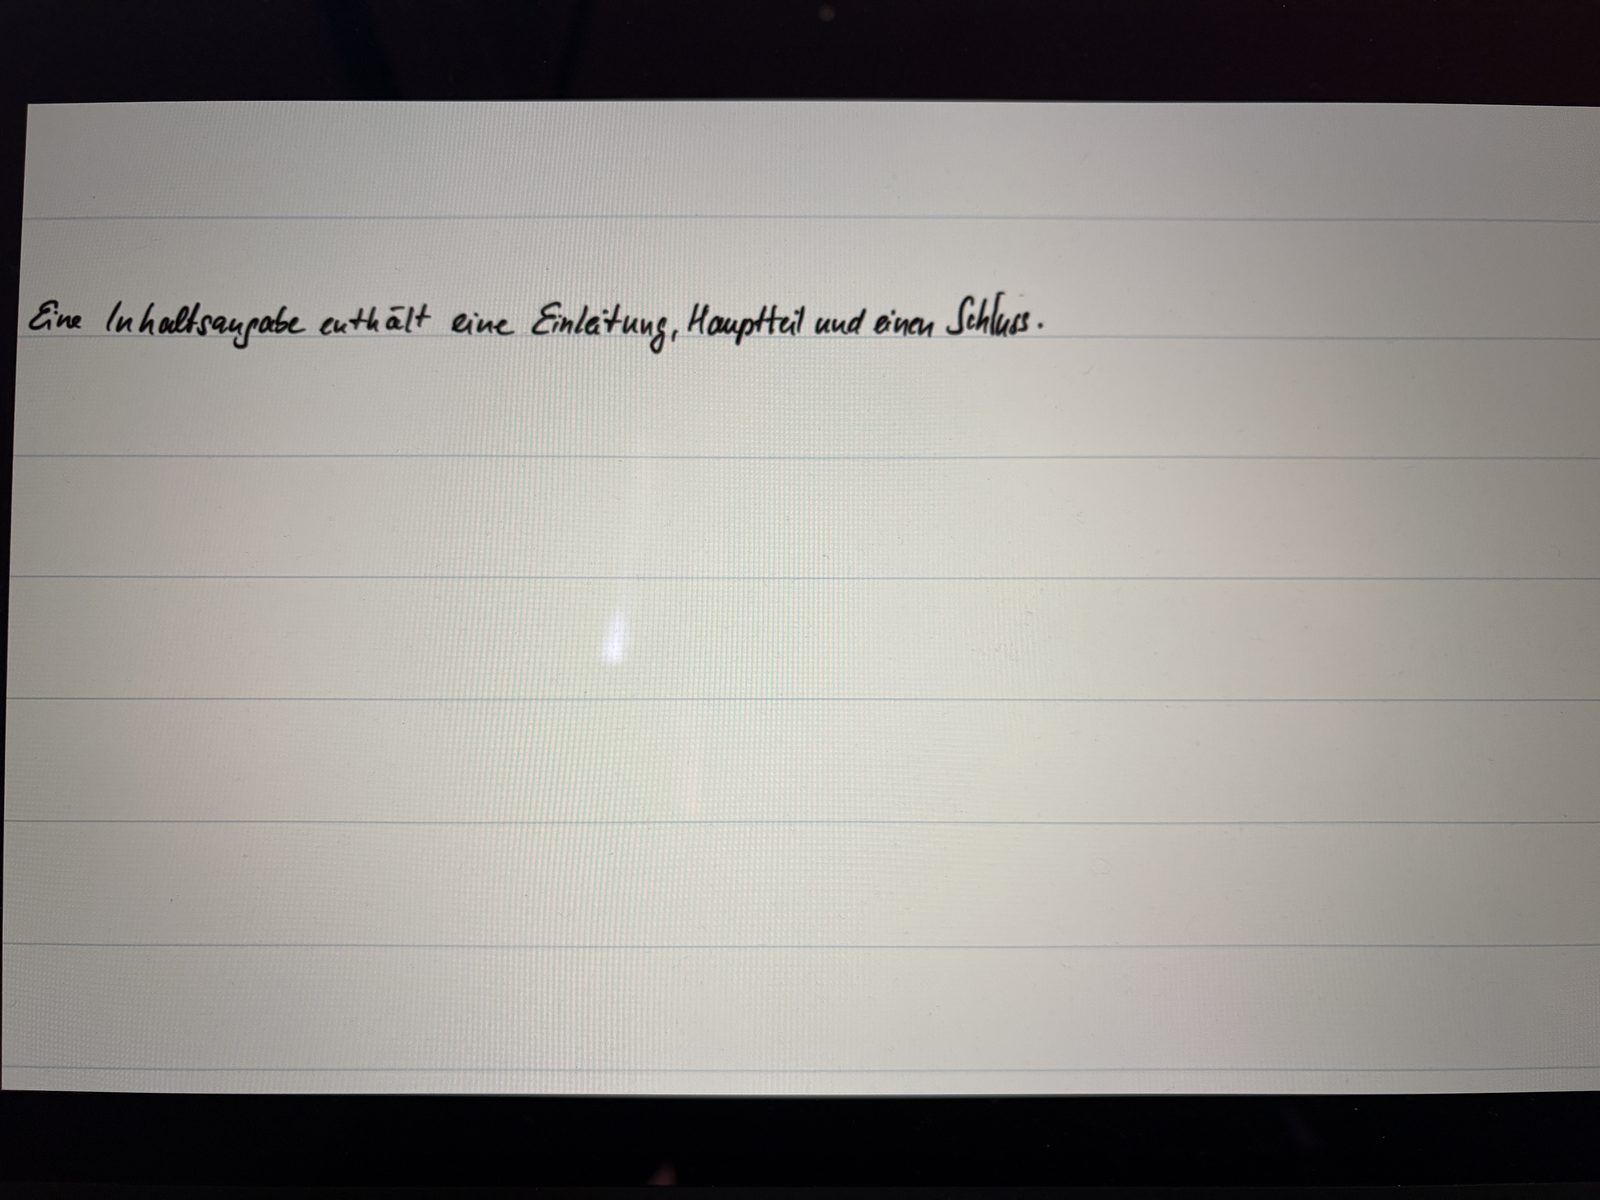
Clean projector view — toggleable with one tap
As soon as an external display is detected, an extra button appears in the toolbar. Use it to switch any time between presentation mode (only the page, no menus) and standard mirroring (everything is mirrored, including controls) — depending on whether the class should follow along or a colleague needs to demo something.
- ✓ External display shows only the notebook page — no tools, no menus
- ✓ The iPad keeps the full editor available
- ✓ Switch back to regular mirroring with one tap
- ✓ The curtain and the zoom level are mirrored 1:1 on the projector
- ✓ Ruler, set square and compass are visible on the projector too — in the correct position and at their current angle. The class can follow a construction step by step
- ✓ The laser pointer is shown on the projector as well — it sits above the tools, so you can point at something on the set square itself
- ✓ Works with AirPlay (Apple TV) and wired adapters
In class: the teacher constructs on the iPad using the set square and compass — the class sees every step on the projector, including the tools themselves. The laser pointer highlights exactly the spot that matters.
Freeze the projector — keep working on the iPad
One tap on the freeze button locks the image on the projector while the teacher carries on working on their iPad. Ideal for preparing the solution on the next page or quickly looking something up — without the class seeing it.
- ✓ Projector image is frozen — the class still sees the previously shown page
- ✓ The iPad keeps full editing capability
- ✓ Freeze status is clearly visible on the iPad
- ✓ One tap to return to live mirroring
In class: hand out the task, freeze the projector, prepare the solution on the next page in peace — once the class is done, lift the freeze and discuss the solution together.
🪟 Curtain & stickers
Reveal content step by step
The curtain fully covers the notebook page. A handle at the top edge of the curtain lets you pull it downwards step by step — revealing the content from the top down. Like a classic blackboard with a flap.
Made for projector lessons
The teacher has prepared a notebook page with tasks or a step-by-step solution, but only wants to show parts of it at a time. With the curtain, the whole page is hidden first. Using the handle at the top edge of the curtain, the curtain is pulled downwards smoothly whenever the class should see the next step.
- ✓ Fully opaque cover — no content shines through
- ✓ Handle at the top edge — pull down to reveal content line by line
- ✓ Also works on an external display — the curtain runs in real time on projectors and Apple TV
- ✓ Close button brings the page back fully with one tap
- ✓ When switching to another page or leaving the notebook, the curtain closes automatically
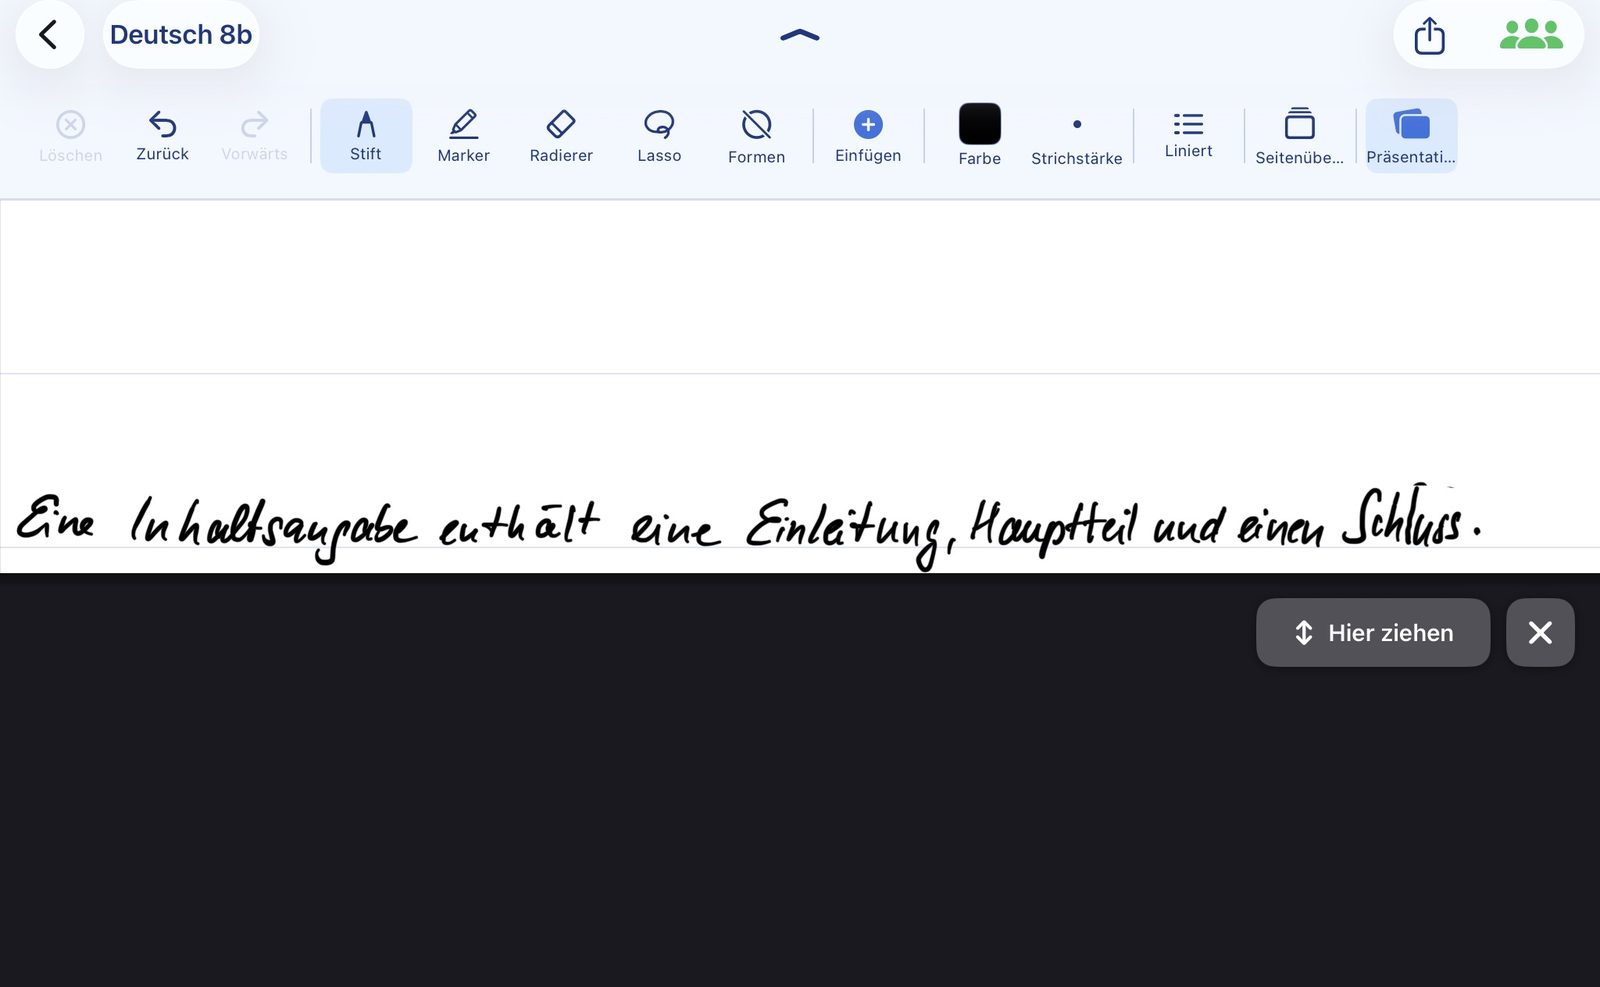
Cover results and reveal them with a tap
Besides the curtain, there is the sticker function: individual areas of the page — for example the solution to a task — can be covered with a coloured sticker. A single tap on the sticker reveals the result underneath. This way solutions can be uncovered one at a time and in any order, while the rest of the page stays hidden.
- ✓ Place as many stickers per page as you like and resize them
- ✓ Each sticker covers exactly one area (e.g. the solution to a task)
- ✓ One tap on the sticker — the result is revealed with a gentle animation
- ✓ The area next to the sticker stays free: you can keep writing there as usual
- ✓ Also works on the projector / external display in real time
- ✓ Ideal for releasing results one by one instead of the whole row (like the curtain)
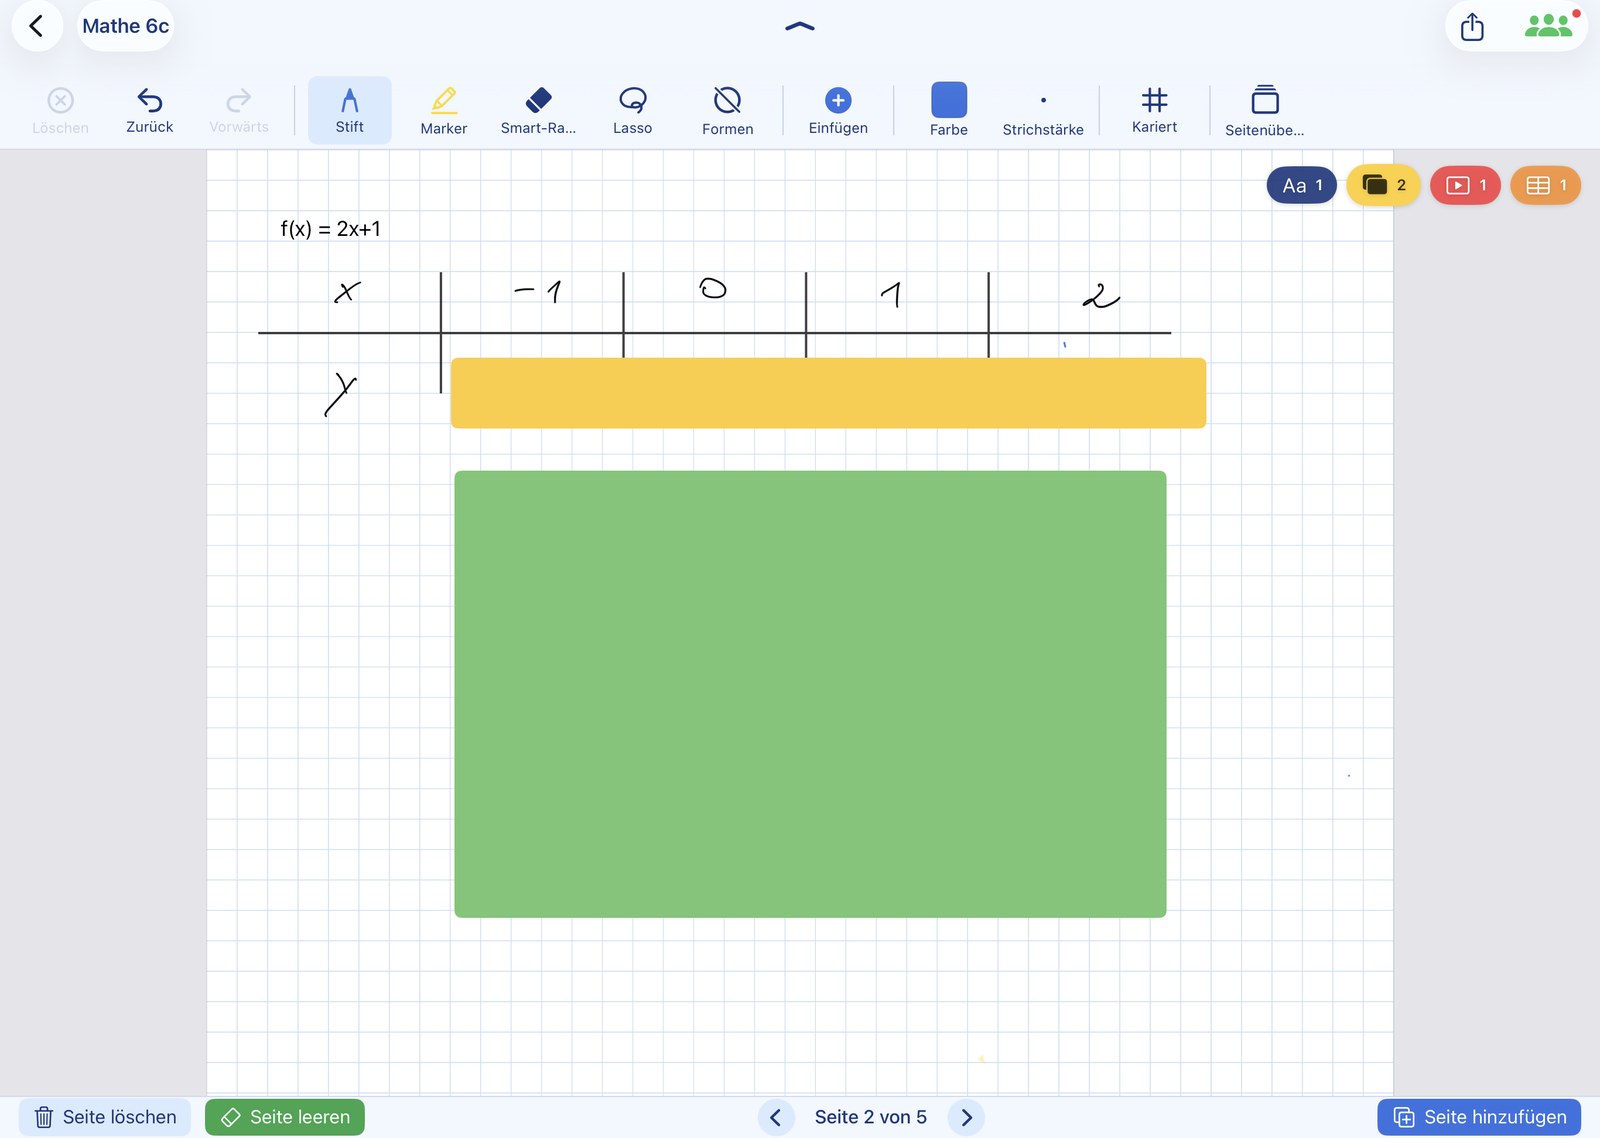
👥 Highlight: Classroom
Share files in the classroom — without a cloud detour
With Classroom mode, teacher and class exchange content directly over the school's Wi-Fi — without a cloud account and without signing in. At the start of the lesson, students scan a QR code once, and the connection stays active afterwards.
▶️ Watch the Classroom feature on video
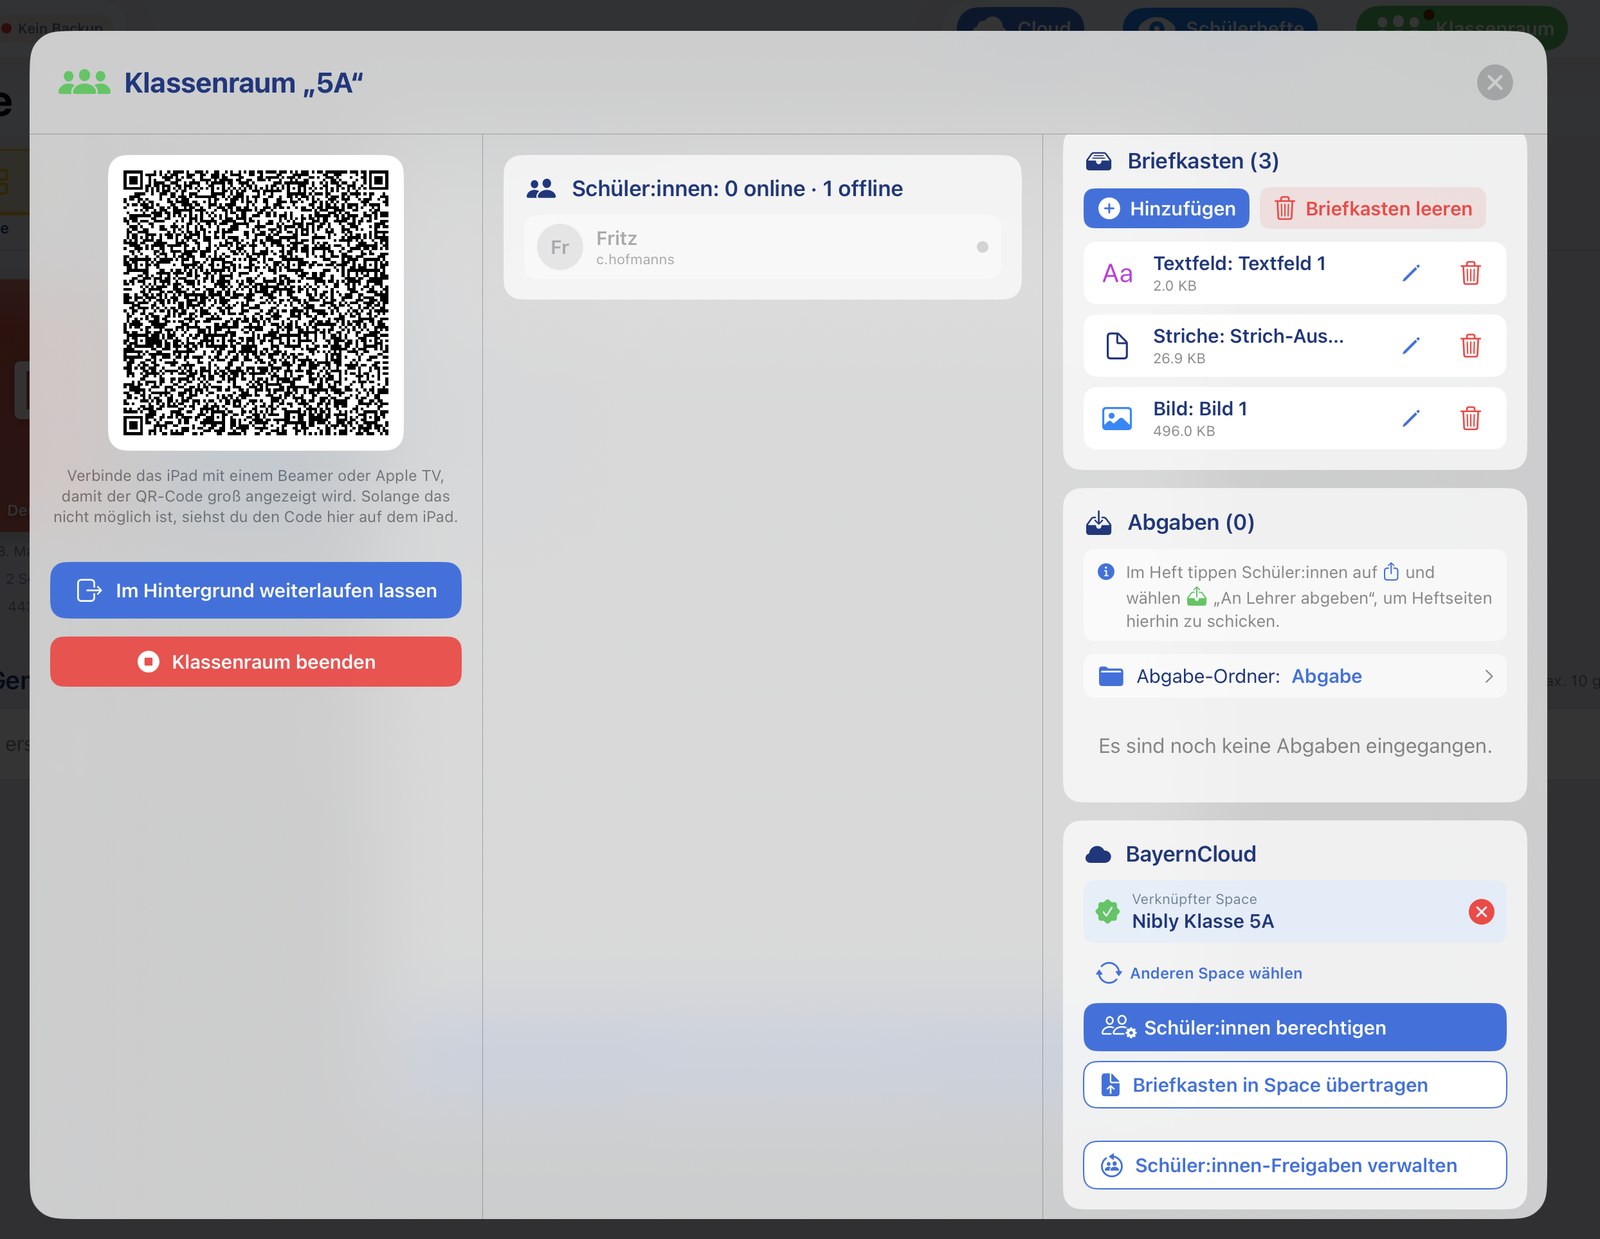
Scan once — connected all day
Students scan the QR code only once at the start of the lesson. After that they stay connected to the classroom — even if the teacher closes the classroom in between and starts it again the same day, there is no need to re-scan. Only the next day is a new scan required.
- ✓ Scan once at the start of the lesson — the connection stays active all day
- ✓ Close the classroom in between and start it again — without re-scanning
- ✓ Works locally over the school's Wi-Fi — no external server, no sign-in
Provide content through the mailbox
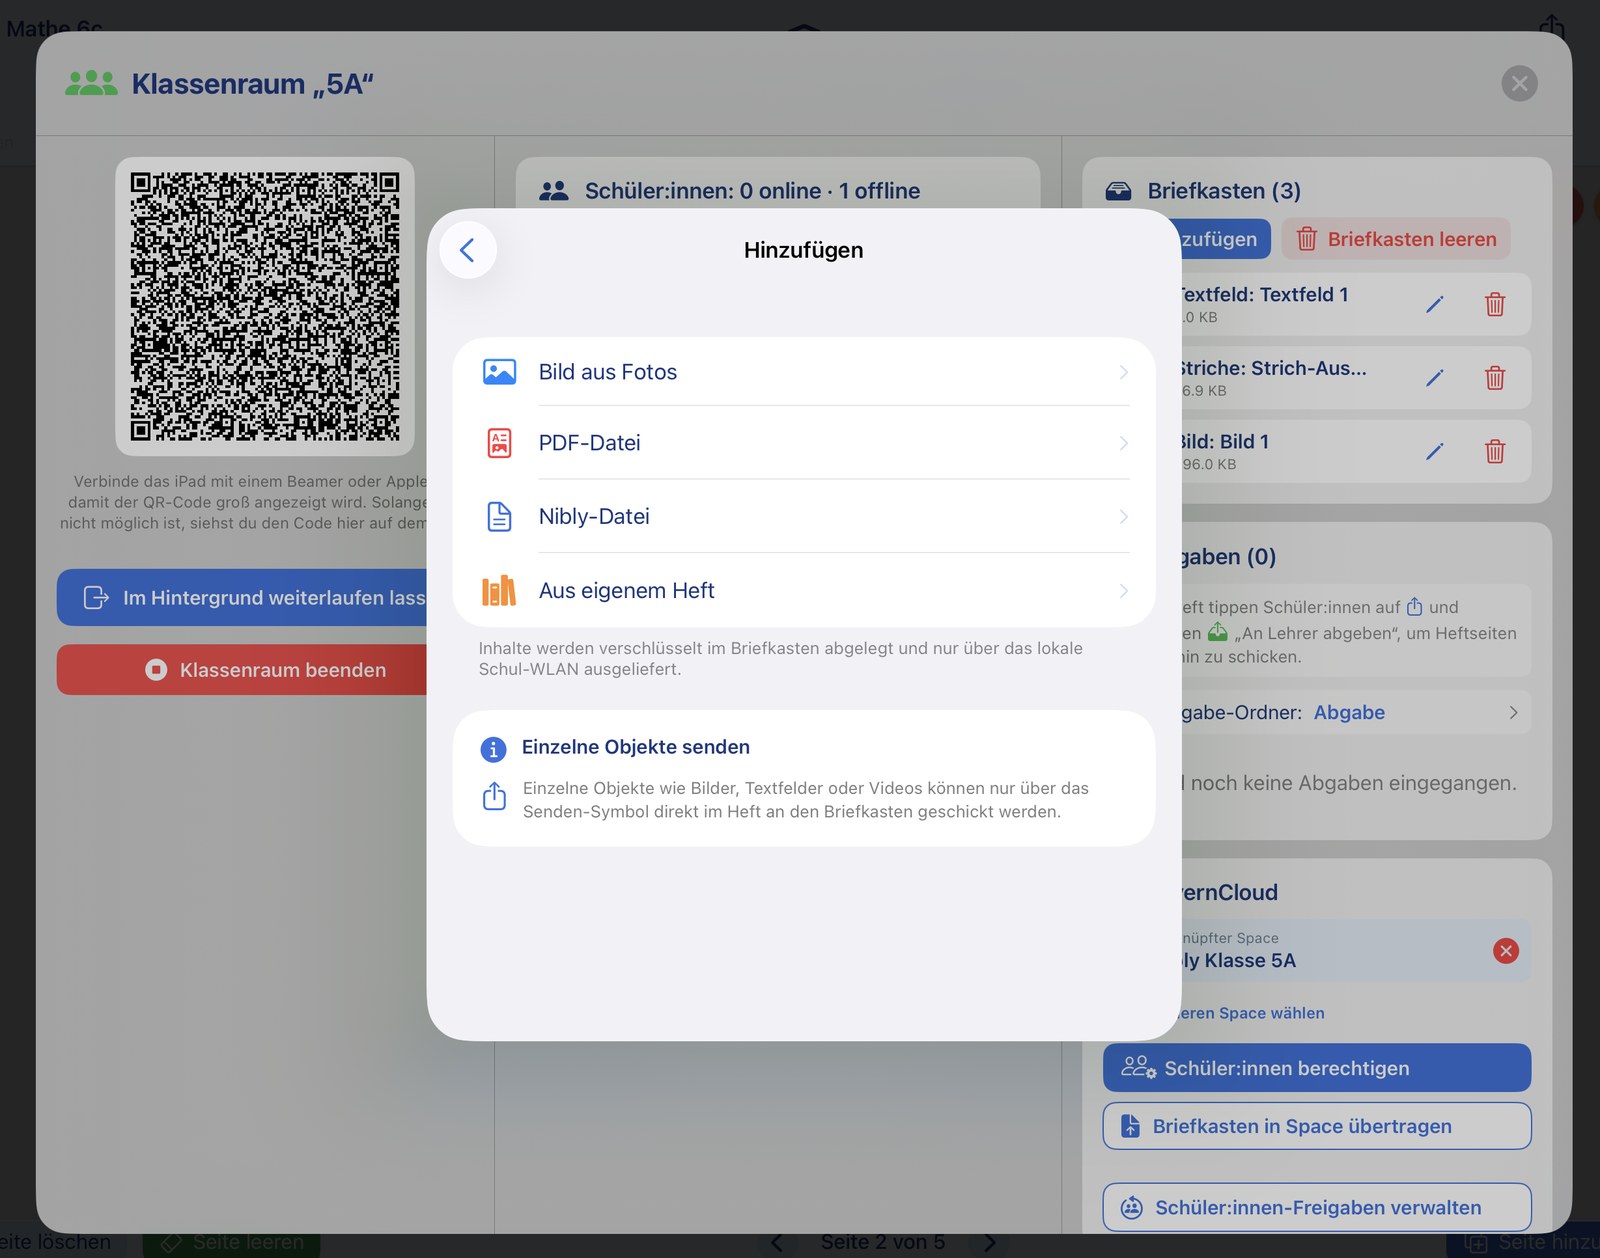
The teacher can place a wide range of content into the students' mailbox. Students have their own mailbox from which they can insert the provided content directly into their own notebook with just a few taps.
- ✓ Whole notebooks
- ✓ Individual notebook pages
- ✓ Images
- ✓ PDF documents
- ✓ Individual objects straight from the teacher's notebook — images, text fields, videos and even individual drawings/strokes by the teacher
Handing in: results back to the teacher
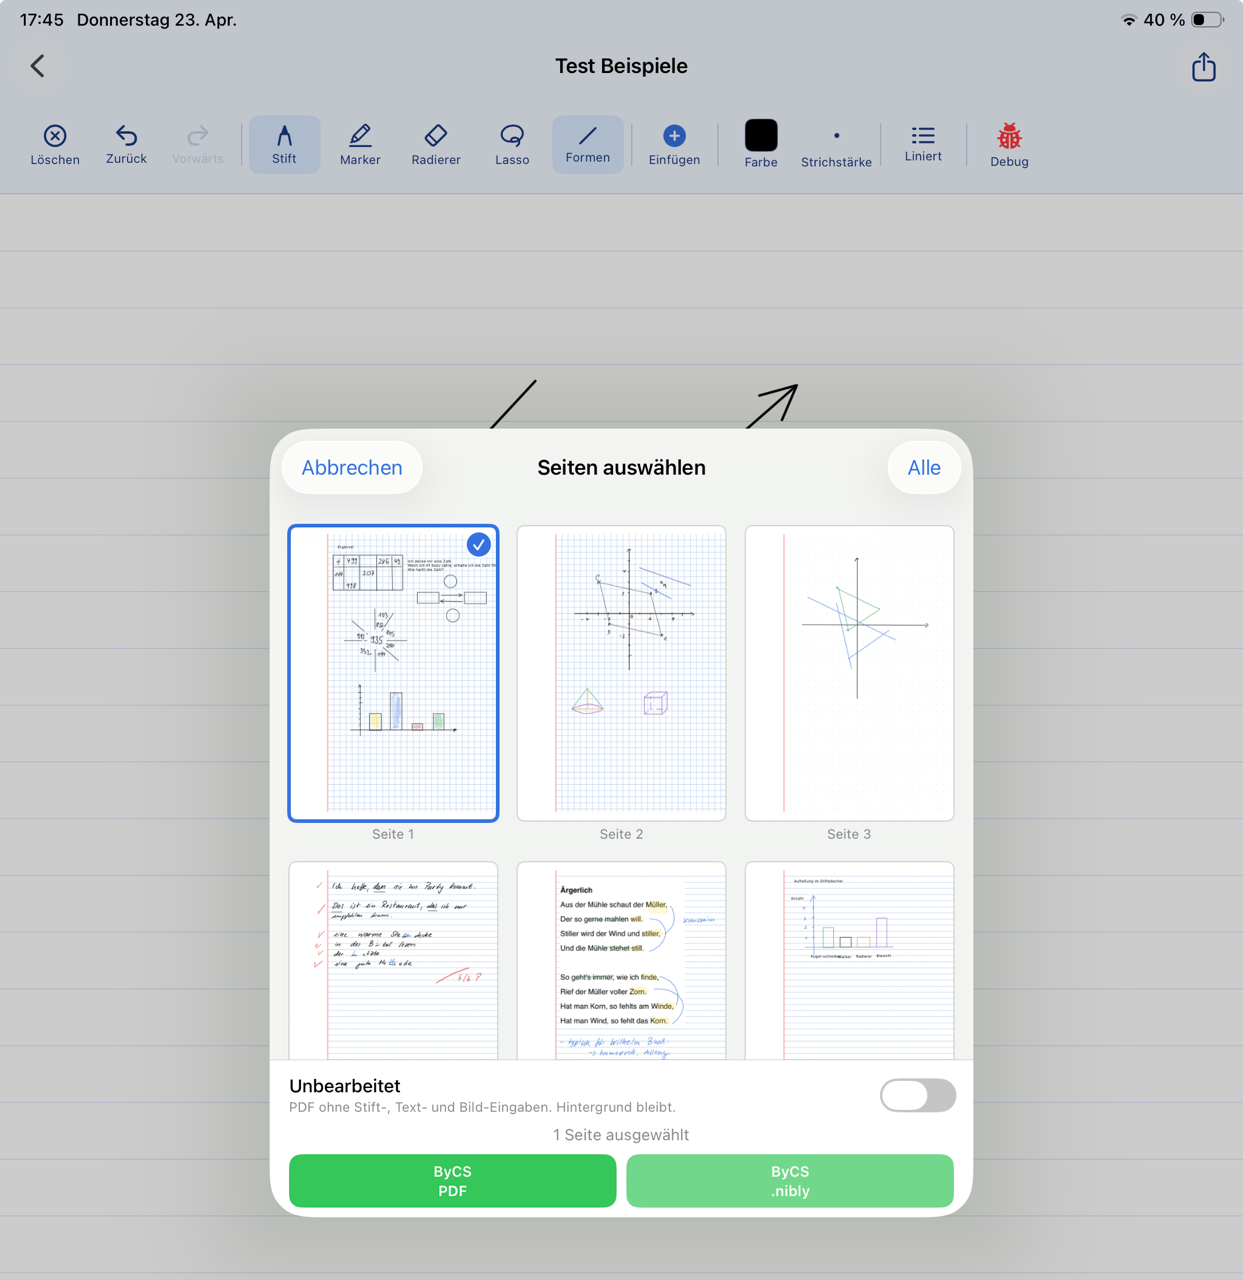
The inbox runs from the teacher to the class. The way back has its own route: students open the share menu inside their notebook and choose "Submit to teacher". No e-mail, no cloud account, no third-party servers.
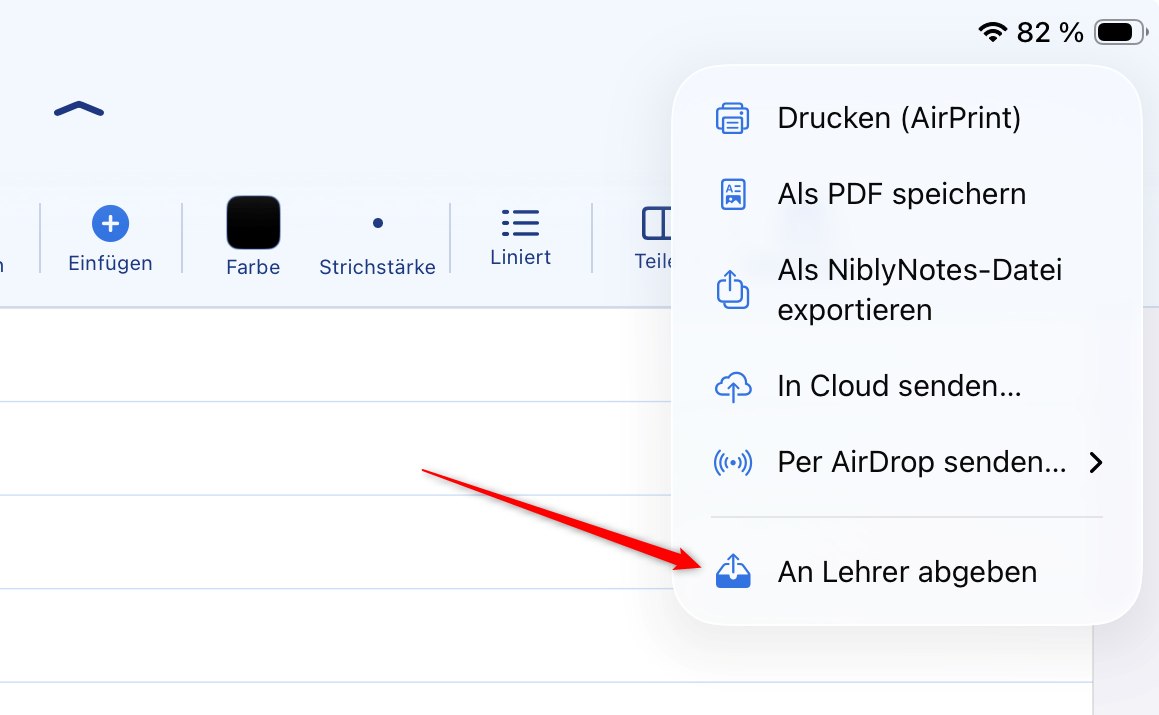
Two submission formats, straight from the notebook
Tap the share icon in the notebook and choose "Submit to teacher". Two formats are then available:
- ✓ Submit as PDF — one or more pages in a single PDF file
- ✓ Submit as Nibly file — the teacher can keep working in the submitted notebook and mark it up directly
- ✓ A page picker follows, just like printing — the current page is already selected, more are added with a tap, "All" selects the whole notebook
- ✓ The menu entry only appears while the iPad is signed in to a classroom and the teacher is reachable
- ✓ Students need to enter their name once so the teacher can tell submissions apart — the app asks for it at this point
- ✓ Transferred encrypted over the school Wi-Fi
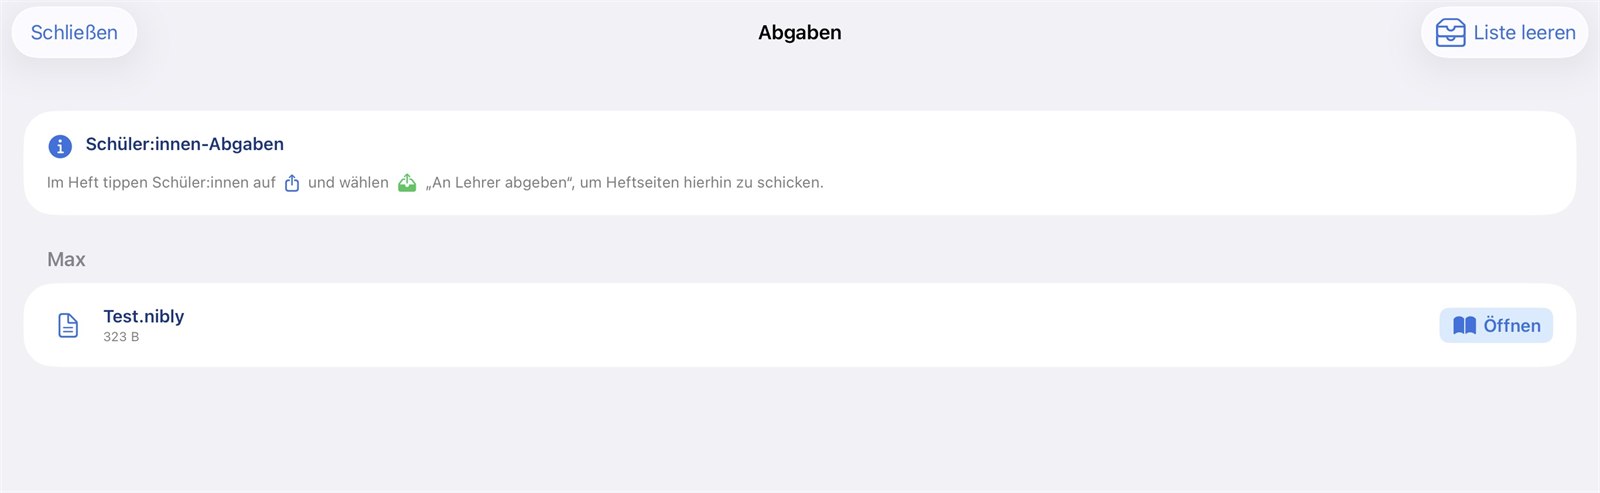
In practice: hand out the task via the inbox, the class works on it, and at the end of the lesson everyone taps "Submit to teacher" in their notebook — the results arrive sorted on the teacher's iPad.
Teacher view: every submission sorted in one place
On the teacher's iPad, incoming submissions are filed automatically as notebooks in the submissions folder — nothing has to be imported by hand. An additional list shows the most recent submissions for quick access during the lesson; it can be cleared at any time and is emptied automatically when the classroom is closed. The notebooks themselves stay in the submissions folder.
ScreenView: a quick look at how the class is doing
With ScreenView, teachers can get a picture of how the class is progressing during the lesson. The students' iPads send a small image of the page they last worked on.
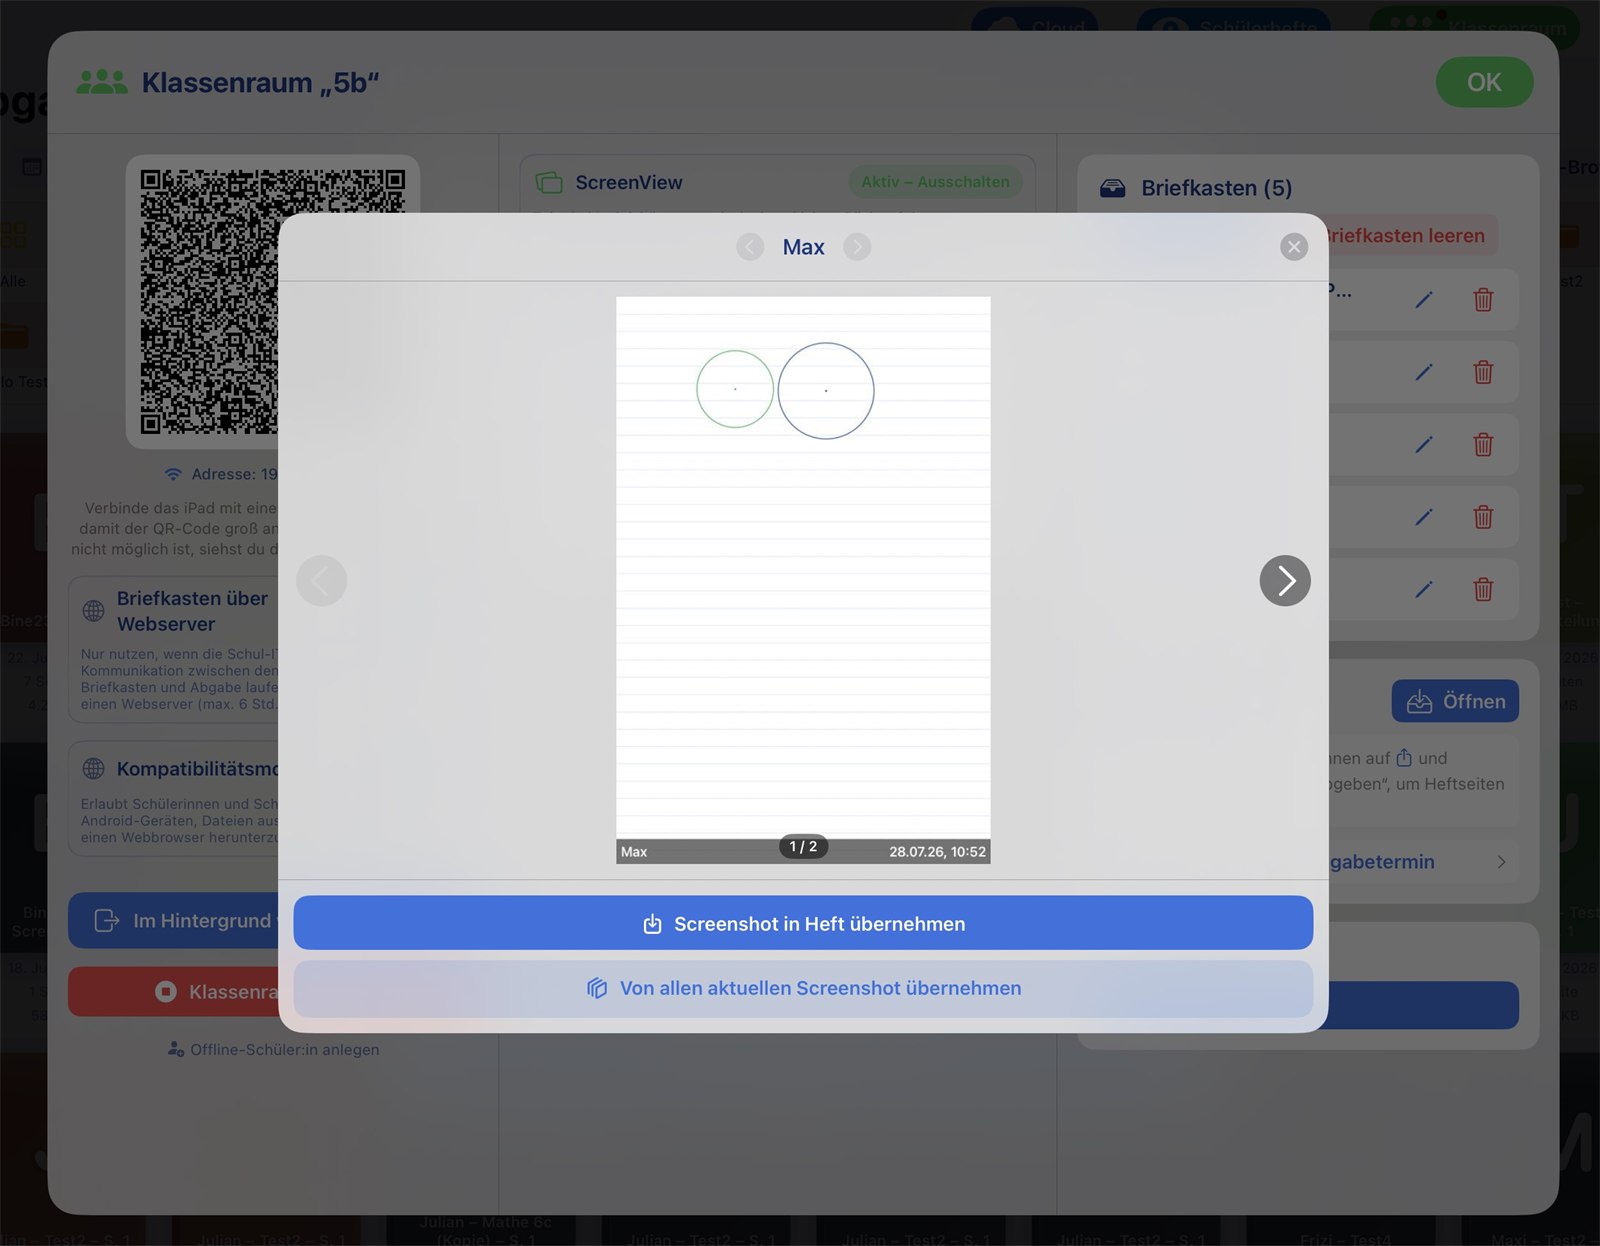
One viewer for the whole class
- ✓ Deliberately switched on and off again by the teacher
- ✓ Only the last three images per student are kept
- ✓ Large viewer: page through students and images, with timestamps
- ✓ Images can be taken into your own notebook as a page background — one at a time or from everyone at once
- ✓ Encrypted transfer; decryption happens only on the teacher's iPad
- ✓ Switches itself off again after a period without use
Transparency note: ScreenView is not permanent monitoring: only the notebook page last worked on is transferred — not the device screen and no other apps. The feature has to be actively switched on by the teacher.
Also for devices without NiblyNotes
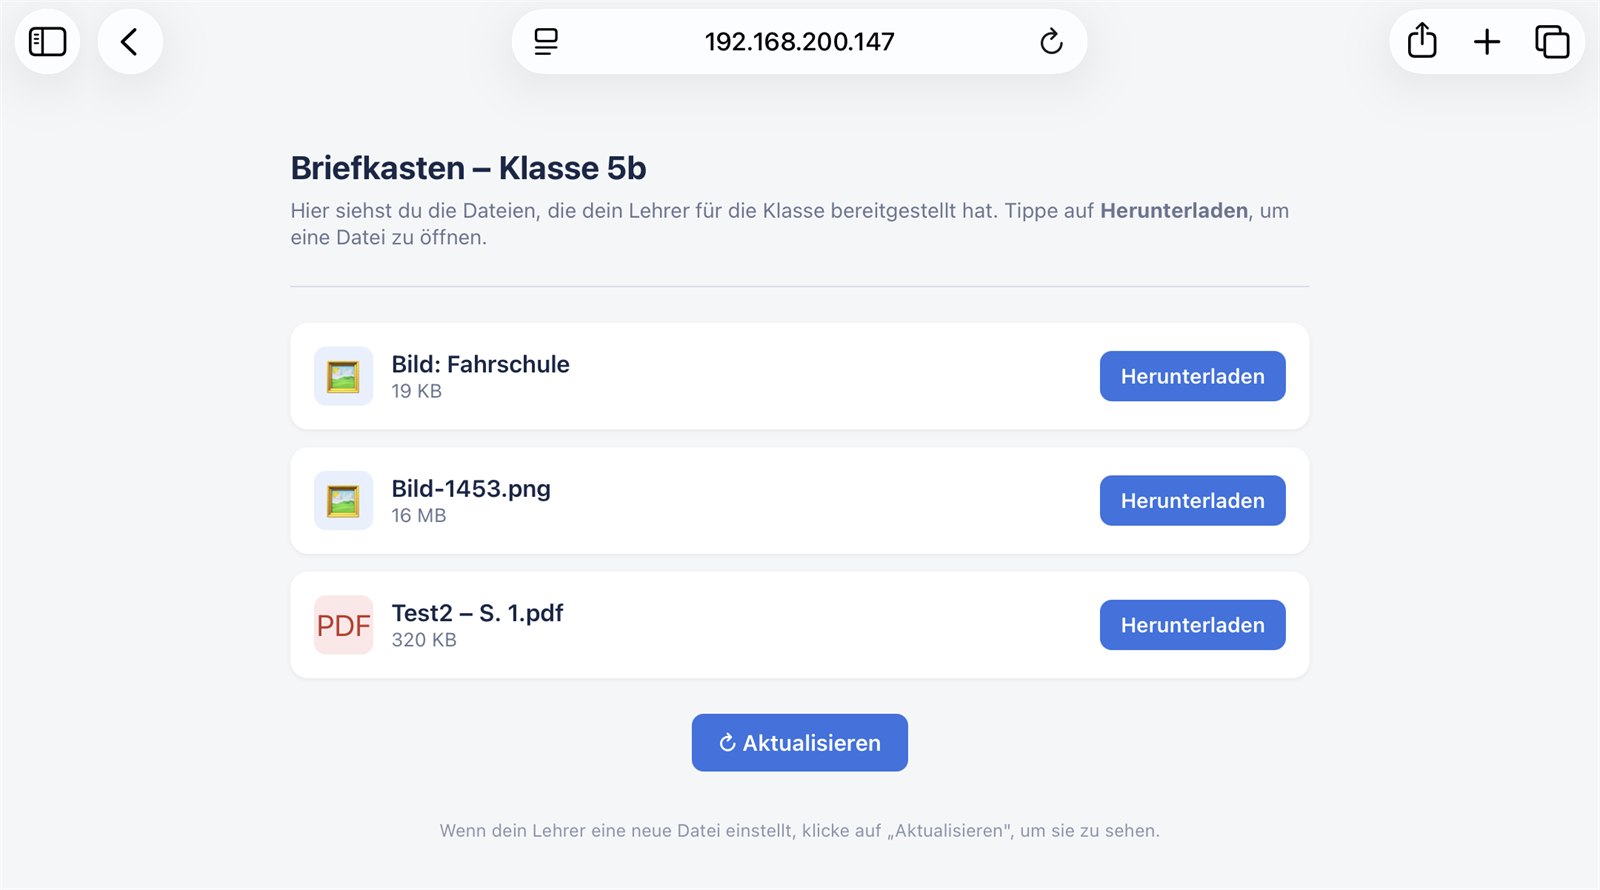
Not every class is an iPad-only class. For students with a Windows laptop, Chromebook or Android tablet there is the compatibility mode: the mailbox is then additionally provided as a simple web page on the school Wi-Fi and can be opened in any browser.
The mailbox in the browser
- ✓ Content appears as ordinary download links in the browser
- ✓ PDFs, images and notebook pages are provided
- ✓ Access only with the displayed address and the six-digit password that changes daily
- ✓ Protection against repeated password guessing
- ✓ Deliberately switched on by the teacher per lesson and ends automatically with the classroom
- ✓ No installation and no account needed on the student device
Note: In this mode the content is delivered to the browser unencrypted — otherwise a non-NiblyNotes device could not open it. On the teacher's iPad everything stays encrypted; decryption happens only in memory, exactly at the moment of retrieval. The app points this out explicitly when the mode is switched on.
When the school Wi-Fi separates the devices
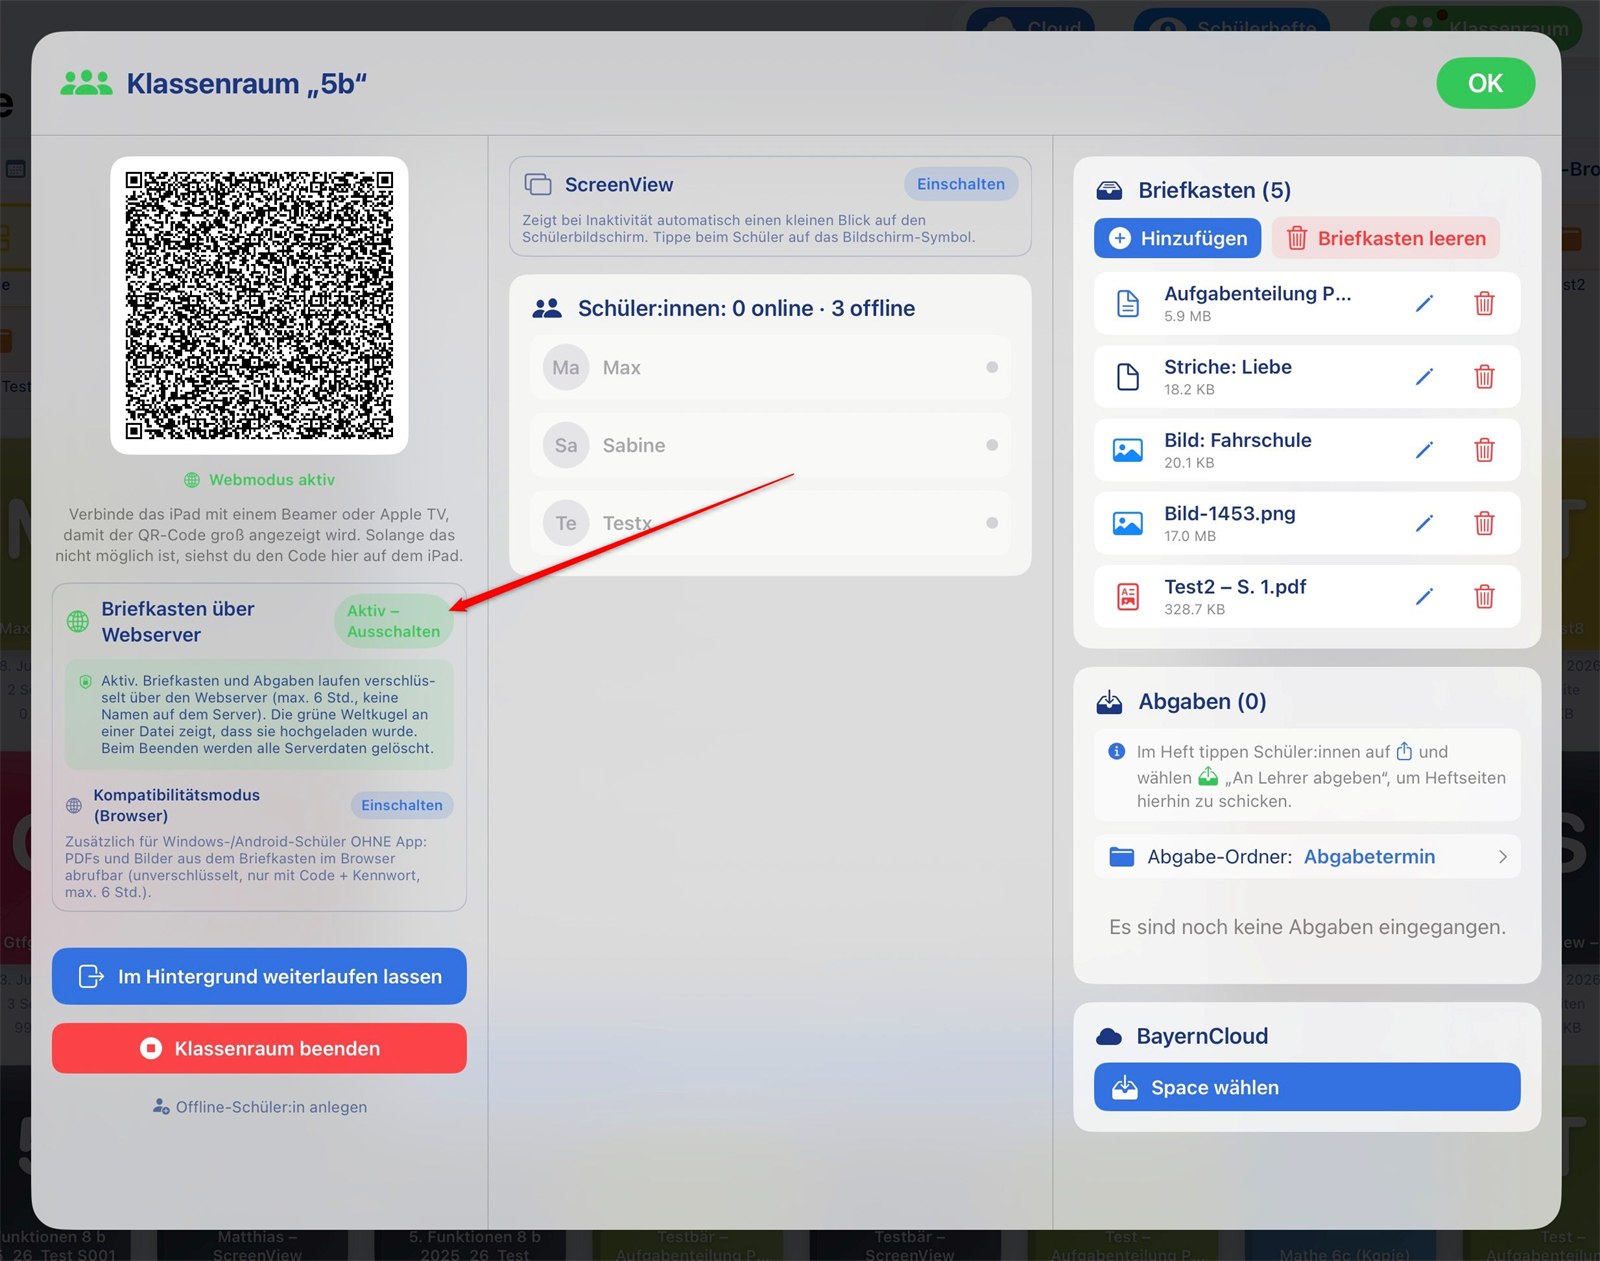
Many school networks separate devices from each other for security reasons ("client isolation"). The iPads then cannot reach each other over Wi-Fi. For this case, mailbox, hand-in and ScreenView can be routed through a web server — everything else in the lesson stays exactly the same.
The same lesson, just a different route
- ✓ Switched on by the teacher per class; the QR code automatically switches the class over to this route
- ✓ Mailbox, hand-in, presence display and ScreenView work unchanged
- ✓ All content is end-to-end encrypted — the server only ever sees unreadable data
- ✓ File names and student names are stored encrypted on the server as well
- ✓ The data is deleted there automatically after a few hours
- ✓ Either via the NiblyNotes server in Germany or via the school's own server (standard PHP hosting is enough; the code is provided free of charge)
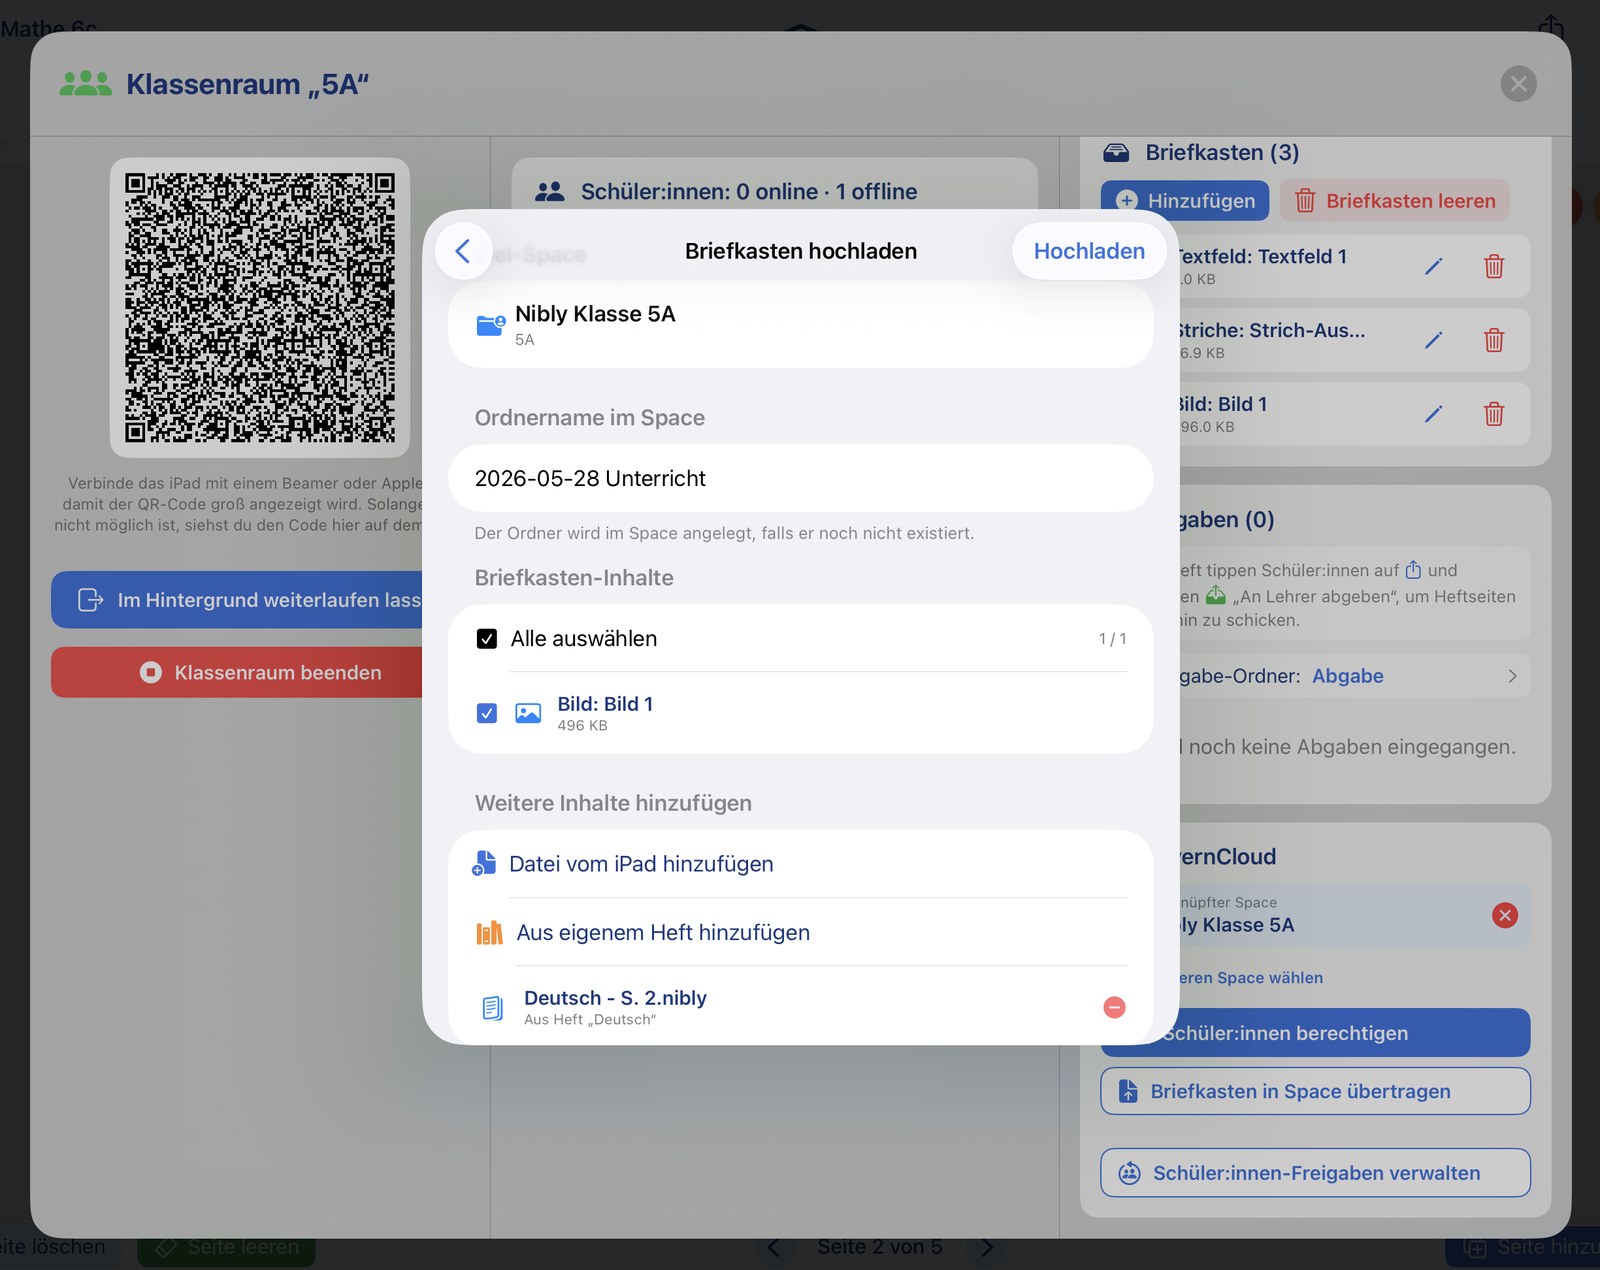
QR code large on the projector
The join QR code can be shown full-screen on the projector or display. The whole class scans at the same time — even from the back row.
Everyone scans at once
- ✓ The QR code fills almost the entire projection area
- ✓ Large, easily readable step-by-step instructions next to it
- ✓ Adapts to landscape and portrait and to any projector resolution
- ✓ Works via AirPlay and via cable adapters
Reachable even without the classroom — via BayernCloud
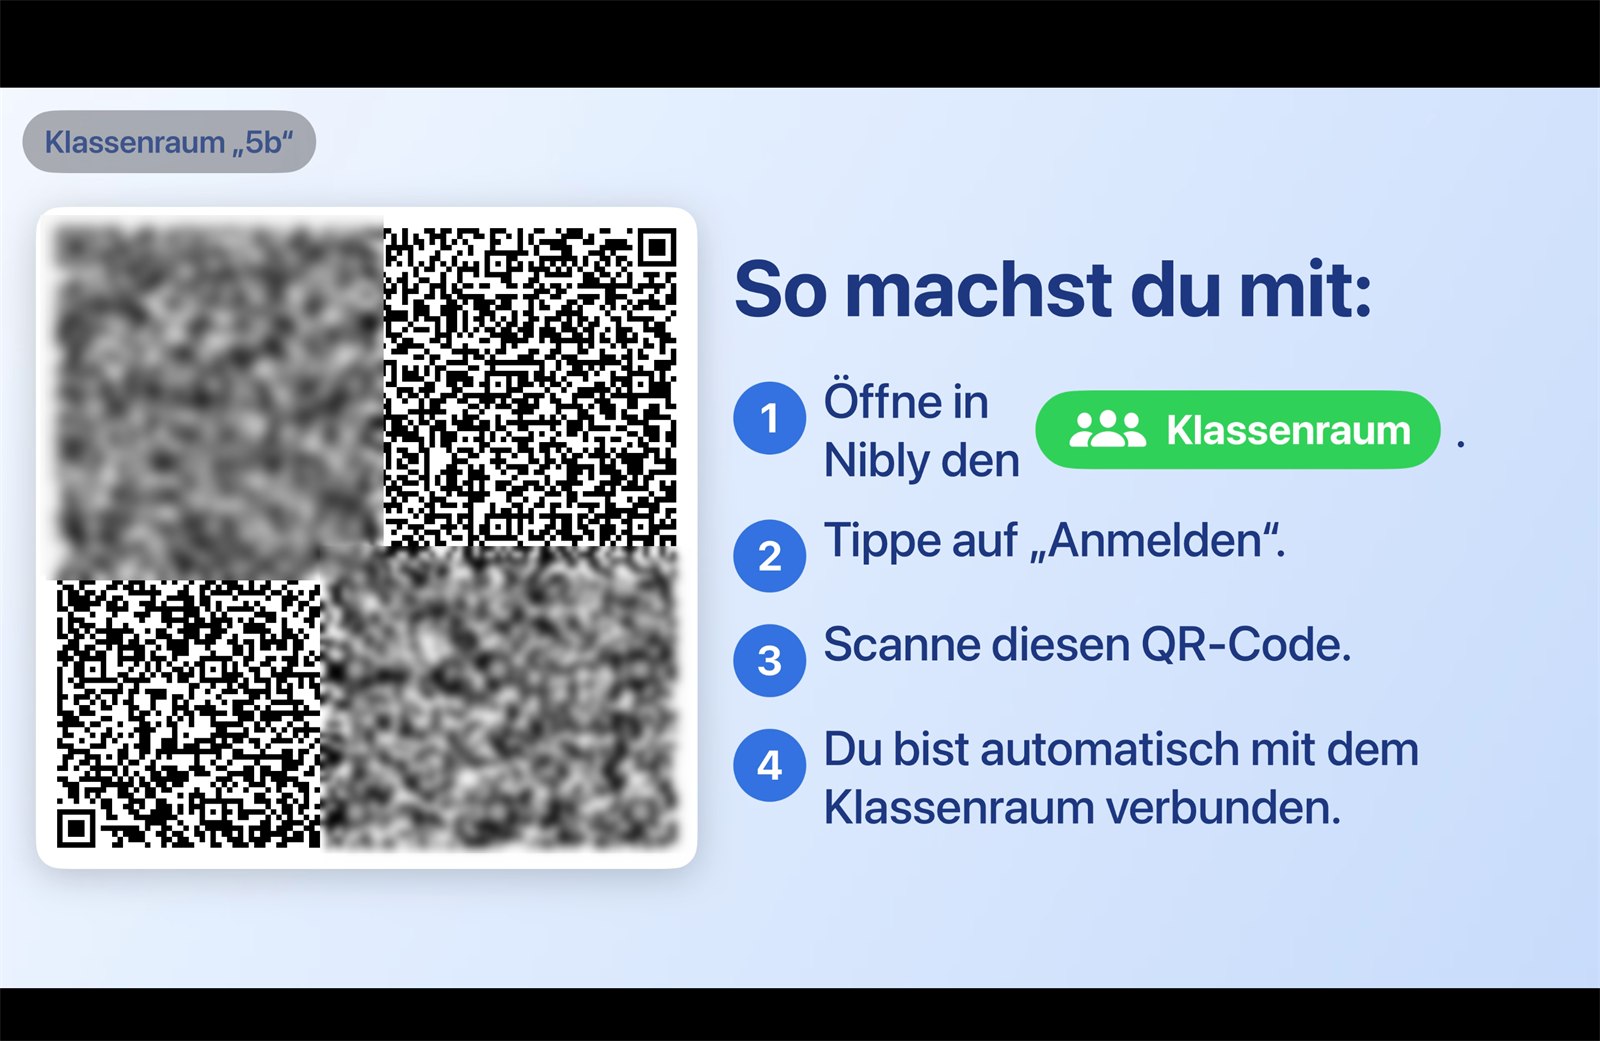
If a student is ill and not in the classroom, the mailbox content can be sent to them directly via BayernCloud with just a few taps. Likewise, a BayernCloud space can receive the entire content of the mailbox in just a few taps.
- ✓ Send mailbox content to individual students via BayernCloud
- ✓ Transfer the whole mailbox into a BayernCloud space with a few taps
- ✓ Ideal for supplying absent students with all materials anyway
Note: The BayernCloud connection is optional. Classroom also works entirely without BayernCloud — locally over the school's Wi-Fi.
👀 Highlight: Student notebook viewing
Keep an eye on the class's progress
Teachers can see their students' notebook pages directly on the iPad — without a cloud account, without sign-in credentials, fully end-to-end encrypted. Students decide for themselves which notebooks they share, and they can pull a teacher's annotations straight into their own notebook.
▶️ Explained in the video
Teacher view: create a class and share a QR code
The teacher opens "Student notebook viewing" and creates a class. NiblyNotes generates a QR code that the students scan to sign in. Already signed-in students appear in a list on the right with the time of their last activity. The number of pages that can be viewed is configurable per class — typically the last 5 pages, so only the current work is visible.
- ✓ Create as many classes per teacher as needed
- ✓ QR code for fast sign-in — one class per QR code
- ✓ Number of viewable pages adjustable per class (1–20)
- ✓ List of signed-in students with the time of their last activity
- ✓ Regenerate the QR code or delete the class at any time
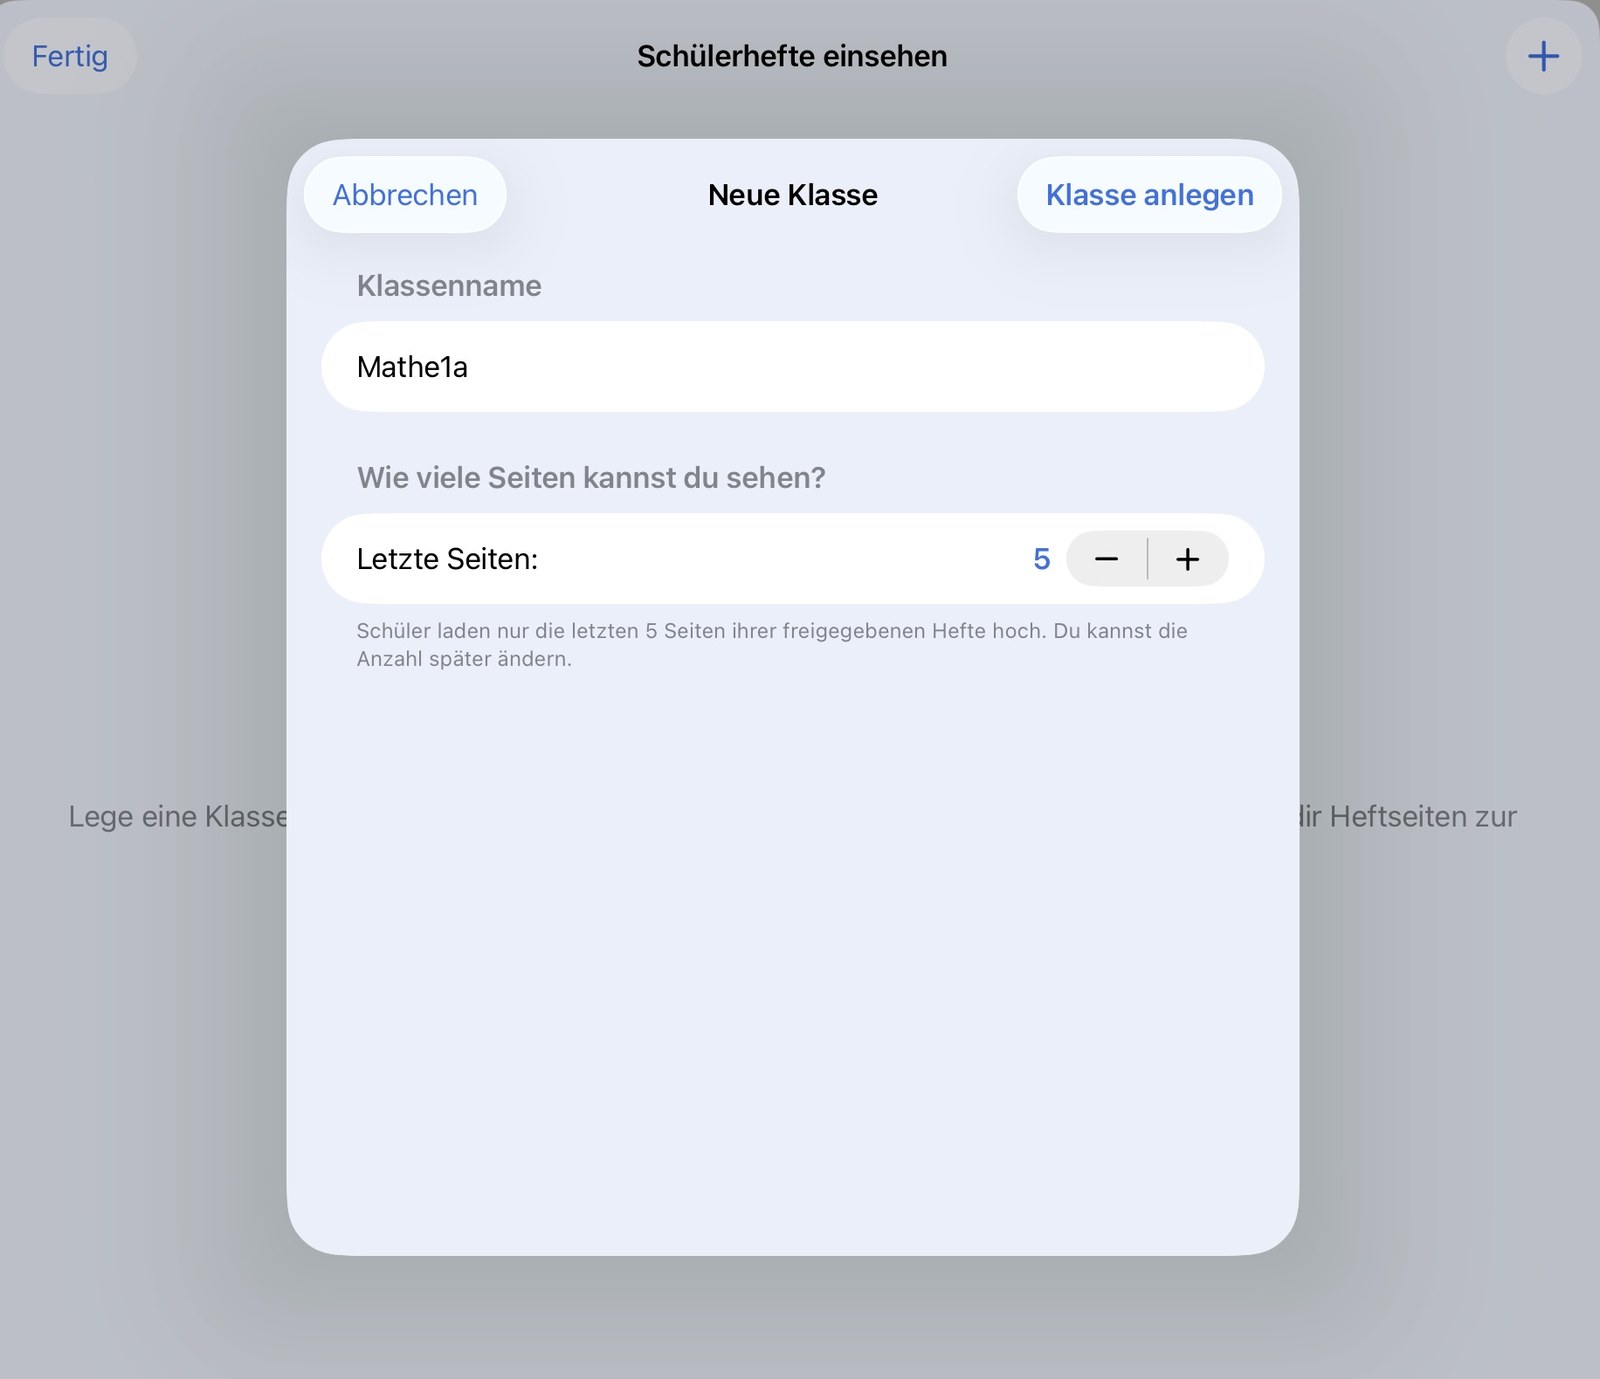
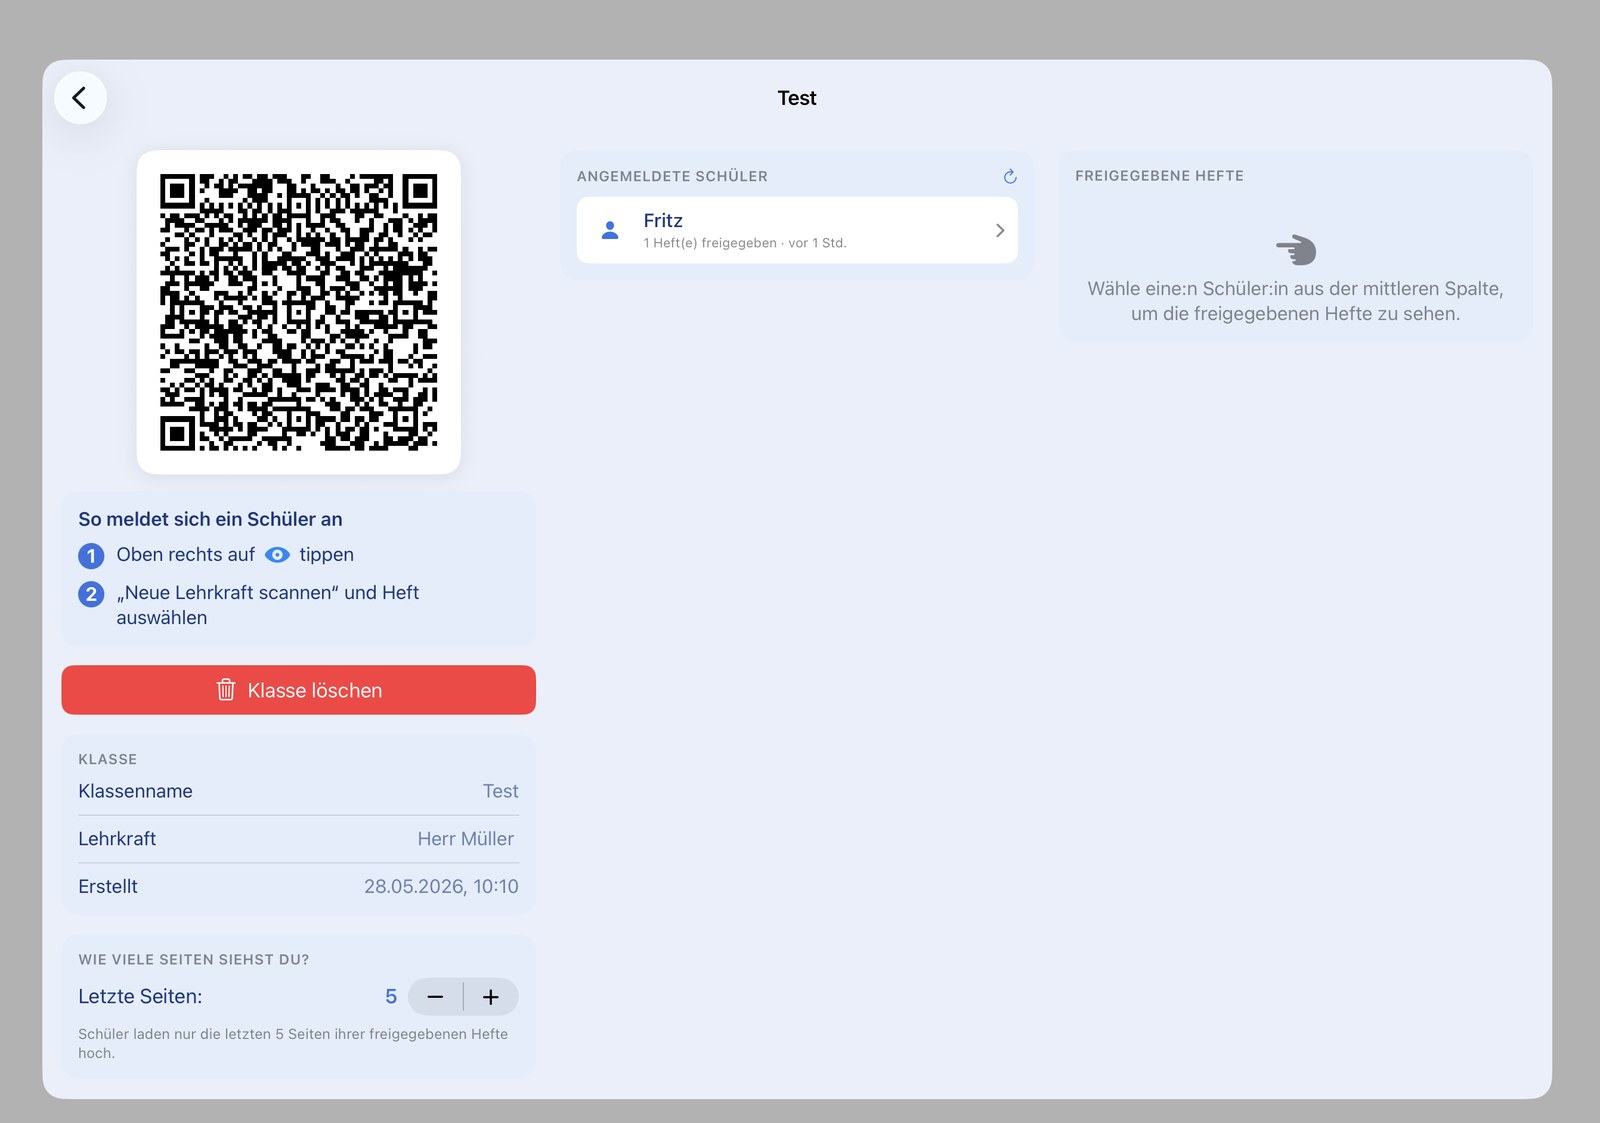
Class detail view with QR code
The class detail view shows the QR code for sign-in, the list of signed-in students with the time of their last activity, and the class settings. From here you can change the number of viewable pages, regenerate the QR code or delete the class entirely.
Teacher view: view notebooks and annotate with the Apple Pencil®
From the class overview, the teacher opens a student's notebook and sees every shared page. With the Apple Pencil®, hints and corrections can be drawn directly on the page. The annotation appears shortly after in the student's own notebook.
- ✓ Overview of every student with the number of shared pages
- ✓ View pages in original quality — auto-refresh every 30 seconds
- ✓ Annotate directly on the page with the Apple Pencil® — like on paper
- ✓ Annotations are transferred automatically to the student
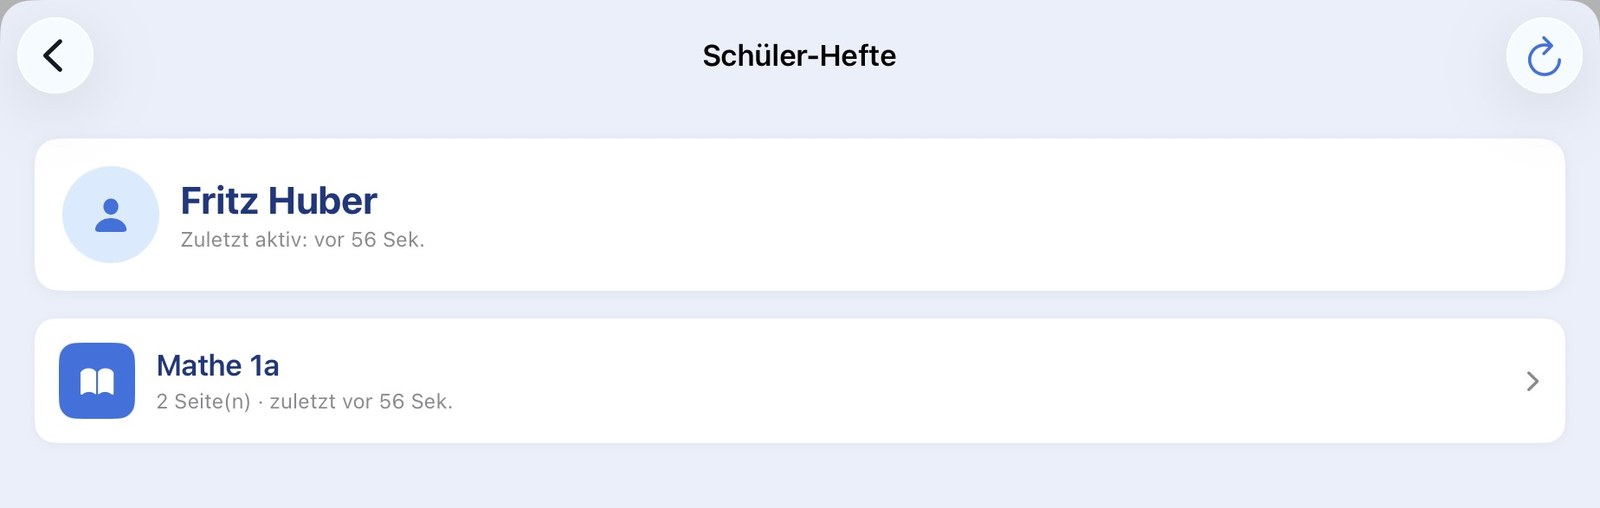
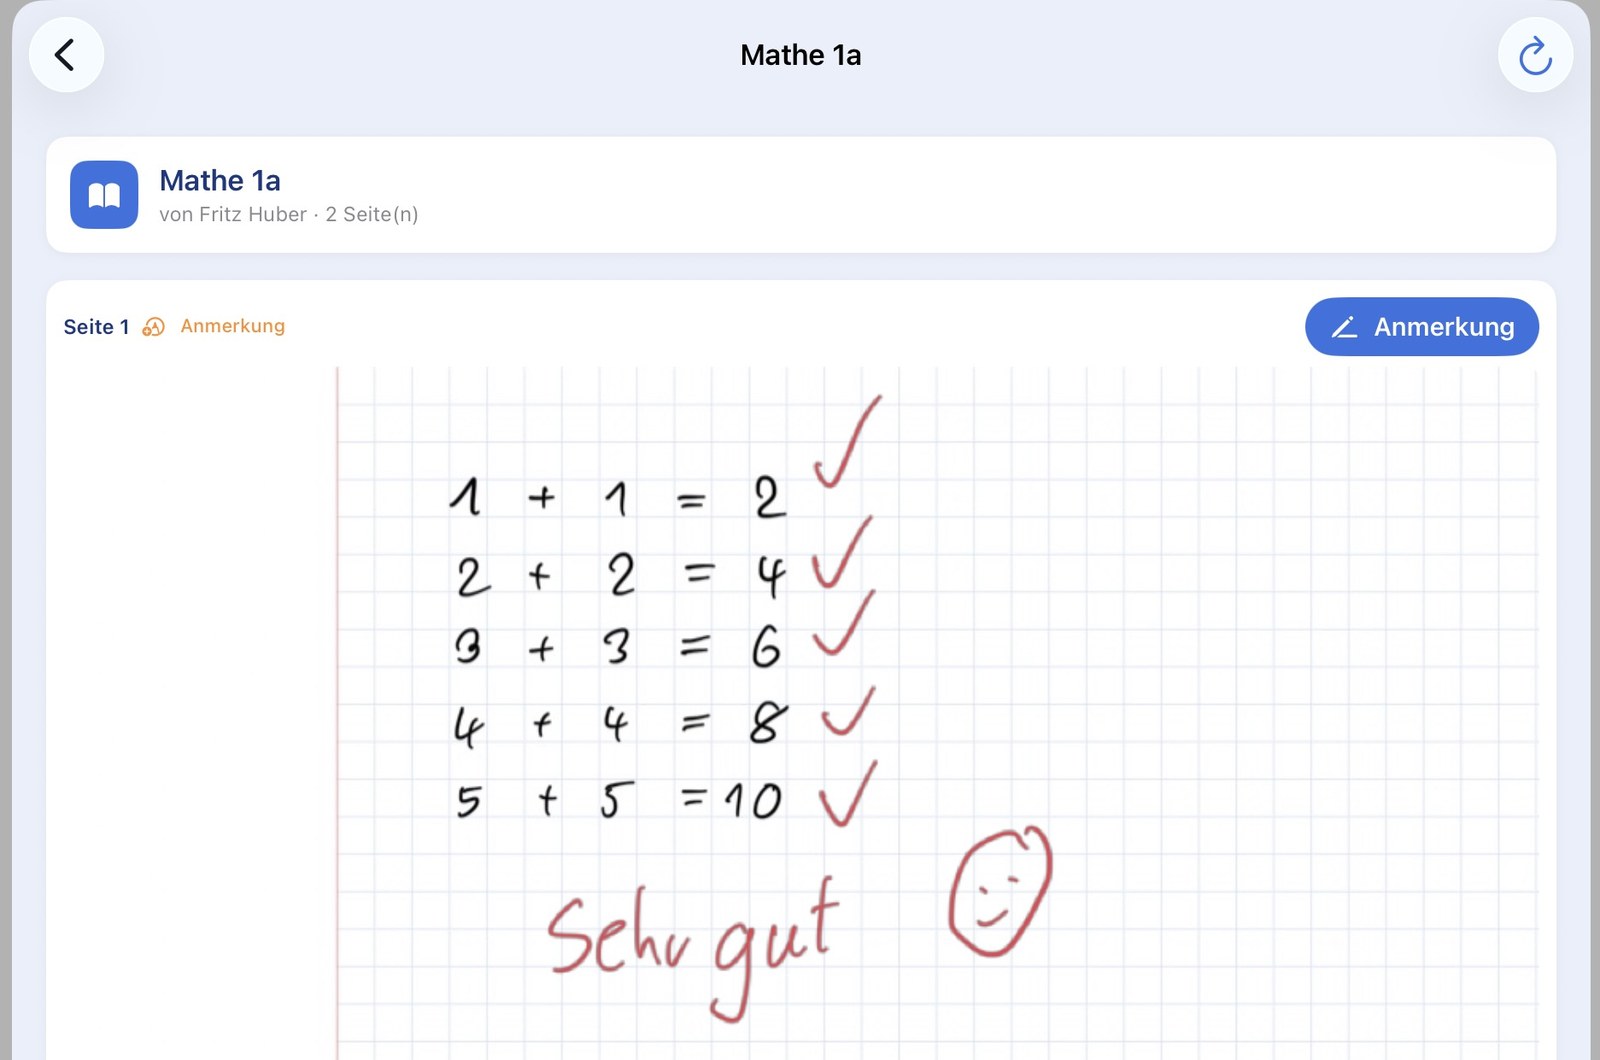
Annotate directly on the page
Ticks, corrections, a "Very good" with a smiley — the annotation is drawn straight onto the student's page and transferred a moment later automatically to the student's iPad. Digital correction now feels like the familiar marking-up of a paper notebook.
Student view: share a notebook and receive annotations
Students connect to the teacher once by scanning a QR code. Through a central view called "Teachers & notebooks" — reachable via the blue eye icon right on the home screen — they can then conveniently decide which notebooks are visible to which teacher. Sharing and un-sharing happen directly from the home screen, without having to open the notebook.
- ✓ Central "Teachers & notebooks" view via the blue eye icon on the home screen
- ✓ Assign notebooks to a teacher or remove the assignment directly from the home screen — without opening the notebook
- ✓ Sign in to a teacher by scanning a QR code
- ✓ A notebook can only ever be shared with exactly one teacher at a time
- ✓ Only the last few pages are shared (the teacher sets the number) — every other page stays private on the device
- ✓ Sharing can be revoked at any time

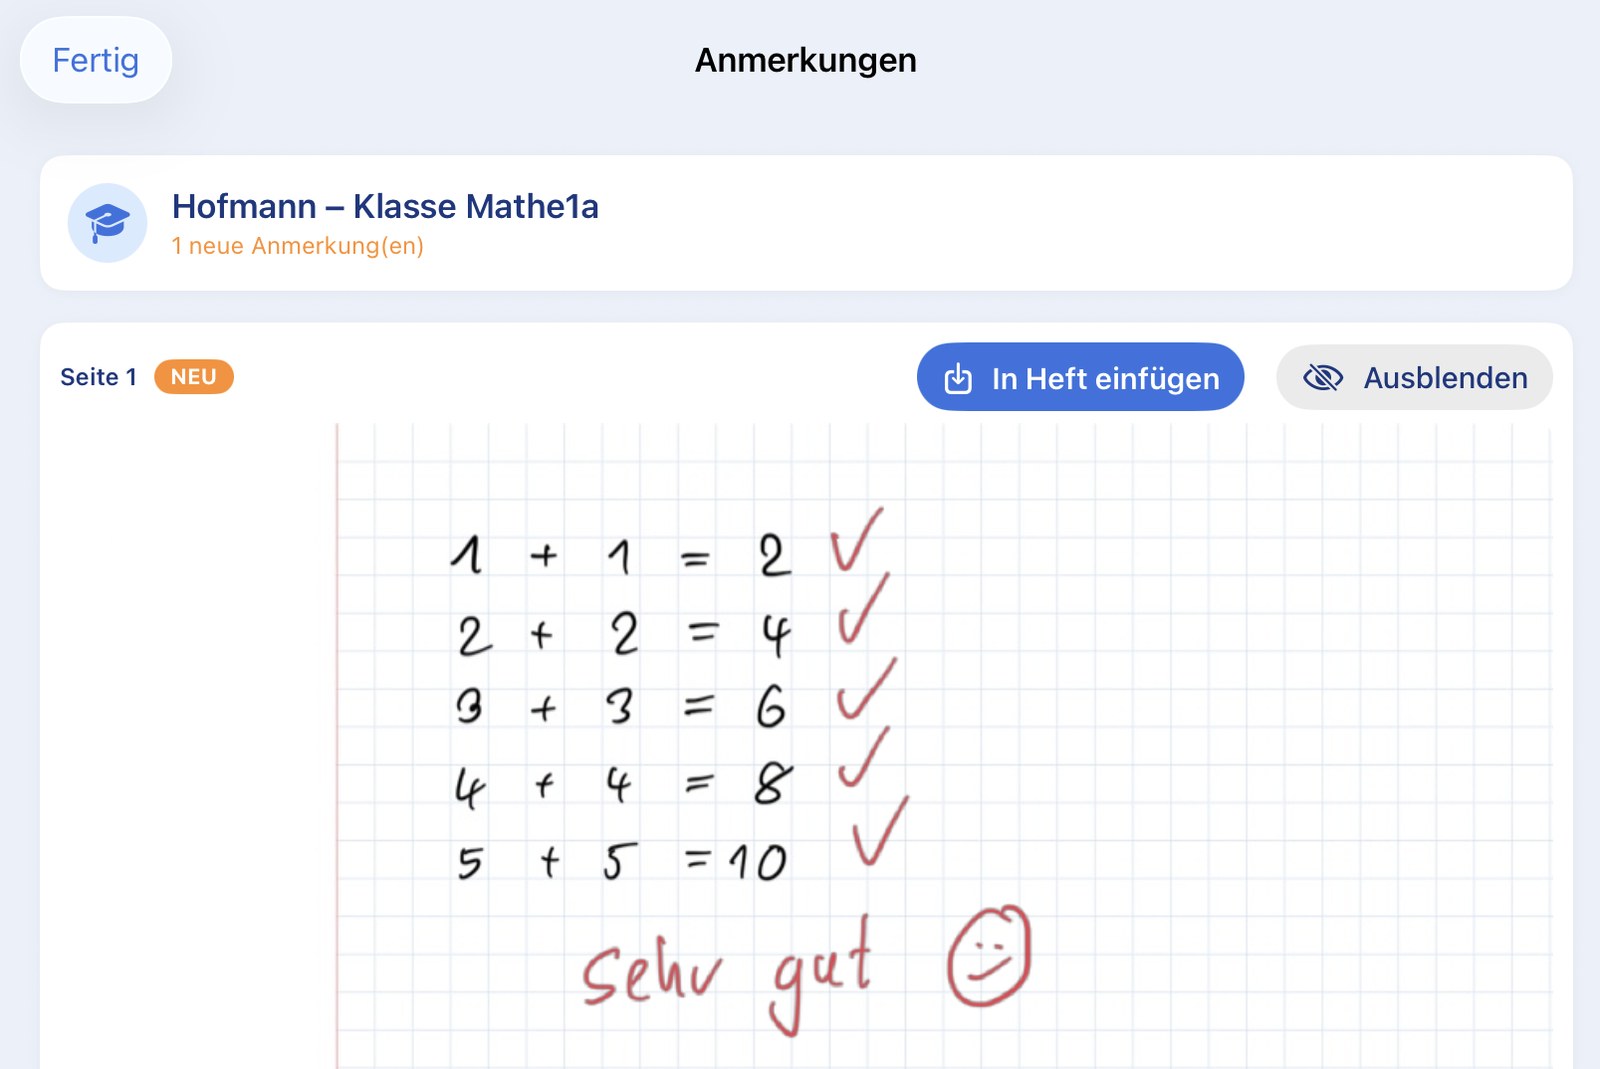
Student view: receive annotations and pull them into the notebook
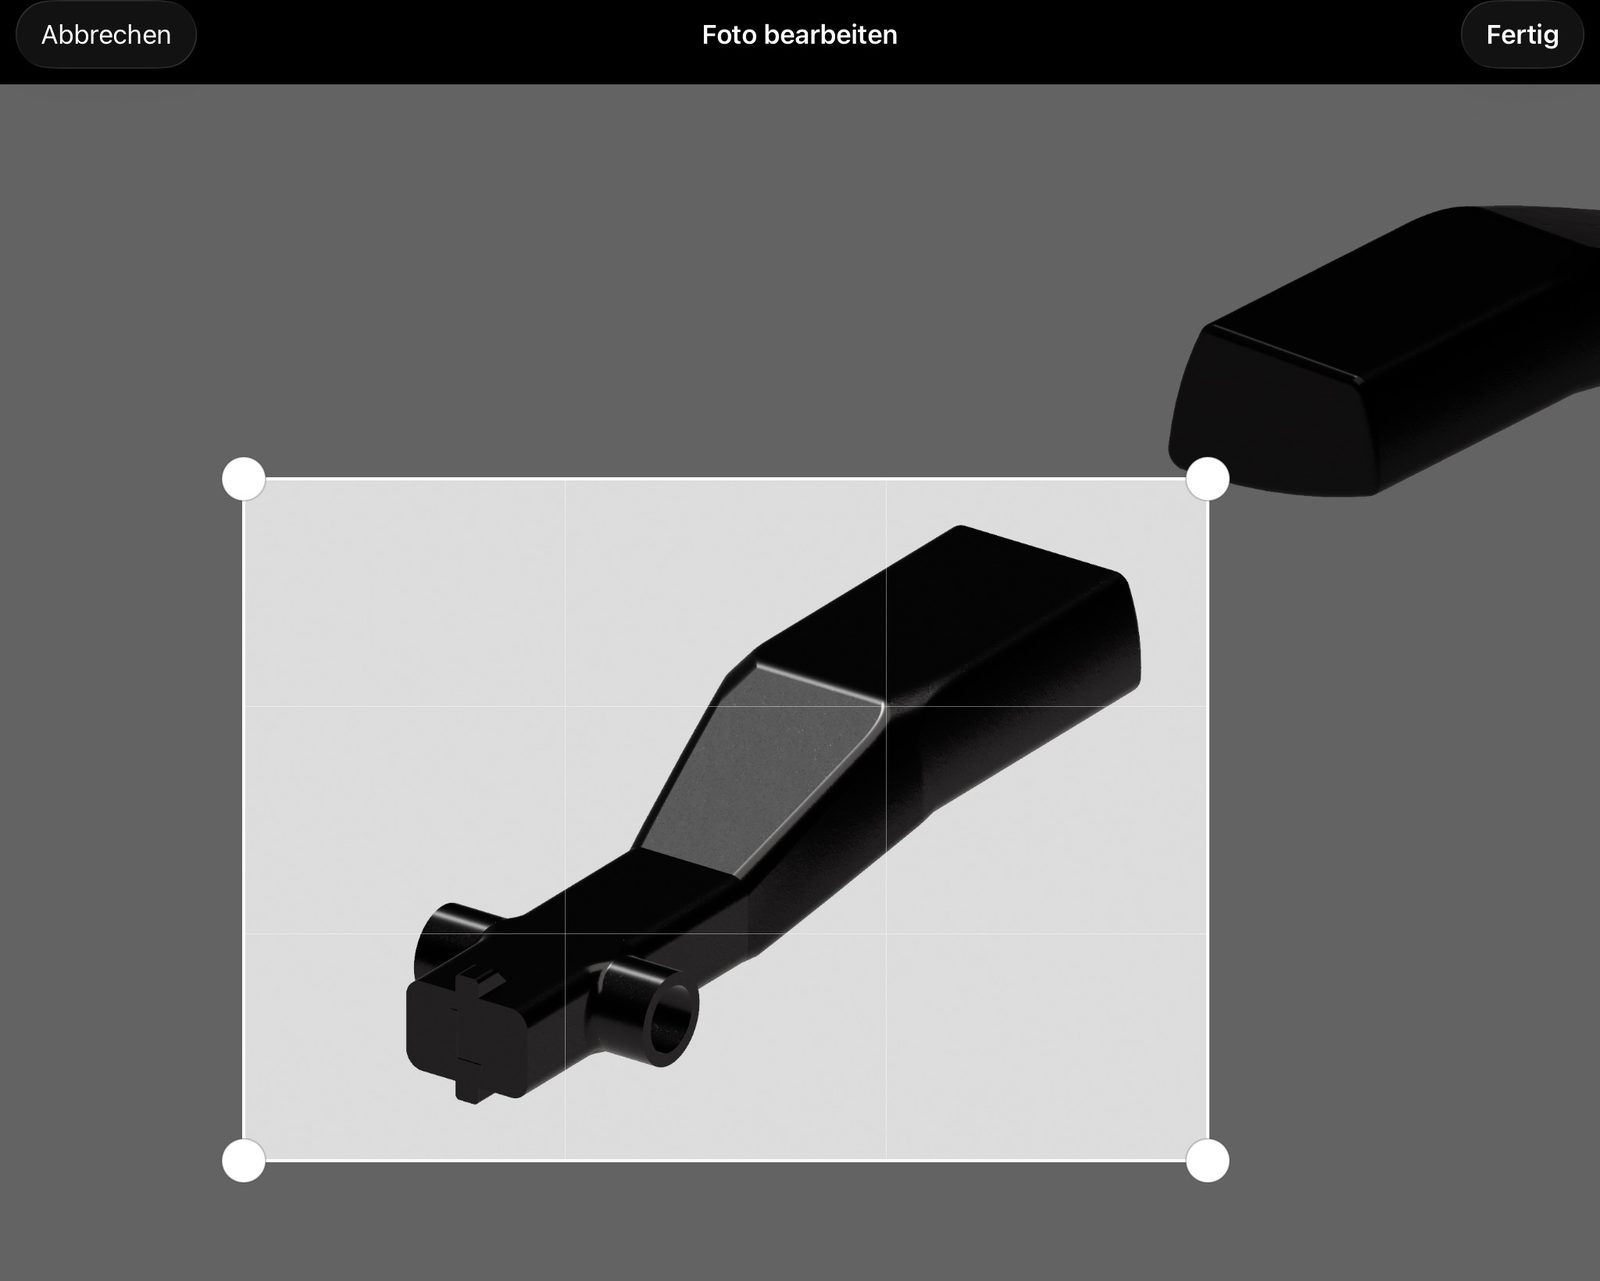
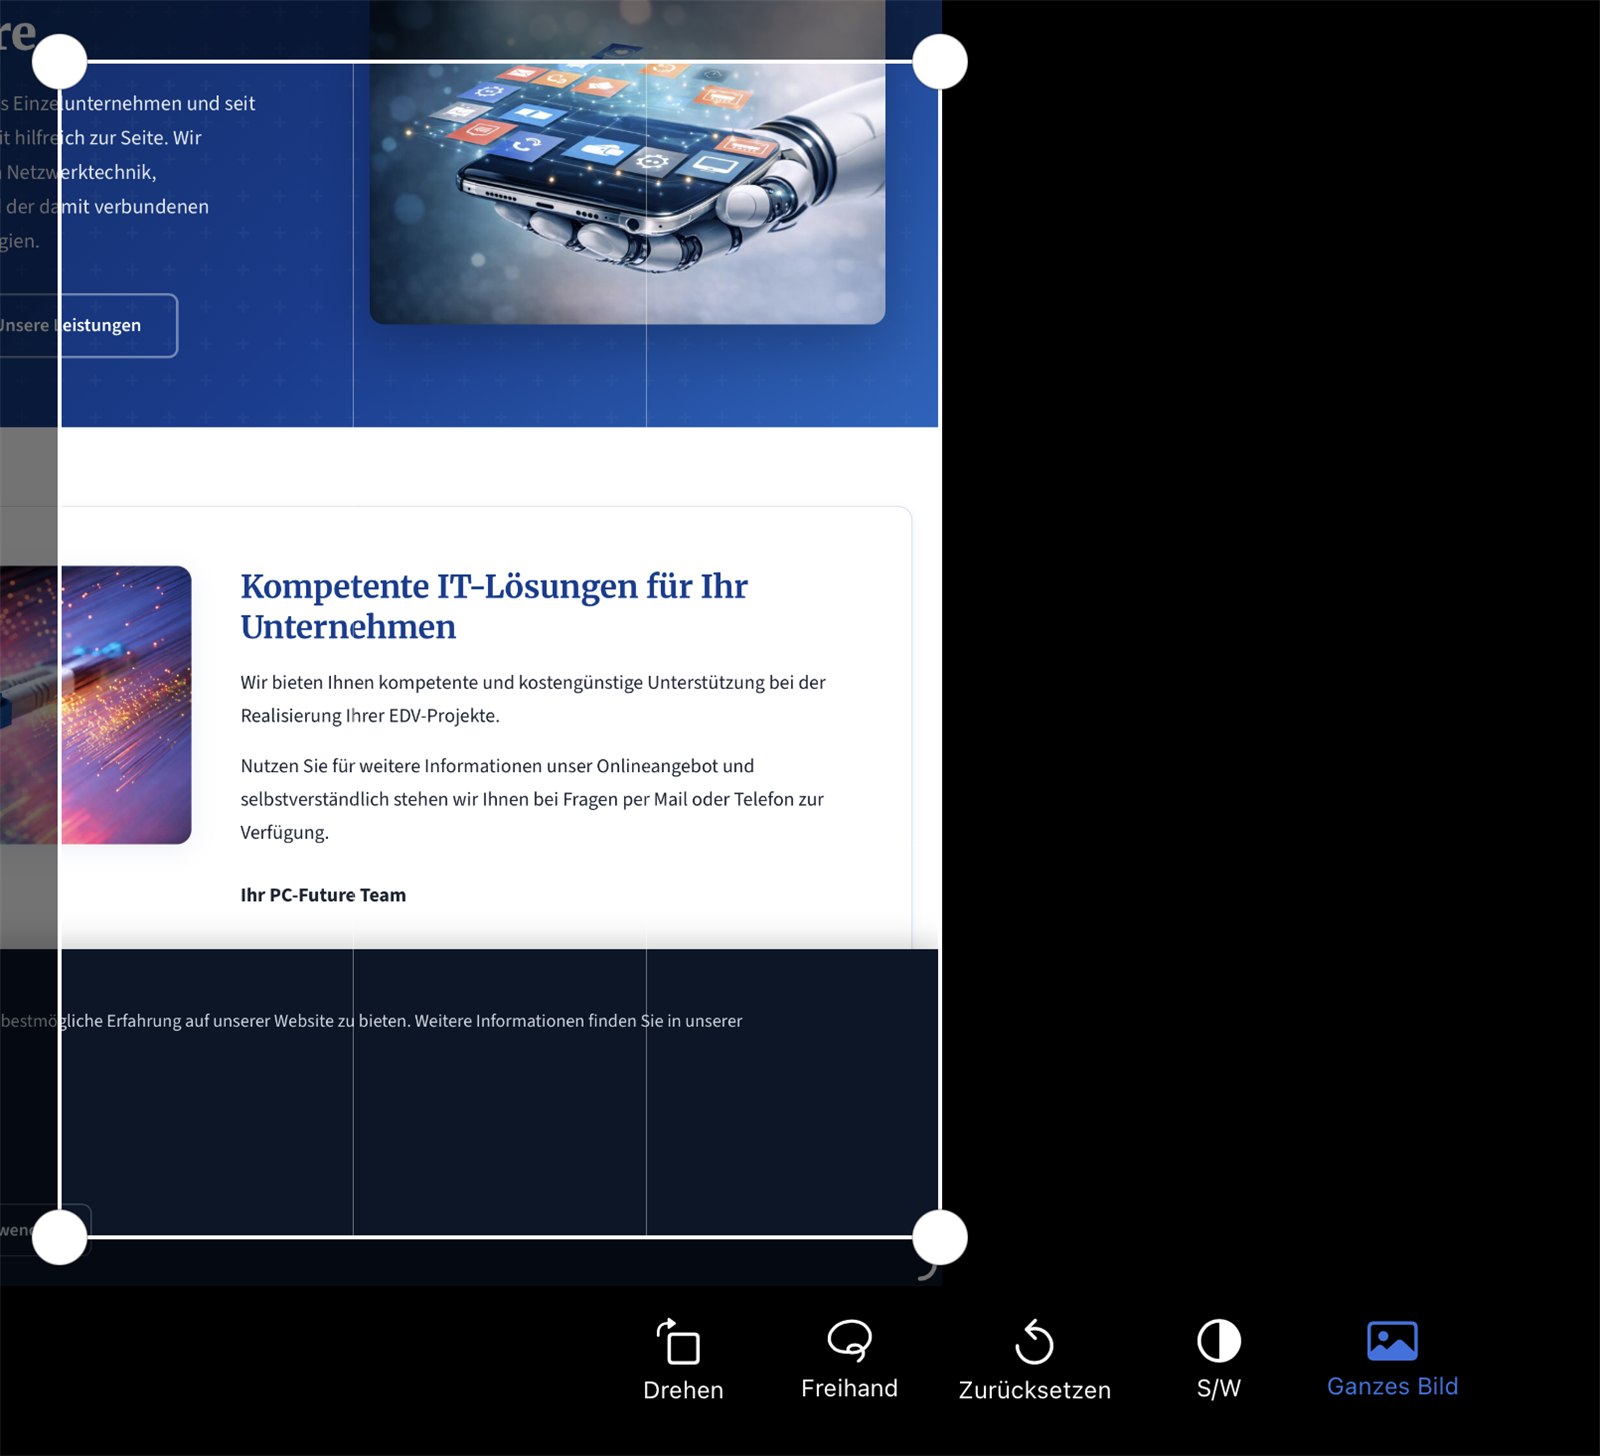
Teacher annotations appear automatically in a central overview. Per notebook the affected pages are visible — including the teacher's annotation. With one tap on "Insert into notebook" the annotated page can be pulled in as an image — the integrated photo editor opens, and the desired area can be cropped before it is inserted into the student's own notebook.
- ✓ Central "Annotations" overview for every notebook and every teacher
- ✓ Insert into notebook — the page with the annotation is pulled into the student's notebook as an image; the photo editor lets you crop to the relevant area first
- ✓ Hide — annotations that shouldn't go into the notebook can be hidden locally
Privacy: end-to-end encrypted — even the server cannot read anything
The feature is built around privacy from the ground up. Pages and annotations are encrypted on the iPad with a class-specific key before they ever reach the server. The server only ever sees encrypted data — class names, student names, notebook titles and images do not appear in clear text. Even the hosting provider cannot do anything with the stored data. Only the teacher and the students who scanned the QR code of the same class can read the content.
- ✓ End-to-end encryption with AES-GCM 256 bit — the same algorithm that is approved for governmental classified data
- ✓ The key never leaves the iPad — it is embedded in the QR code and travels exclusively from teacher iPad to student iPad
- ✓ No clear-text names on the server — class names, student names and notebook titles are part of the encrypted data, too
- ✓ The server only sees random strings — even the server operator or hosting provider cannot do anything with the data
- ✓ Automatic deletion on the server after 21 days of inactivity

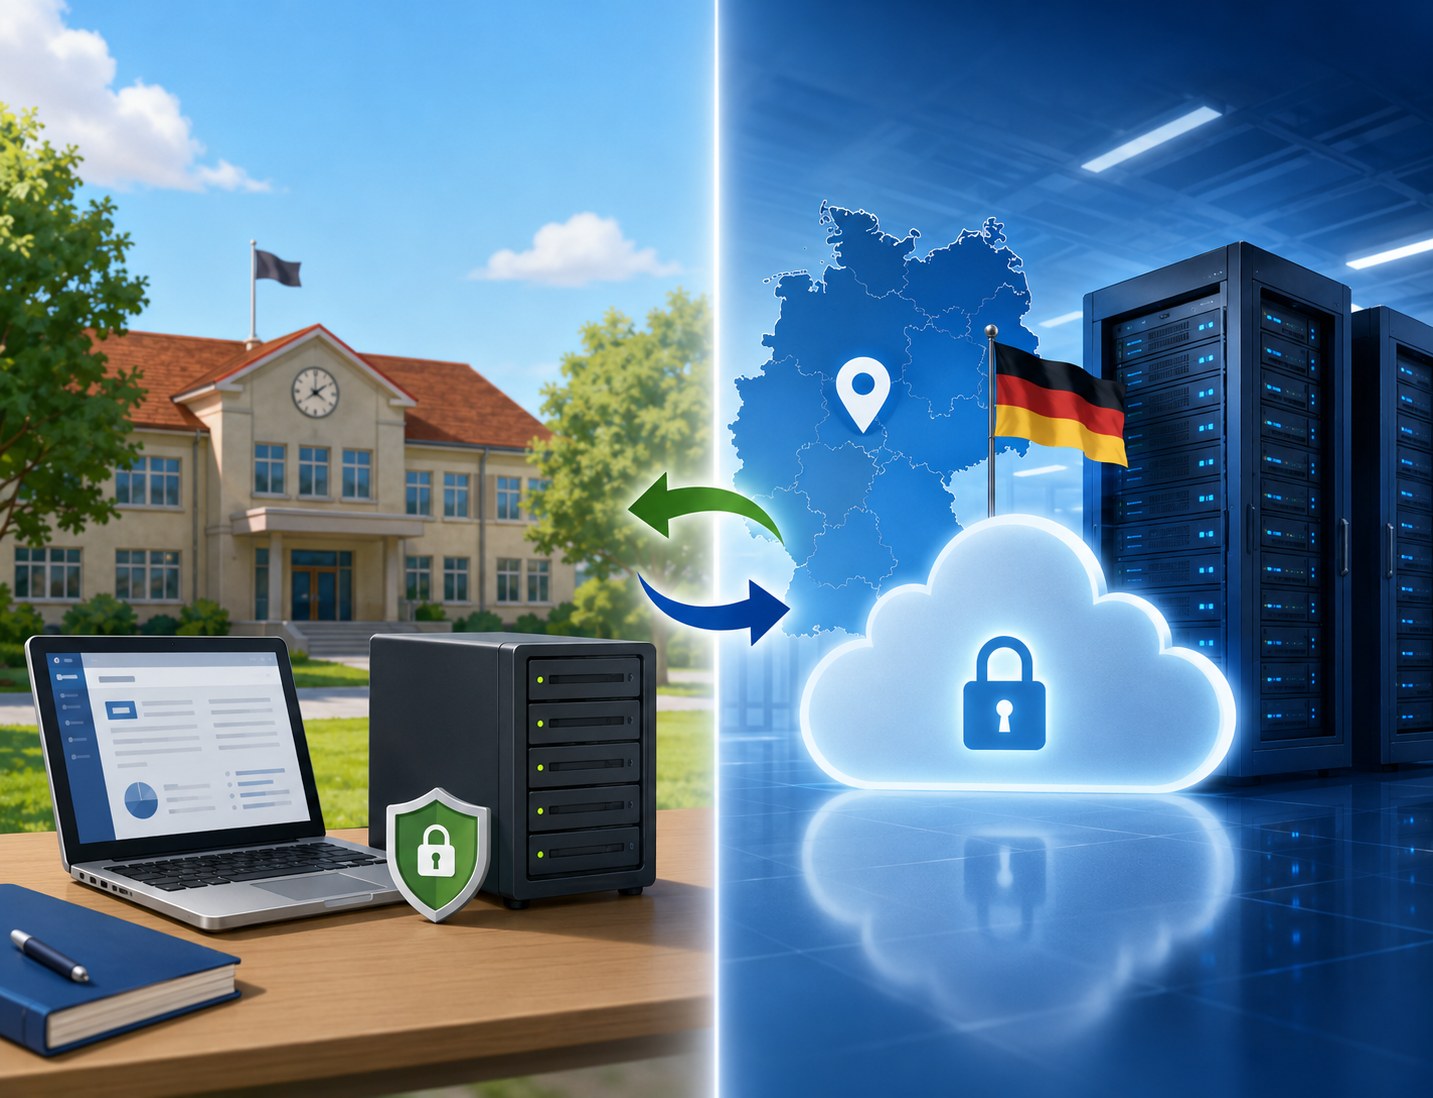
School-owned server or our server in Germany
Schools can run the server on their own school website — a simple PHP web hosting is enough. The (encrypted) data then stays entirely in the hands of the school. Anyone who does not want to run their own server can use the NiblyNotes server we run — hosted in a data centre in Germany.
- ✓ Run your own server — standard PHP hosting is enough; PC-Future provides the server code free of charge
- ✓ NiblyNotes server in Germany — anyone who does not want to run their own server can use ours, with no sign-up and free of charge
- ✓ Address per class — the server address is set in the teacher app and travels via the QR code to the student iPad automatically
- ✓ MDM required for your own server — if you run your own server, the corresponding security key must be deployed to the iPads via an MDM system
- ✓ Switching between school server and NiblyNotes server is possible at any time
Note: Even when using the NiblyNotes server in Germany, the operator (PC-Future GmbH) cannot read any notebook content — the data is already encrypted on the iPad, the key is never transmitted to the server.
🤝 Highlight: shared notebooks
Work on a notebook together
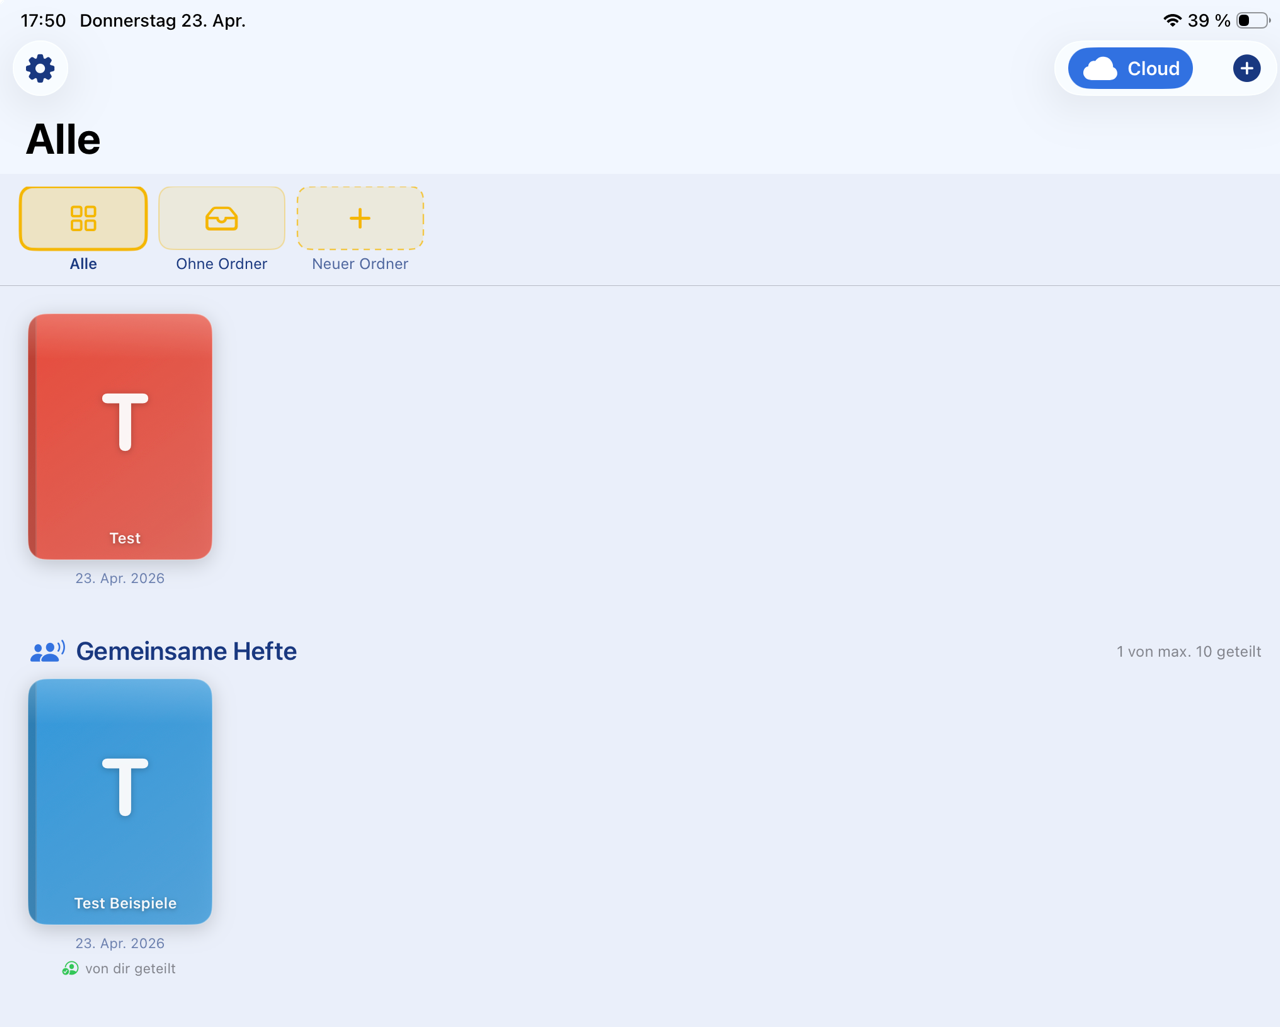
Share a notebook and collaborate — for group work, class projects or teacher collaboration. Synchronisation runs through your personal iCloud® — no third-party servers.
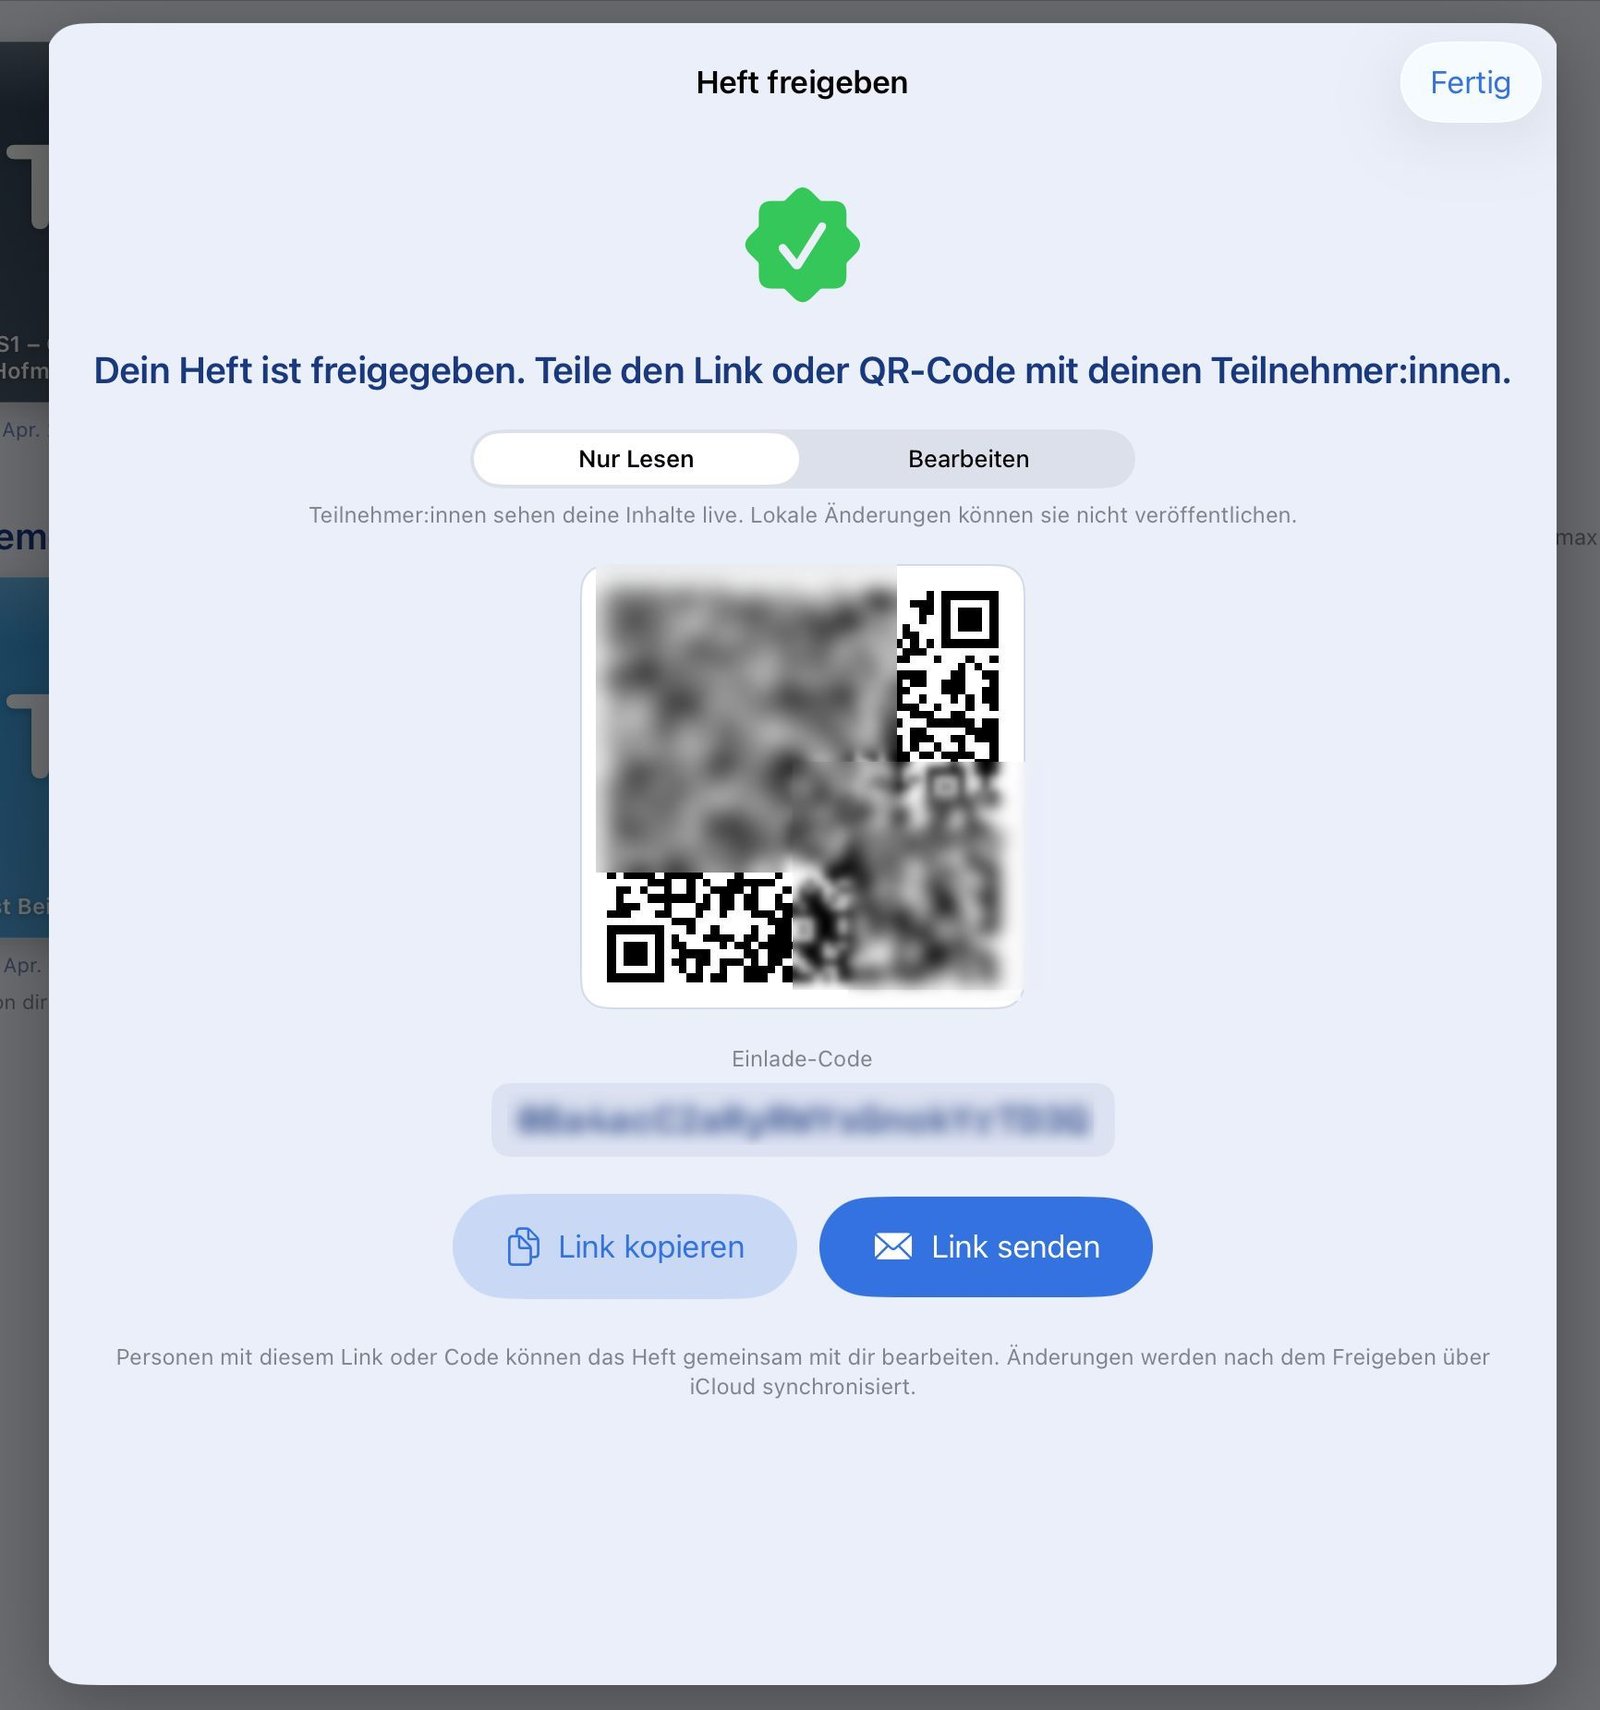
Invite via link or QR code
There are two ways to invite participants:
- ✓ Send invite link by email — convenient for participants who aren't in the room
- ✓ Show QR code — participants in the same room simply scan with their iPad
- ✓ When inviting, pick read-only or edit access (all participants can contribute)
- ✓ Permission switchable at any time — even after inviting
Privacy: Apple® iCloud® instead of third-party servers
The shared notebook function exclusively uses Apple®'s iCloud® as infrastructure. There is no publisher server in between that could see the content.
- ✓ Synchronisation runs through your private iCloud®
- ✓ No intermediate storage on publisher servers
- ✓ All participants need an Apple® account
iCloud and Apple are trademarks of Apple Inc., registered in the U.S. and other countries. NiblyNotes uses the iCloud infrastructure through the developer interfaces provided by Apple (CloudKit).
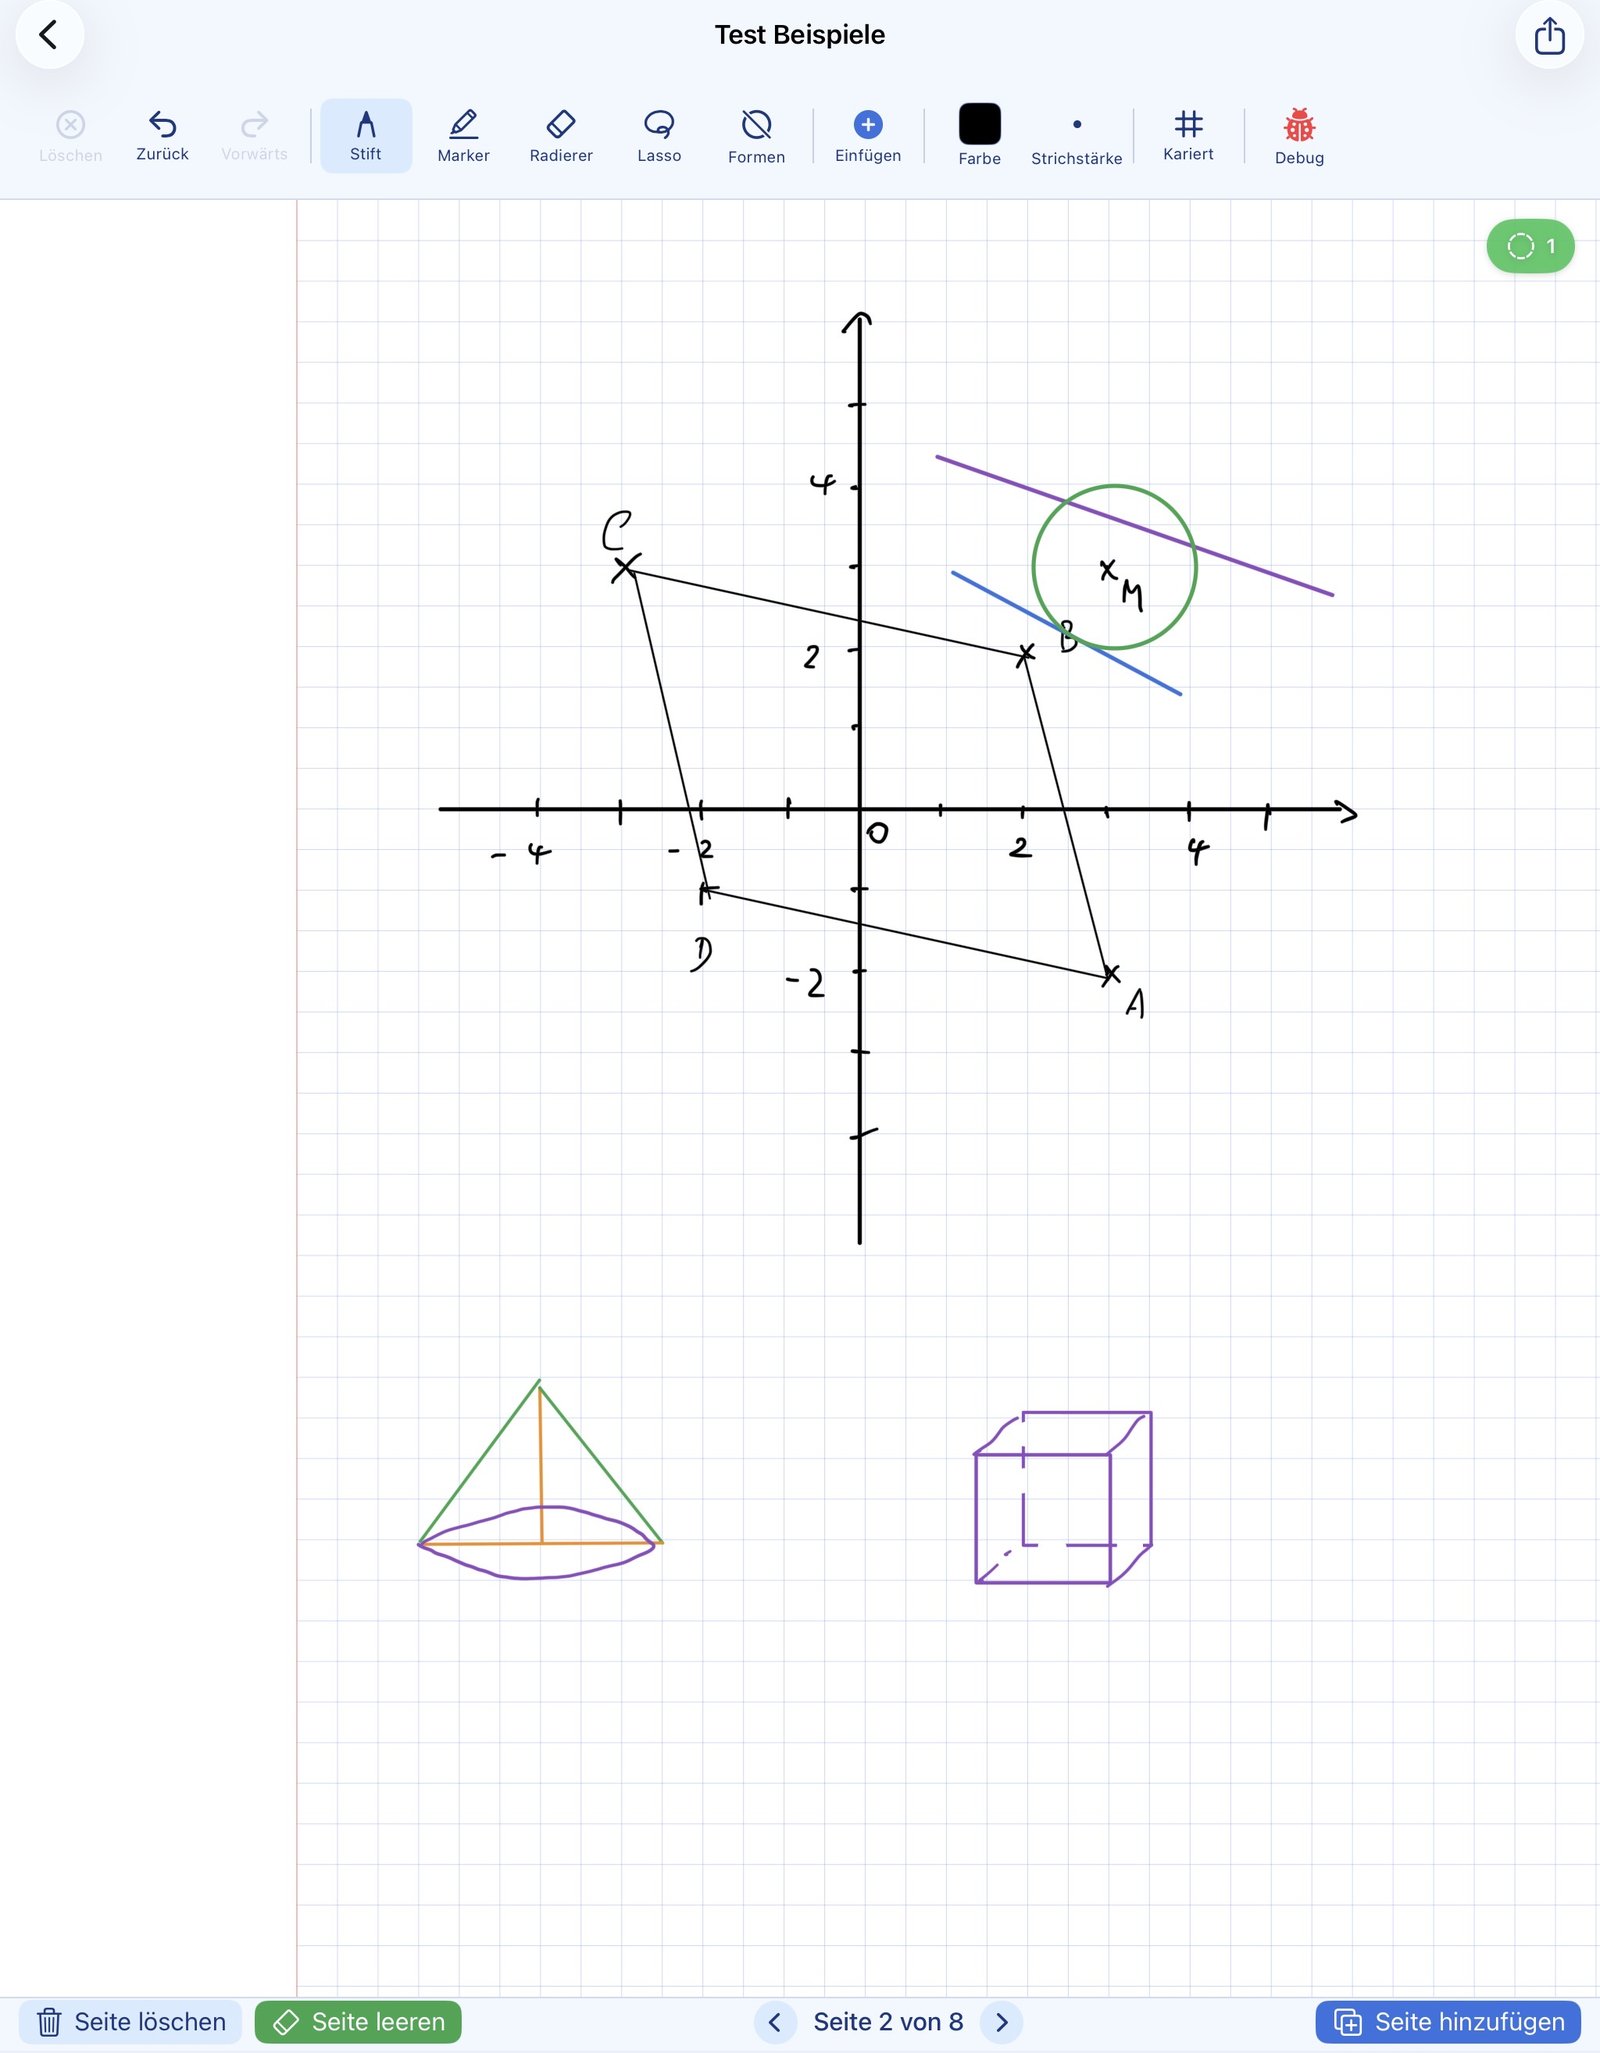
How working on a shared notebook feels
All participants work together on one notebook. So that no one overwrites anyone else, only one page is edited at a time:
- ✓ Whoever opens a page for editing automatically locks that page for the others
- ✓ The other participants see the locked page as read-only during this time — with a note showing who is currently editing it
- ✓ As soon as the page is released again, another person can edit it
- ✓ Other pages of the notebook remain editable in parallel — different people can work on different pages at the same time
- ✓ Strokes, text boxes, images, pages, backgrounds — all changes are synchronised
- ✓ Synchronisation still runs through your private iCloud® — without third-party servers
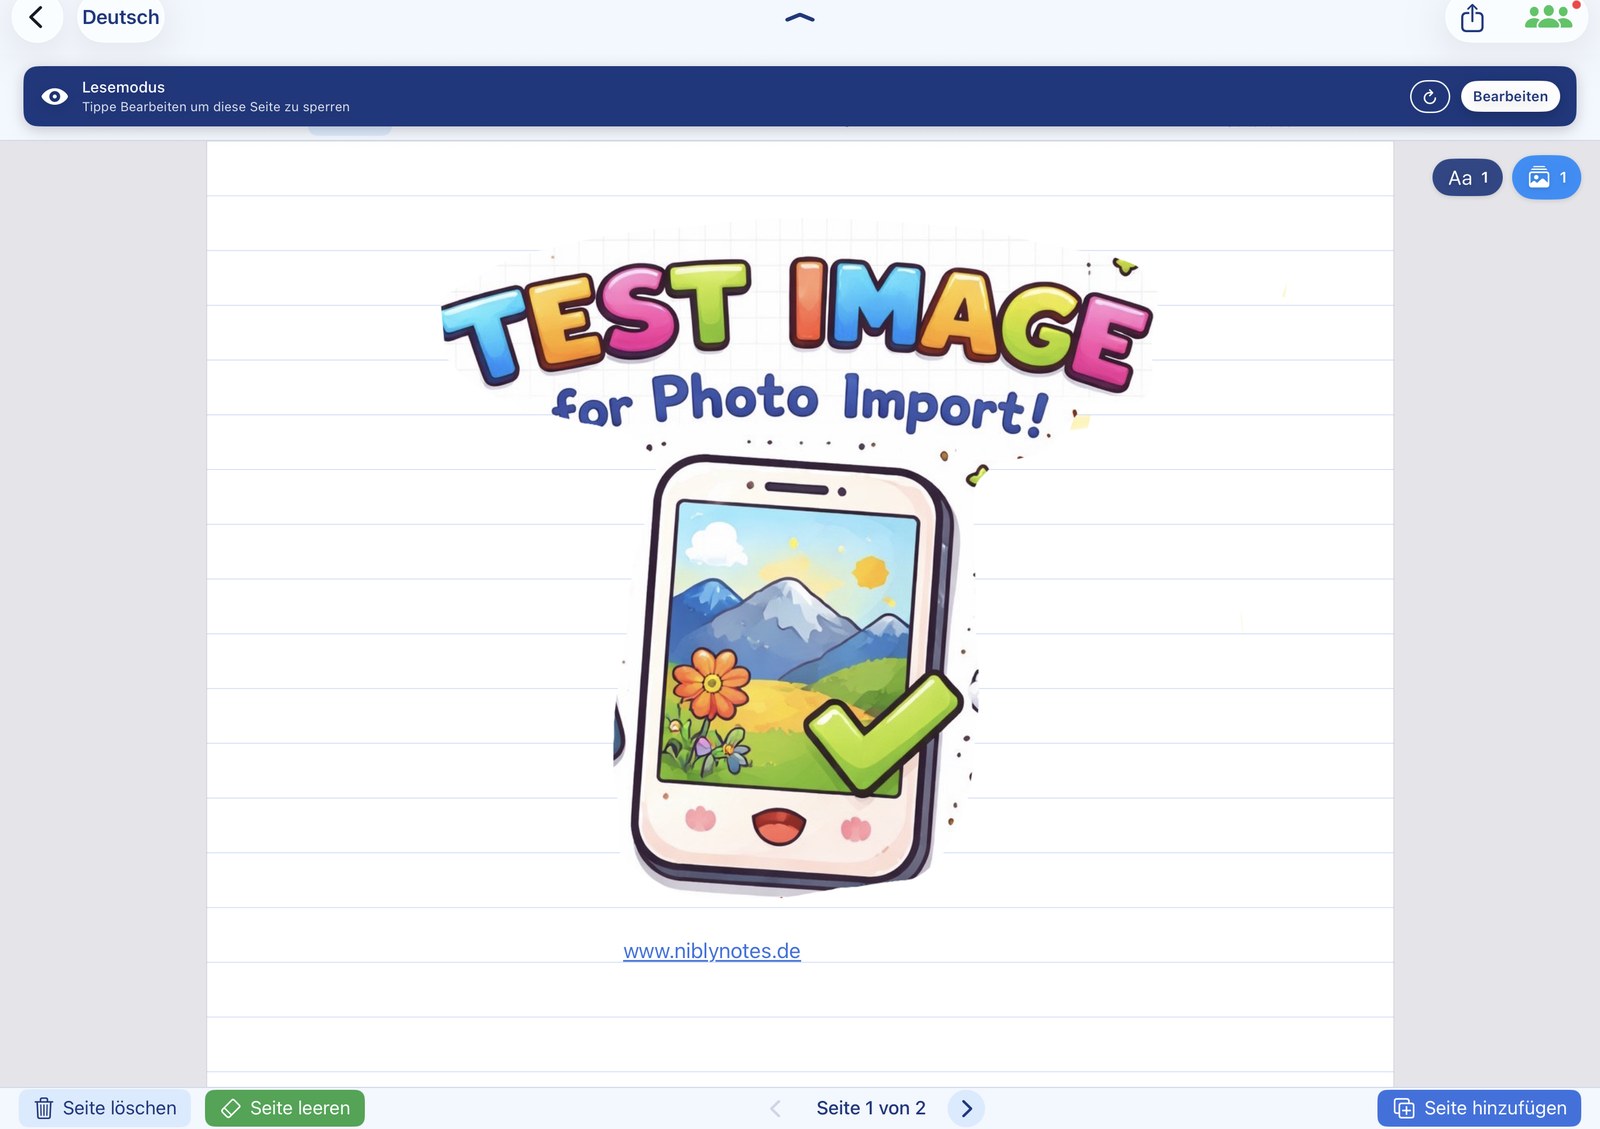
Everyone keeps their own state
When a sharing session ends — whether the owner stops it or a participant leaves the session — everyone keeps their current state. The notebook moves back into the participant's own notebooks and can be used as normal.
- ✓ No data loss when leaving a shared notebook
- ✓ Local copy is kept by every participant
- ✓ Each person can continue working offline with their state
📤 Send & export
Archive work, simply
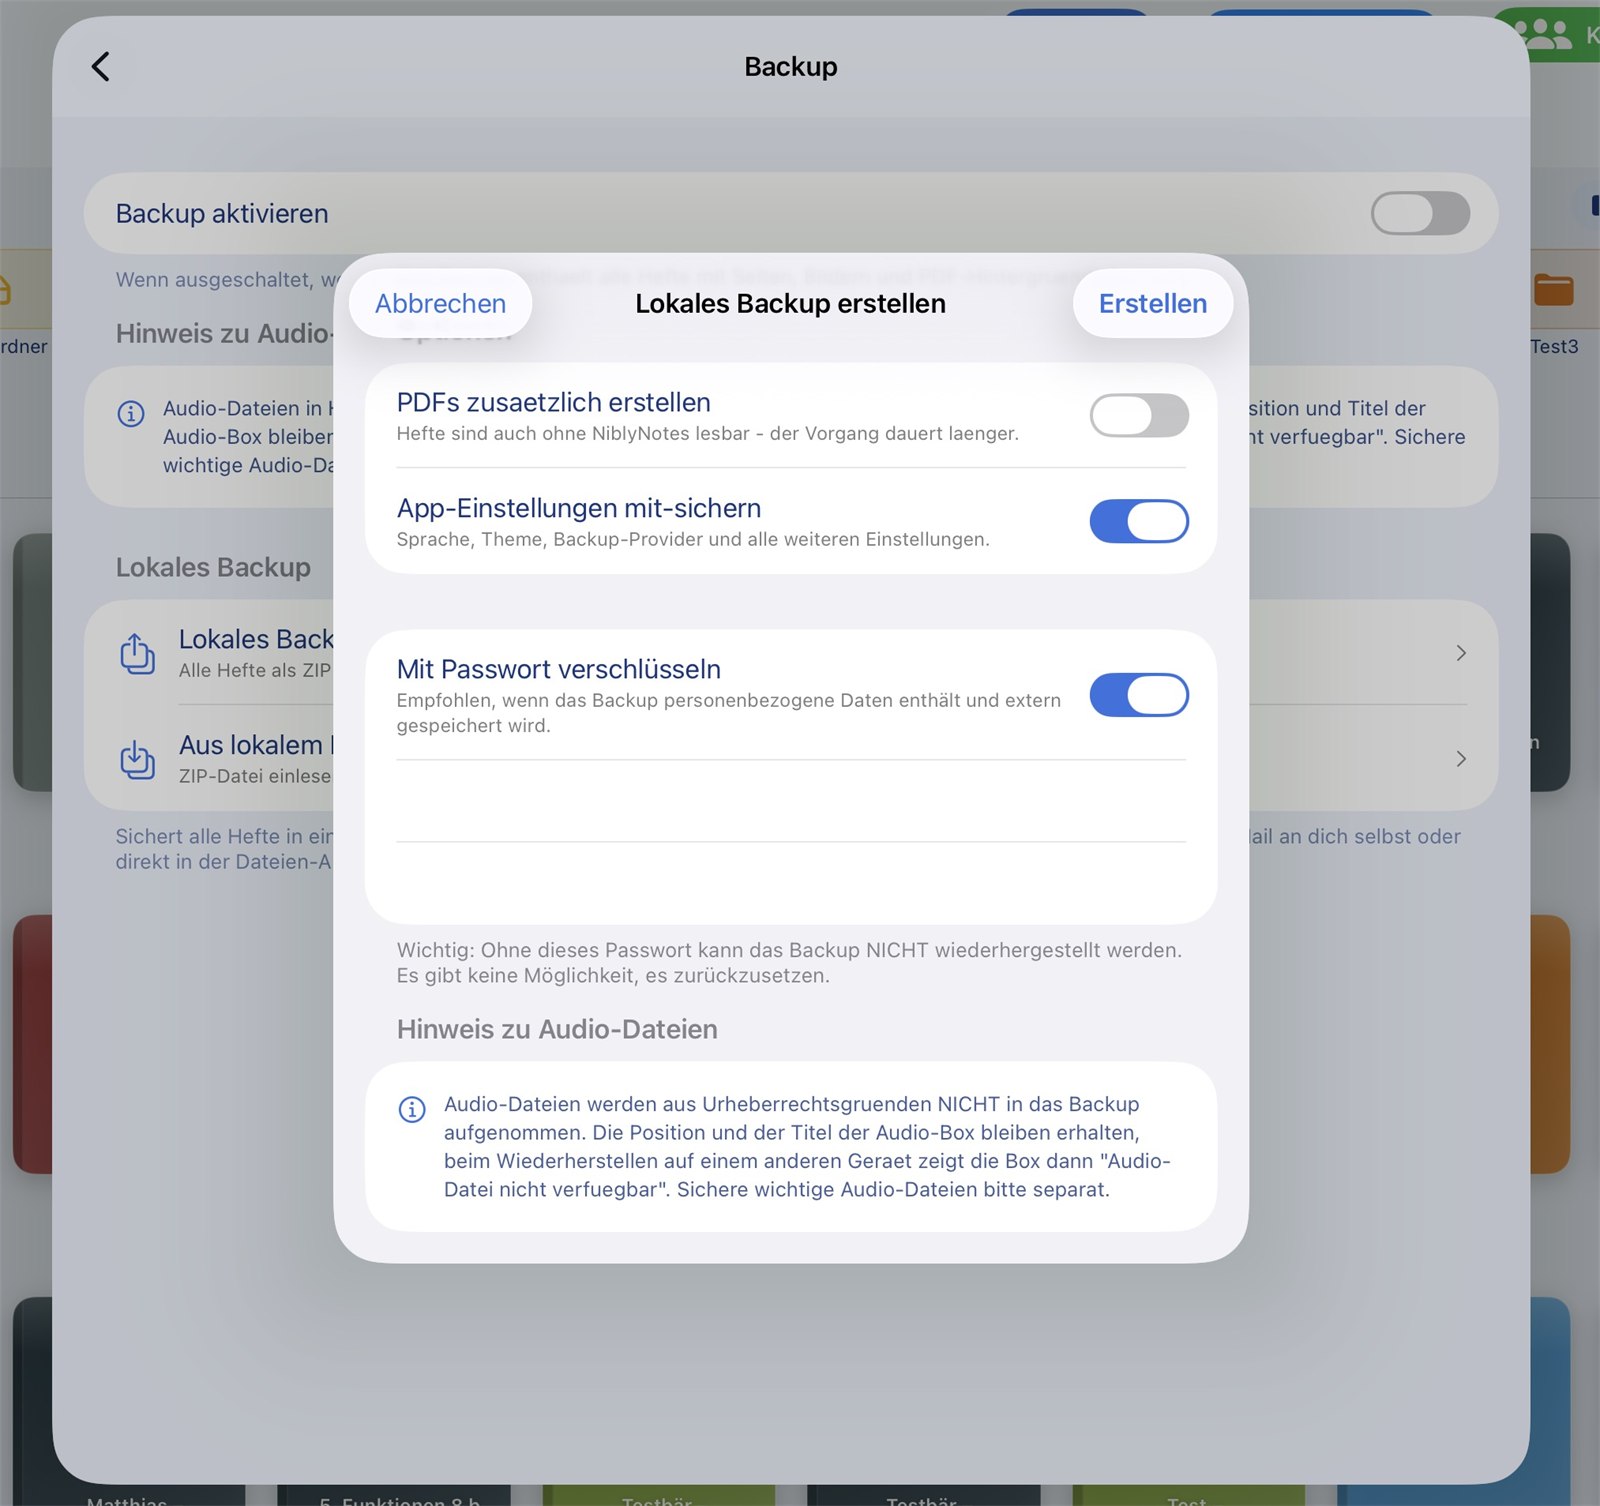
NiblyNotes saves you the detour through "Share" to another app. Print, send, save and upload directly to your school cloud — all from one app.
Print, AirDrop®, save
Print or send entire notebooks, or selected pages, with a preview that lets you decide what really gets shared.
- ✓ Print via AirPrint® — entire notebook or selected pages
- ✓ Send directly to students via AirDrop®
- ✓ Send as PDF or as NiblyNotes file (
.nibly)
- ✓ Save locally as PDF
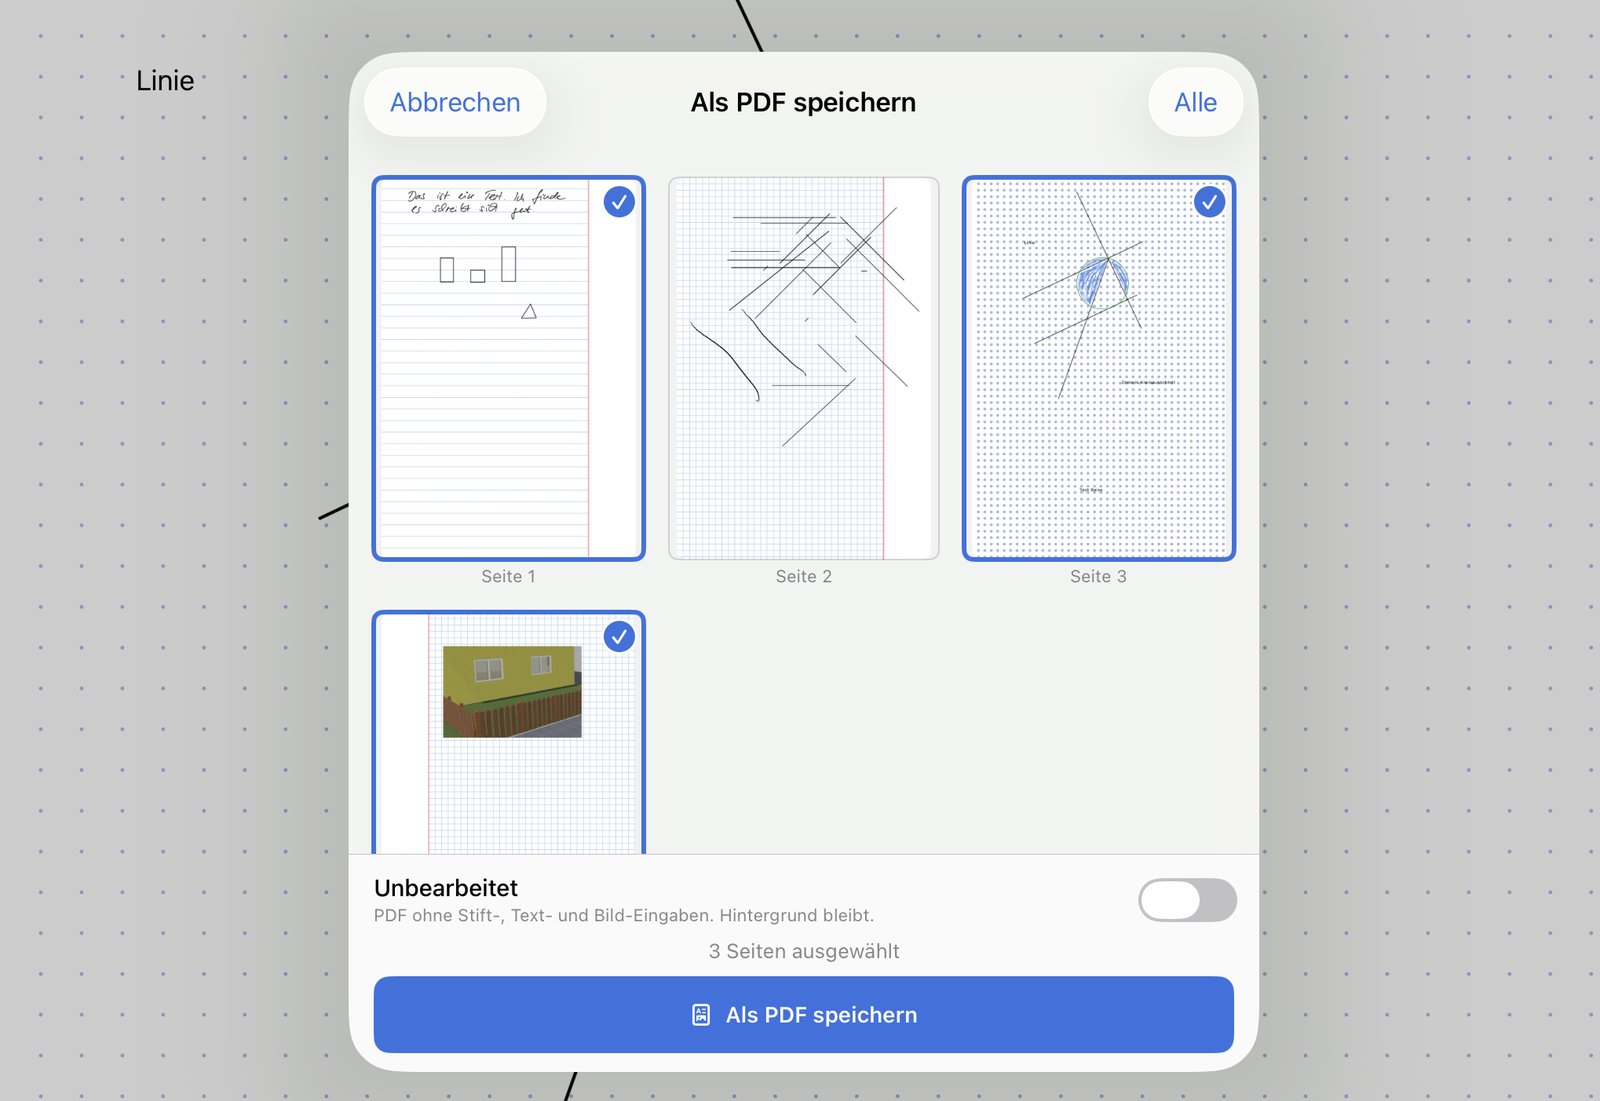
- ✓ When opened from the editor, the current page is already ticked; add more pages with one tap or hit “All” to select the entire notebook
Teacher mode: hide master solution
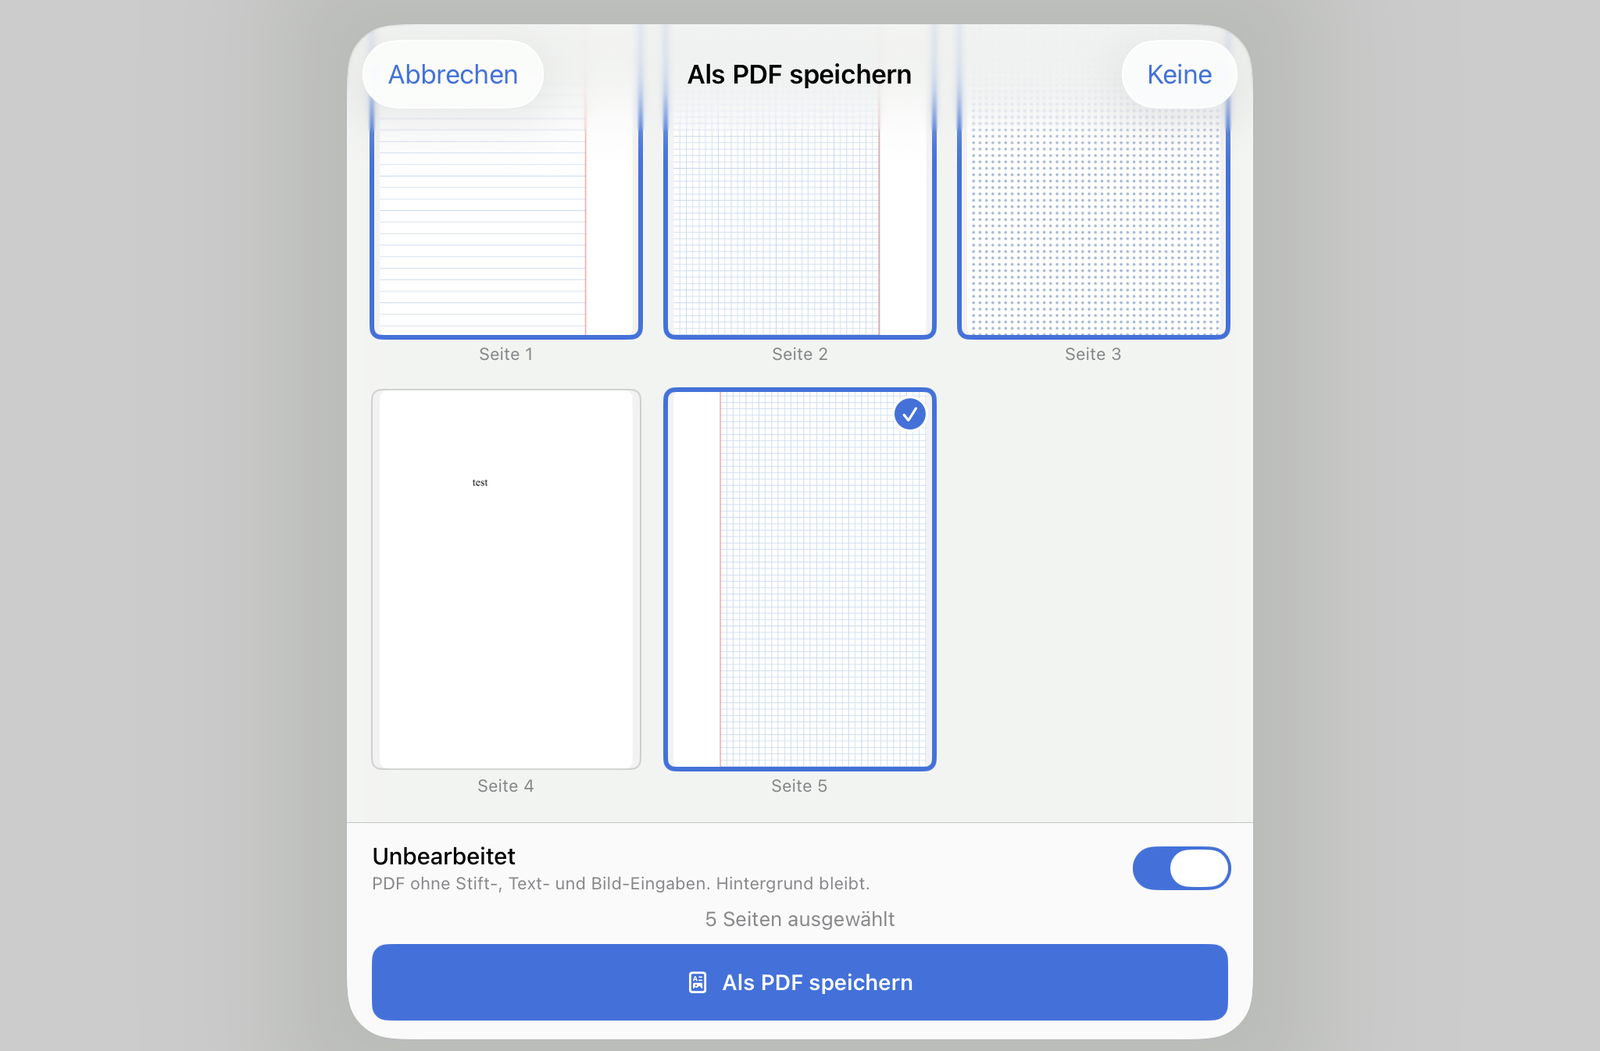
When sending or saving, you can choose to export the page unedited. Perfect for teachers: the master solution you wrote on the worksheet doesn't need to be shared with students — they get the clean, empty template.
- ✓ Export with or without your own handwritten additions
- ✓ Create worksheet once, keep master solution and student version in one file
- ✓ Works for printing, AirDrop, cloud upload and PDF export
- ✓ When exporting you can decide layer by layer what is included — for example the worksheet without the solution, but with the inserted images
Direct to the school cloud — with sharing in one step
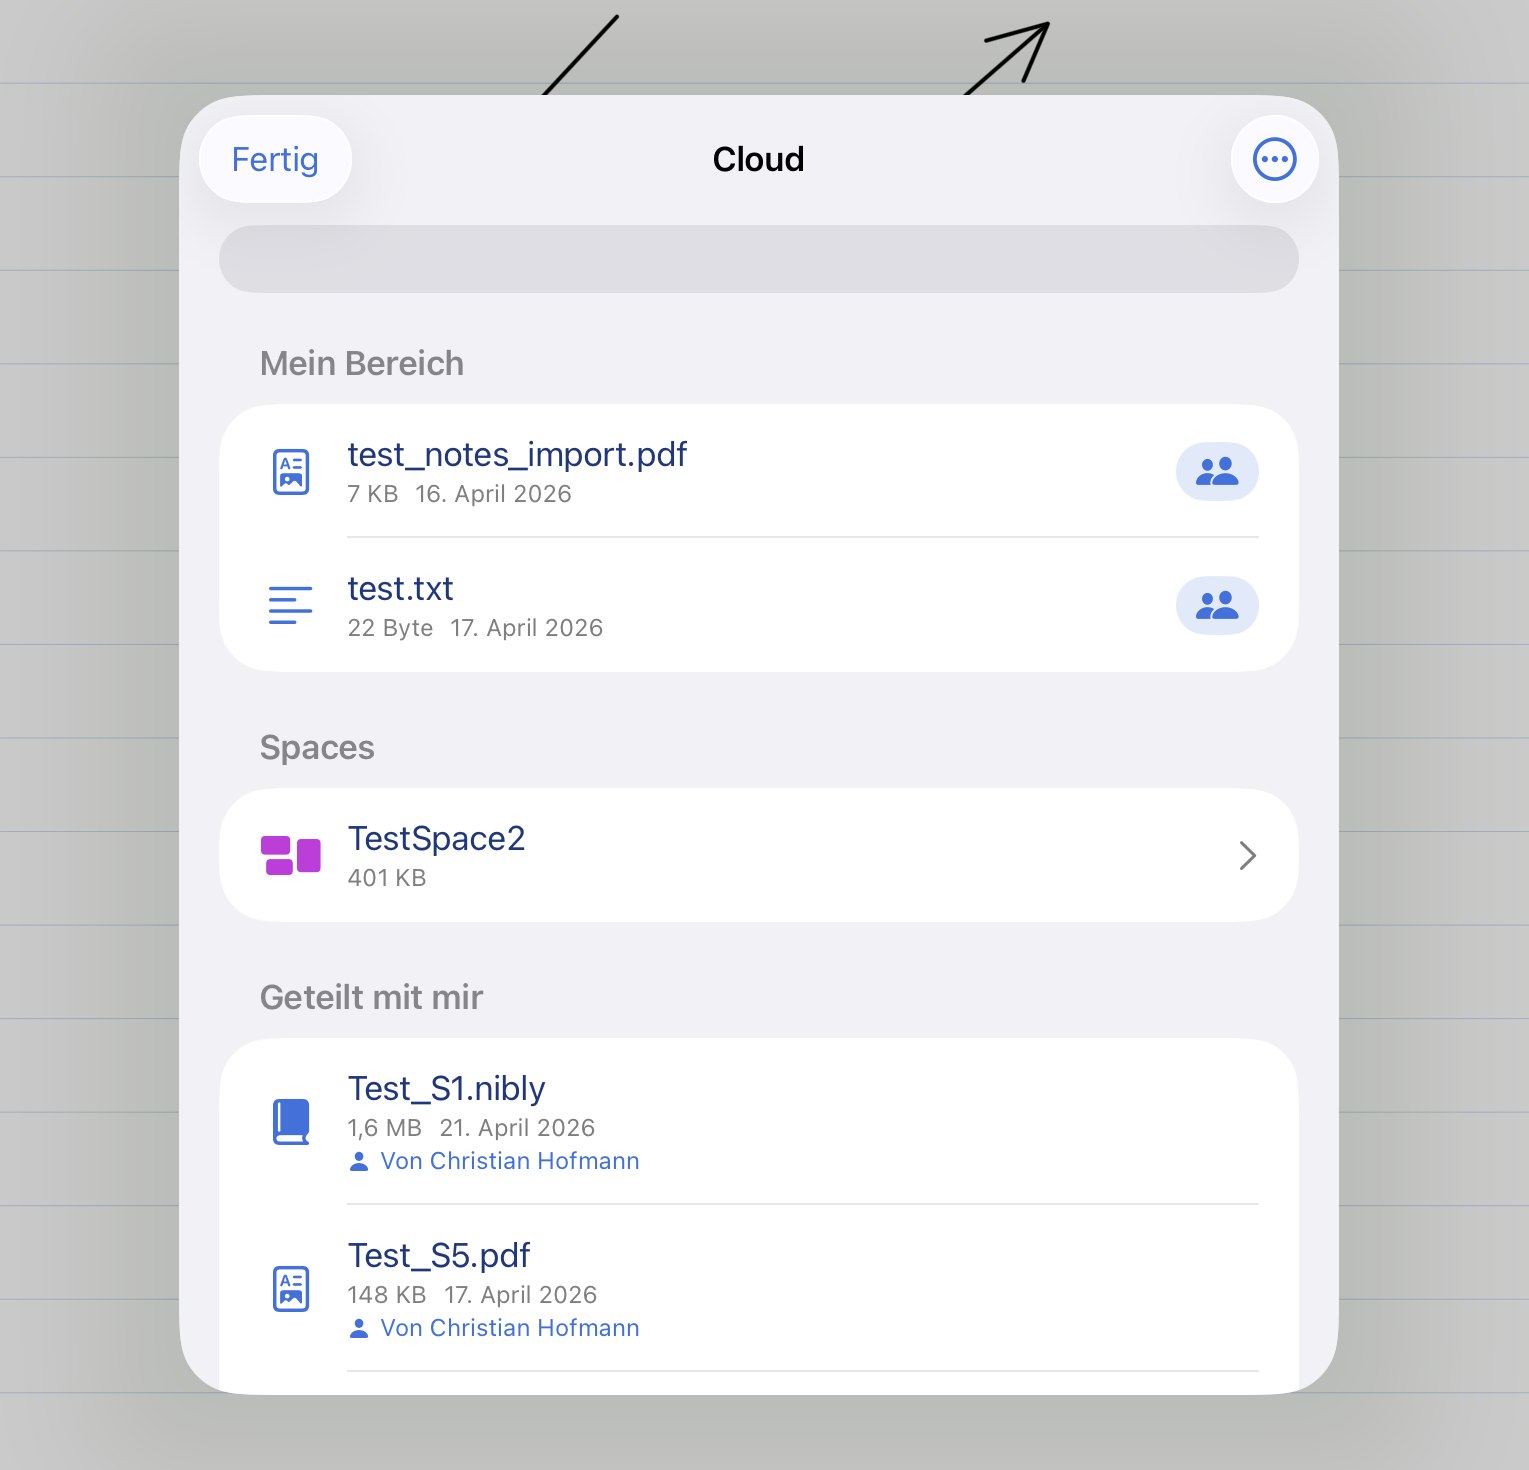
The highlight: upload notebooks or individual pages directly from NiblyNotes to a school cloud and, if wanted, share them with a person in one go. The detour "save file → open cloud app → upload → share" is gone.
- ✓ Upload to BayernCloud Schule, Nextcloud or NetMan for Schools
- ✓ Pick target folder directly, create new folders if needed
- ✓ Share directly with a person — enter address or name
- ✓ Recent recipients are remembered — quick access during lessons
- ✓ Upload as PDF or as
.nibly file
- ✓ Here too, the current page is automatically ticked when opened from the editor
For teachers: Create worksheet → "Send" → pick cloud → folder "Class 7b" → share with class. Done.
☁️ Privacy-friendly school clouds
Built in — for everyday school use
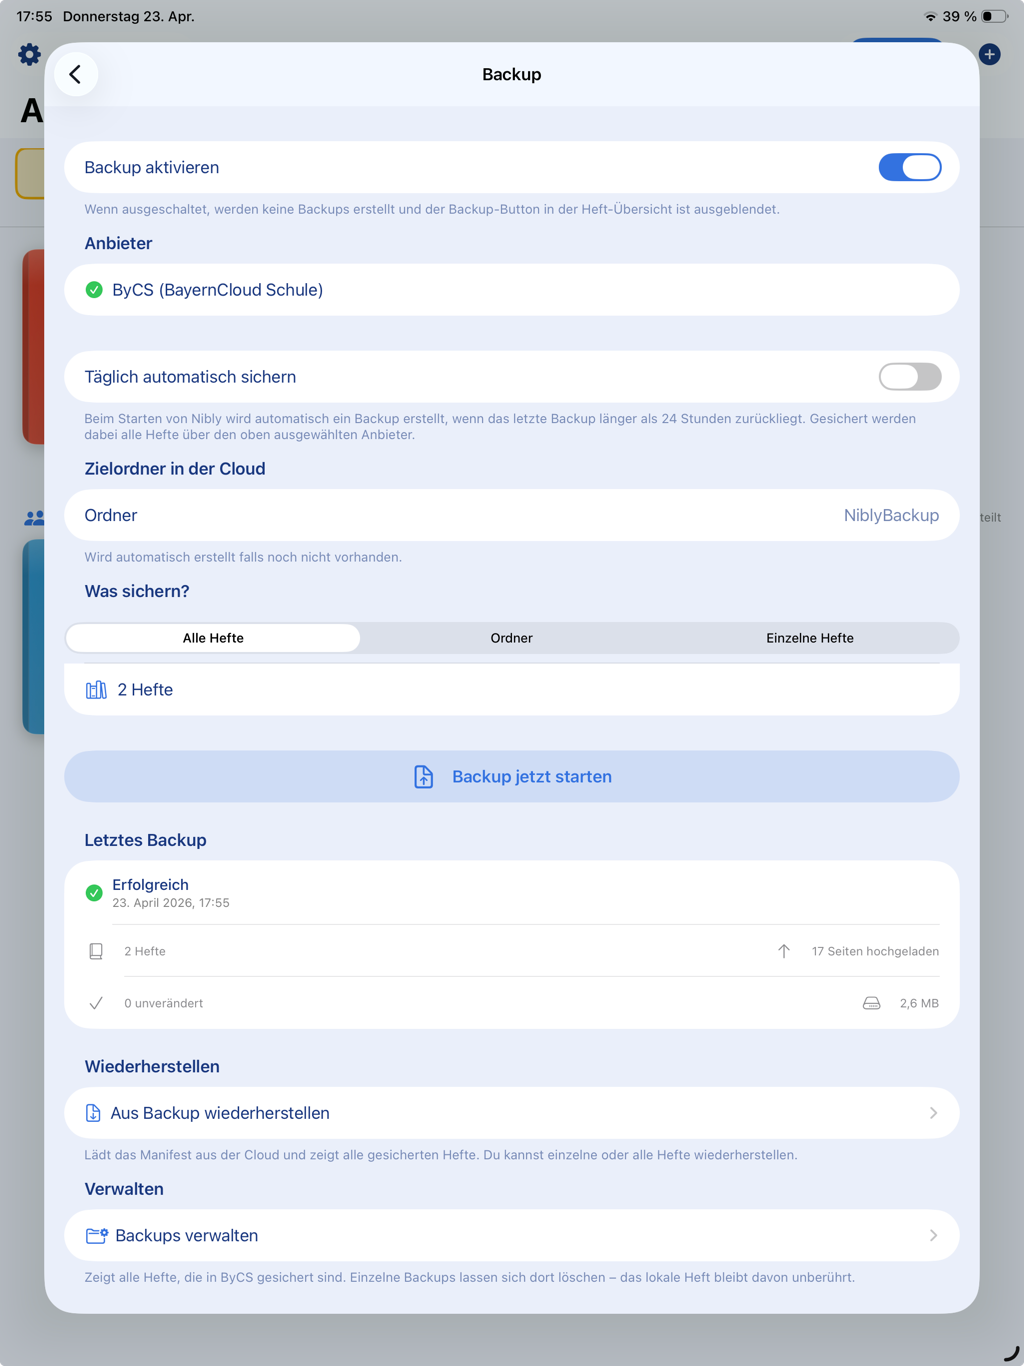
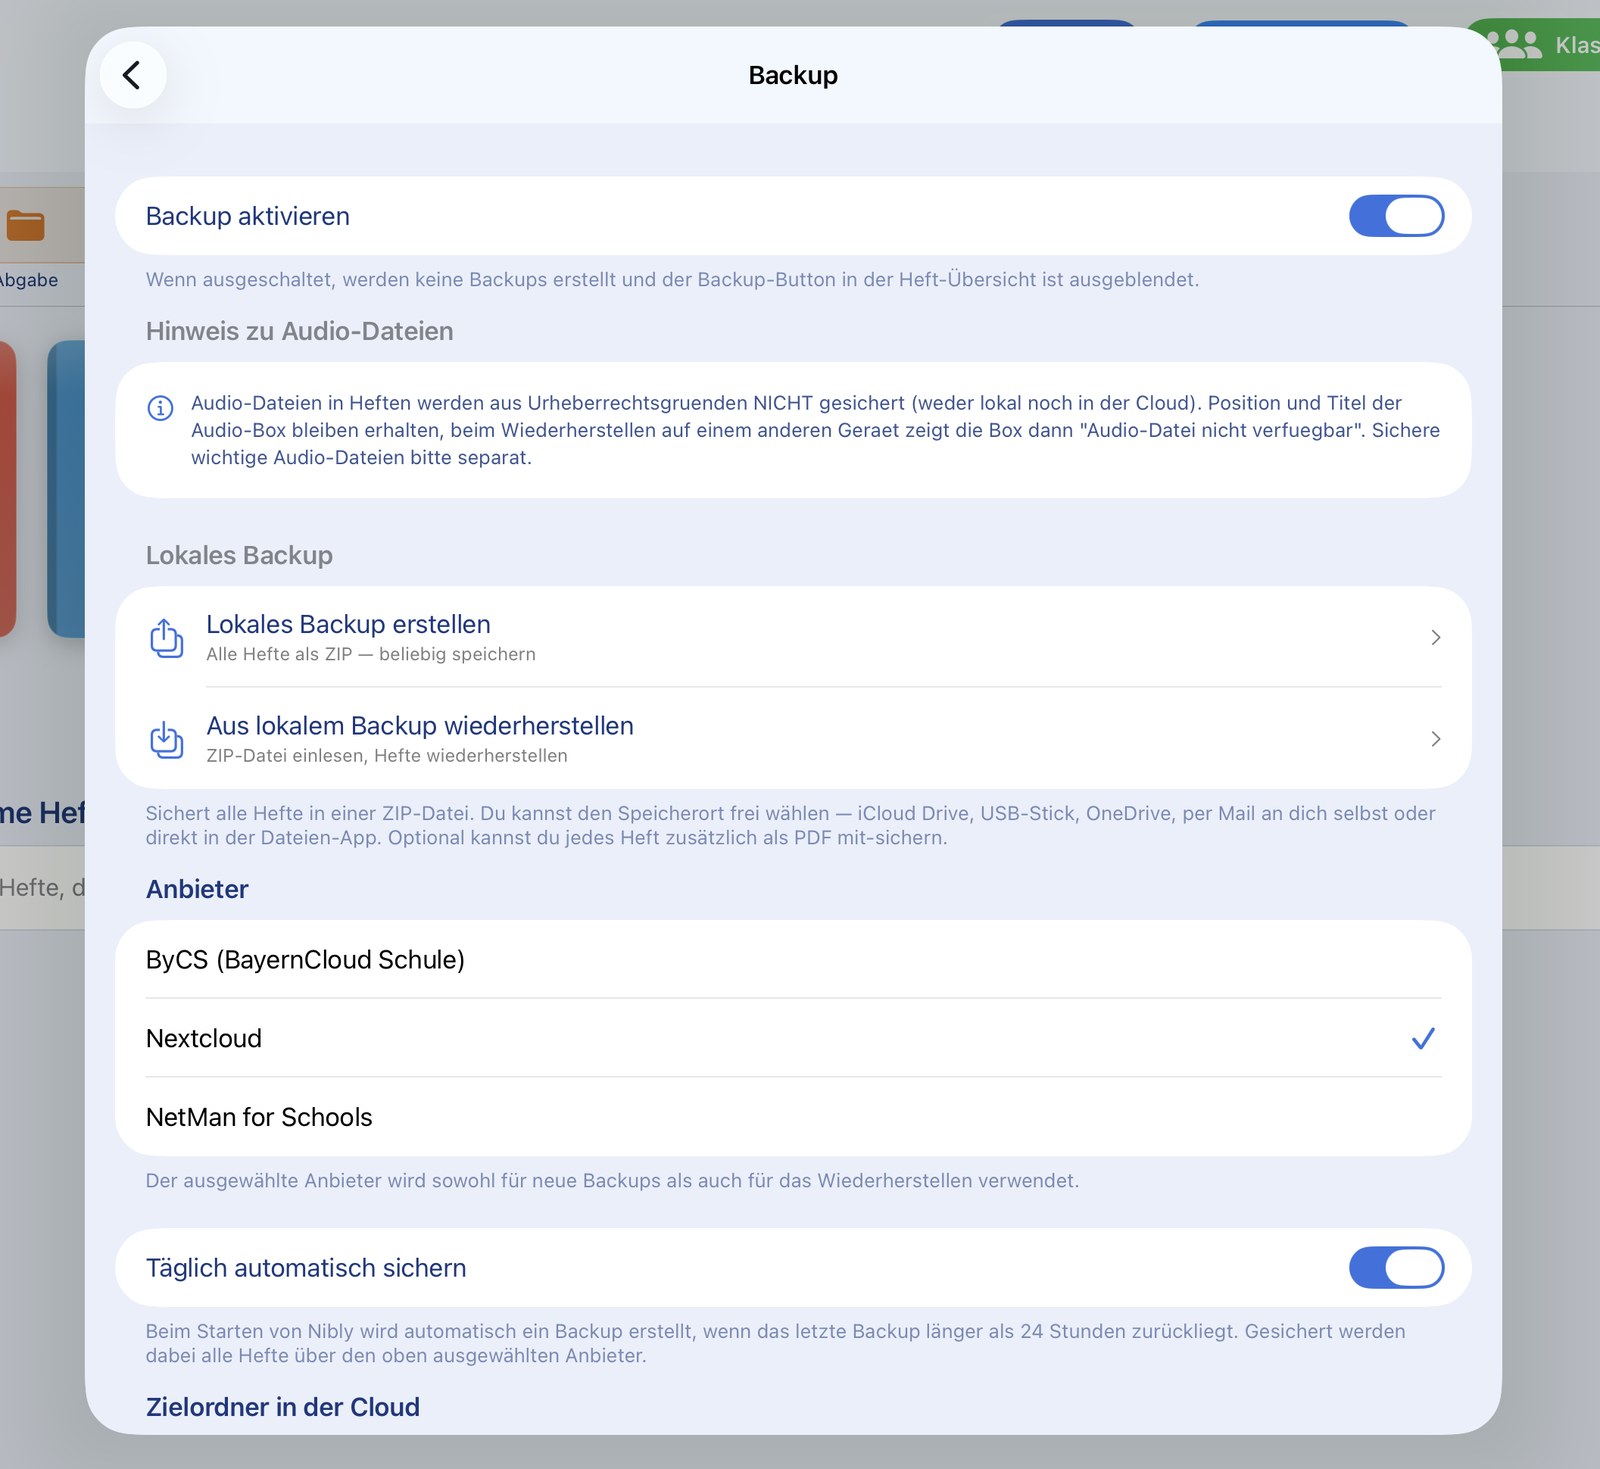
Three privacy-friendly cloud providers for educational use are integrated directly in NiblyNotes.
BayernCloud Schule (ByCS)
The school cloud offering of the Free State of Bavaria — specifically for Bavarian schools. Login is handled via your school's official ByCS sign-in procedure.
☁️
Nextcloud
The free, open-source cloud solution many schools self-host. NiblyNotes uses the official Nextcloud login with app password — secure and standards-based.
🏫
NetMan for Schools
The school network solution by H+H Software. User and teacher drives as well as exchange shares are supported directly. (Supported from NetMan for Schools version 6 onwards.)
Trademark notice: The integration with BayernCloud Schule, Nextcloud and NetMan for Schools is provided without support or official partnership from the respective providers. NiblyNotes uses only the publicly available interfaces of the cloud providers.
"BayernCloud Schule" is an offering of the Free State of Bavaria. "Nextcloud" is a registered trademark of Nextcloud GmbH. "NetMan for Schools" is a trademark of H+H Software GmbH. All product names, logos and trademarks mentioned are the property of their respective owners. They are named here solely for the purpose of describing compatibility.
🧹 Storage at a glance
See what takes up space — and clean up
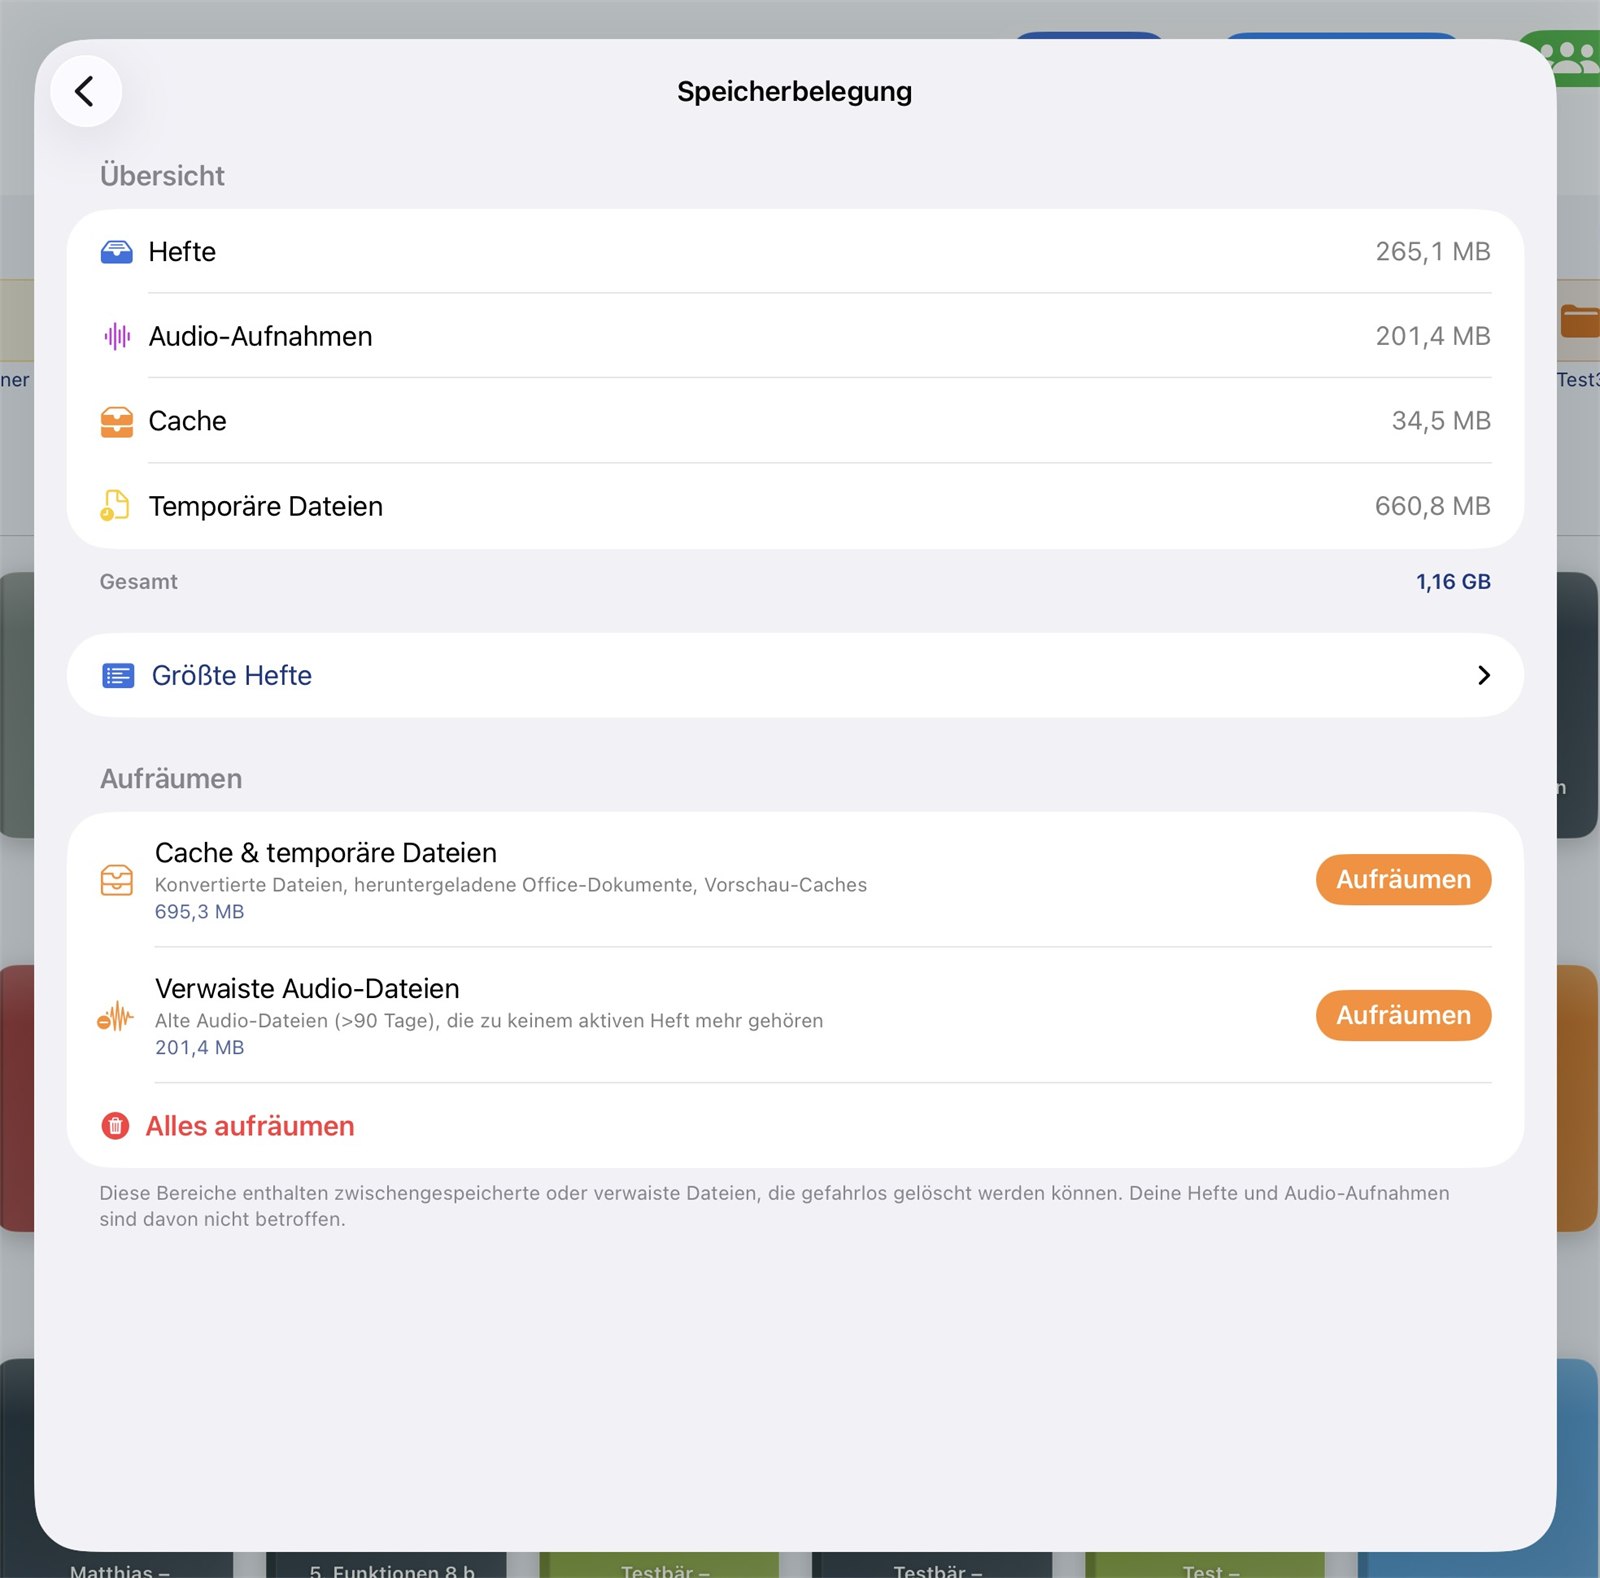
In the settings, NiblyNotes shows what the used storage consists of. Temporary files created when converting Office documents, downloading from the cloud or during interrupted backups can be removed with a single tap.
Clean up without risk
- ✓ Overview of the app's storage usage
- ✓ Clean up temporary files and leftovers selectively
- ✓ Notebooks and their content remain untouched
- ✓ Useful on devices with limited storage
🏫 For school IT
Roll out centrally instead of setting up device by device
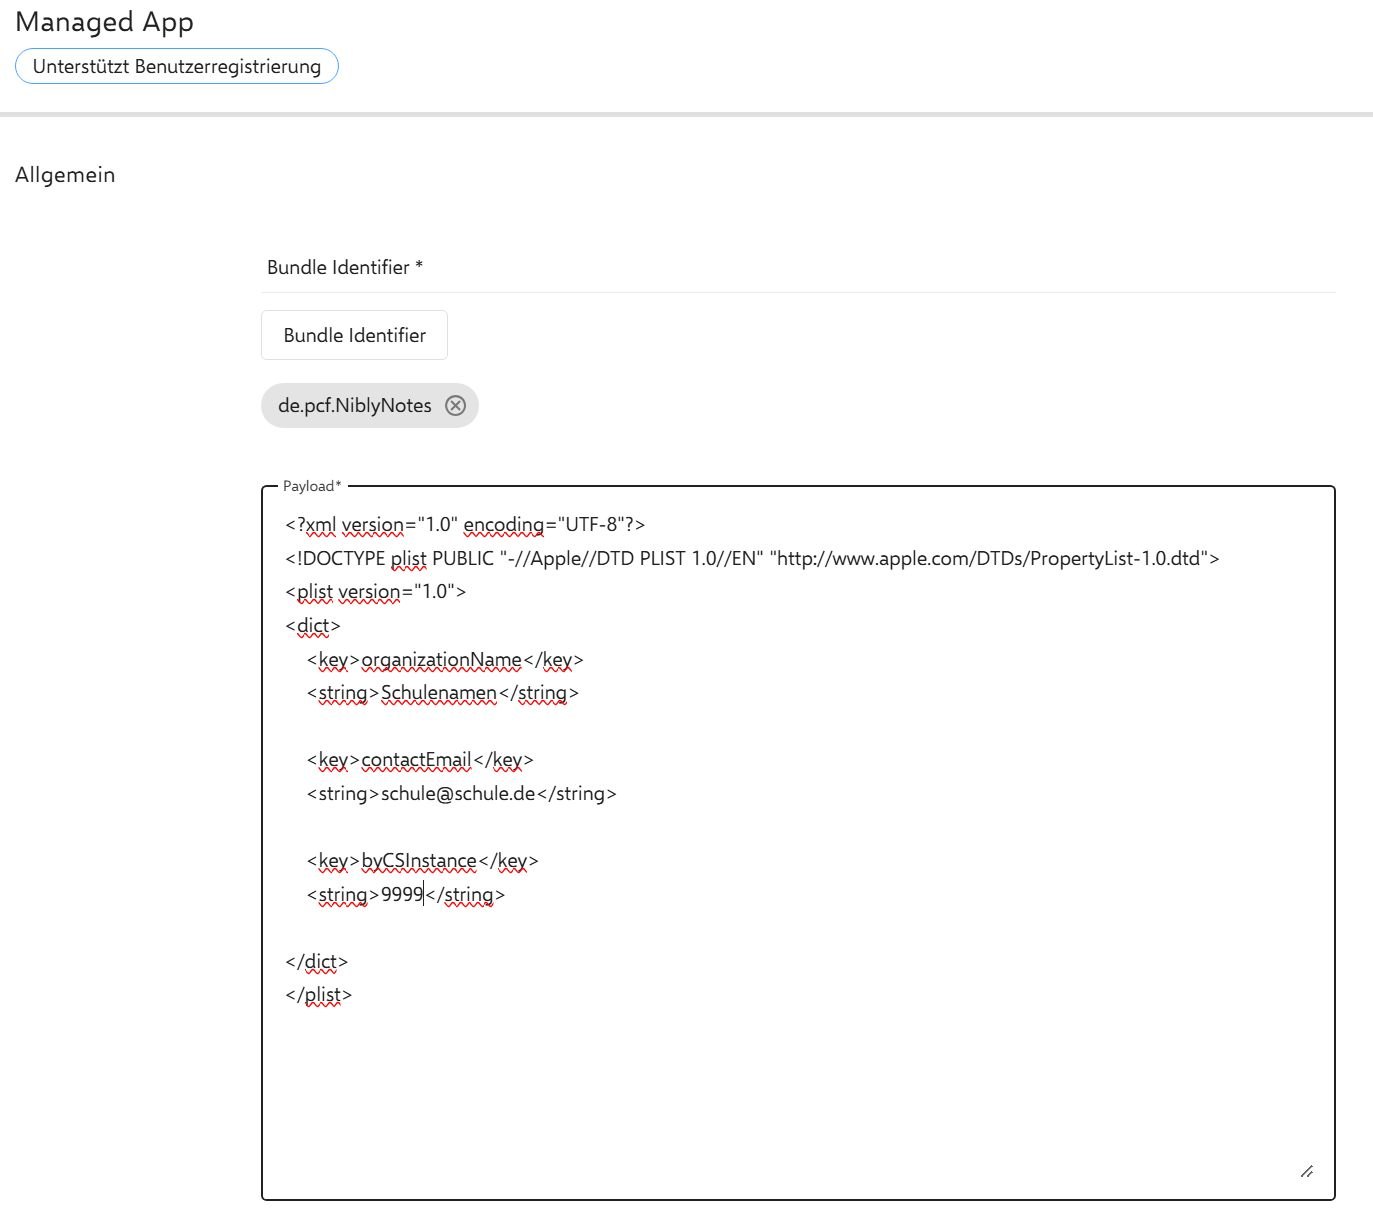
NiblyNotes can be pre-configured through any common device management system (MDM). IT staff store the settings centrally once; nothing then needs to be set up on the individual iPads.
Managed app configuration to Apple's standard
- ✓ Supports Apple's standard managed app configuration
- ✓ Tested with common systems such as Relution, Jamf, Intune and Mosyle
- ✓ Distributed settings include, for example, the server addresses for student notebook review and for the classroom via web server
- ✓ Configuration changes are picked up by the app automatically
- ✓ Required if the school wants to run its own server
❓ Frequently asked questions
Frequently asked questions
Will there be a NiblyNotes version for Android and Windows?
We are asked this regularly — and we understand why, since many schools use a mix of devices side by side.
Our approach is a deliberate one: we first want to complete all planned features in the iPad version and prove them in everyday school life. NiblyNotes is closely tied to the Apple Pencil® and to what the iPad makes possible — and that is exactly what creates the writing experience. Only once the iOS version is complete will we examine whether, and in what form, the app can also be made available for Android and Windows.
Until then: students without an iPad do not have to be left out of the lesson. Using the classroom's compatibility mode, they can open and download the materials provided by the teacher in any browser — whether on a Windows laptop, a Chromebook or an Android tablet.
📲 Download
Now on the App Store®
NiblyNotes is now available for Apple® iPad® on the App Store®. Free, no subscription, no ads.
NiblyNotes is and remains completely free — every feature is available without restriction. Anyone who would like to support further development voluntarily will find a small supporter contribution in the settings. No feature depends on it.
 Download on the App Store®